Join the Veganlovlie Cocoon!
Receive an occasional burst of sunshine and a little flower, recipes, craft projects and FREE resources.
Showing posts with label Snacks. Show all posts

Sunday, 20 September 2015

Spicy and Easy Mauritian-style Jicama, Pineapple and Mango Pickle Recipe

Easy Jicama (Chinese / Mexican Potato or Yam, patate / batate chinois), Pineapple, Mango Pickle

With their wheeled carts ladened with big jars of various pickled fruits and vegetables, the pickle sellers (or 'marchand confits' as we would call them) paint one of the most picturesque scenery of the Mauritian streets, bus stations, beaches or school yards. Like most Mauritians, kids and adults alike, I have an unwavering fondness for these mouthwatering local sour treats that make the eyelids tickle — green mangoes, pineapple, cucumbers, giant green olives, chayotes, ambarella fruit (finally I've been able to find the English name for this local fruit named 'fruit cythère') and jicama being among the most typical ones.

Tuesday, 30 June 2015

Spiced Boiled Brown Chickpea Snack | Gram Bouilli - A Mauritian Snack

spiced brown chickpea snack, recette gram bouilli, Mauritian recipe

Previously featured here, the spiced boiled brown chickpea snack is simply irresistible for a year round anytime nibble. Locally we call this snack "gram bouilli", gram for the brown chickpeas and bouilli (pronounced bwee) literally means boiled. The chickpeas are boiled then sauteed and spiced. I remember the days when I used to buy this snack after school. Very often, the sellers would come onto the bus with their basket full of these chickpea snacks, nuts and other nibbles; I would always grab a couple bags of the boiled chickpea ones and munch on the way. They somehow made the bus journeys more pleasant.

Wednesday, 11 February 2015

Roasted Pepper & Lentil Crackers | Vegan + Gluten-free

Roasted Red Pepper & Lentil Crackers

I remember my first experience as a new vegan when I was searching for a recipe to make my very first vegan cake — one ingredient freaked me out, totally. Vinegar! Vinegar? In cake? No! Can I omit it? Won't the cake taste/smell like vinegar? Thinking back on this only makes me smile.

Tuesday, 25 November 2014

Niouk Yen (vegan/vegetarian version): Chayote/Daikon Radish Dumplings (Boulette Chouchou)

Niouk Yen, chayote dumplings, boulette chouchou mauricien

Food cravings for the local cuisine - aren't they the worse when you really can't find the food you are craving for where you are? For a few months now, Boyfriendlovlie and I have been craving our local dumplings - Niouk Yen being one of them. Despite living in many countries where Chinese cuisine is so popular, I have never come across a Chinese place that sells Niouk Yen. So, undoubtedly, they must really be a typical Mauritian-Chinese delicacy.

Friday, 17 October 2014

As Fit As Popcorn Can Get!

Popcorn Indiana Review

When it comes to vegan snacks, it can become quite a challenge in my case with my nuts-and-seeds allergy. While I do often make my own tasty homemade snacks, sometimes I just want the convenience of a store-bought one. So, when Popcorn Indiana offered to send on a sample of their popcorn for my review, I just couldn't refuse. Now, not all of their popcorn range is vegan but they do have a few varieties that are. But what really caught my attention is that Popcorn Indiana uses only non-GMO corn. I rarely ever buy even fresh corn, let alone popcorn, on this part of the planet namely because I cannot be sure they are non-GMO.
So, when I received a bag of Popcorn Indiana in the Fit range that was non-GMO, I was pretty excited.

Tuesday, 16 September 2014

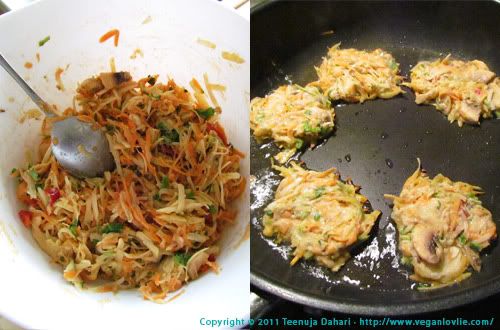
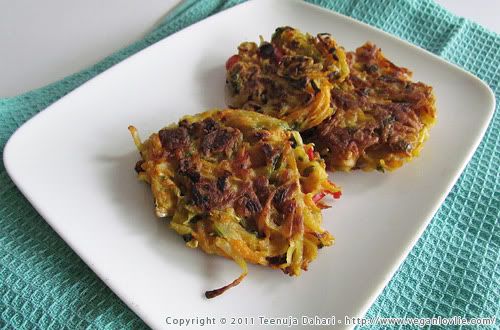
Vegetable Fritters Unfried

Baked Oregano Vegetable Fritters

After school tea time snacks, when I was a kid, varied from French pâtisserie to deep fried fritters, not forgetting, when time permitted, Mum's delicious homemade treats. Although we only had these greasy fritters only about once a week, thinking about them today make me cringe. While I do shallow or pan fry occasionally, deep frying is almost non-existent as a means of cooking in my kitchen nowadays. The only time that I do deep fry is when I am make these dal chili cakes that I have yet to develop a baked version for.

Deep fried fritters — (above mentioned) dal chili cakes, bhajis, samoosas, assorted vegetable fritters to mention a few — are sold as a popular street food in Mauritius. Even though they are very much part of the food culture, I cannot bring myself to enjoy them with peace of mind. Food culture or not, I cannot resound to them anymore. A baked version sounds a lot more appealing. And, turns out, they were even tastier.

Wednesday, 28 May 2014

When The Munchies Attack


If you are a nut-allergy sufferer, then you will undoubtedly agree that finding a satisfying savoury snack is no easy endeavour and even more so when you are on the move. Coupled with this, the inconvenience (to say the least) of also being a seed-allergy sufferer, basically leaves me clueless as to what to munch on to sate the occasional hunger pang.

Kale chips -- the homemade version -- has been quite verily the pacifier of the munchies at the Lovlie Cocoon for a while now. However, leave them a tad too long in the oven and scorched chips is no pleasant surprise.

While roasted chickpeas would probably be the next runner-up for a nut-free seed-free snack, its cousin -- the brown chickpea -- does not get a fair share of attention in western cuisine nor is it commonly found in local supermarkets. I get mine at the Indian or Asian store.

Toothsomely chewy, while being smaller than regular chickpeas, the texture is not utterly different. Hinted with woodsy notes of a nutty aroma topped by a denser toasted taste, these beans make quite a unique ingredient in many dishes.

Do not be fooled by the short list and simplicity of ingredients, fenugreek, fresh thyme and chilies are the perfect trio to bring out the best splash of flavour in this humble preparation. Infact, spiced brown chickpeas are a much loved street food and snack in Mauritius. Accompany this with a large salad and you could wholeheartedly enjoy a decent complete meal.


Spiced Brown Chickpea Snack

Serves 5 - 6
200g dried brown chickpeas
1/2 teaspoon fenugreek (you may substitute with yellow mustard seeds if you are not allergic)
6 - 7 stems of fresh thyme (pick the leaves)
4 - 5 hot green chilies (you may also use dried red chilies)
1 tablespoon coconut oil (vegetable oil is also good)
Salt to taste

  • Soak the brown chickpeas overnight or for at least 8 hours. Once soaked, drain the water.
  • Place chickpeas in a deep pan, cover with fresh water so that water is just covering the chickpeas.
  • Cover and boil until chickpeas are soft (about 40 minutes). You may need to lift the cover and remove the froth from time to time to avoid overflowing.
  • Add water if it dries out.
  • Once boiled, drain and discard all water and keep chickpeas aside.
  • In a skillet or fry pan, heat 1 tablespoon oil on medium heat.
  • Add fenugreek. Allow to roast for about 30 seconds to release the aroma but do not let it burn.
  • Next add chickpeas, chilies and thyme.
  • Mix well and sauté for 5 - 7 minutes.
  • Add salt to taste. Turn off heat.
  • Serve warm or at room temperature.

By the way, you should check out the Virtual Vegan Linky Potluck!

Friday, 8 February 2013

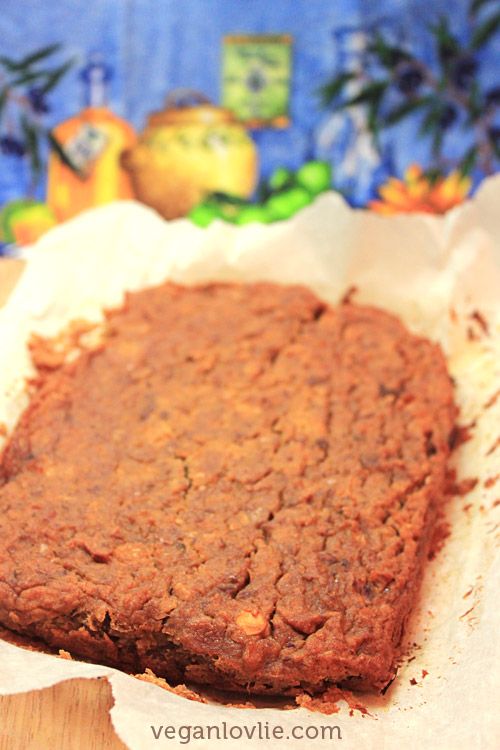
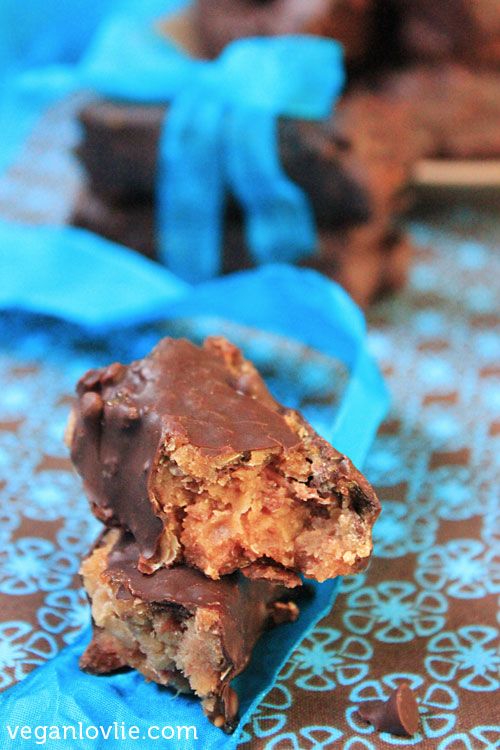
Pre-Workout Chocolate Coated Protein Bar (Gluten-Free too!)


Valentine's day is almost round the corner. Not that I actually look forward to it or do anything special, I don't actually do anything on Valentine's day. But at least, I think the day isn't complete without a little chocolate treat! According to recent studies*, dark chocolate, or more so the flavanols present in chocolate, are actually very beneficial for the body as a pre-workout snack. These flavanols reduce muscle fatigue by 30% and increase performance by 50%. But don't go eat a whole block, only a little amount (about 5g) is recommended before exercise.

I am a serious chocolate lover and I only buy dark chocolate. I've never actually paid much attention in having a little bit of chocolate before exercise. But if this can improve my exercise performance, then I'm in! And a pre-workout protein bar is something that Boyfriendlovlie has been requesting for a long time to assist with his training.

Although I made this as a pre-workout protein bar, it was so good that I actually had it anytime I wanted a sweet healthier snack. Boyfriendlovlie absolutely loved it too! When I make little sweet snacks, he usually doesn't remember that they are there to be eaten (until I remind him) but for these ones, he came looking for them by himself! They definitely appealed to him!

Make sure you use dark chocolate that is above 70% as lower than this contains too much sugar and is not as effective.
Here's a little treat that will appeal to young and old alike. A chocolate covered protein bar that kids can enjoy and adults can fill up on for a protein-rich snack.

Ingredients (approx. 12 bars)

2 1/4 cup mixed red kidney beans and chickpeas
150ml pear puree (apple sauce is fine too, I use 1 1/2 ripe pears, peeled)
6 medjool dates
1 tablespoon coconut milk (thick consistency)
1/4 cup maple syrup
1 teaspoon pure vanilla extract
1/2 teaspoon baking powder

200g Semi-sweet dark chocolate for coating (use dark chocolate about 70%)

  • Soak the dates in some hot water for about 10 minutes or until soft enough to blend to a smooth paste.
  • Preheat oven at 350 degrees Farenheit (or 180 degrees Celsius).
  • Mash the beans to a paste, I used a hand blender which left a few small chunks in. It is fine to use a blender too but pulse to break into small chunks first.
  • Remove dates from water, remove pits, chop into small pieces and add to the blender.
  • Add the rest of the ingredients to the blender and blend until all ingredients are well mixed.
  • Lay a sheet of parchment paper on a rectangular oven dish. Pour mixture in the dish and smooth out evenly.
  • Bake for one and a half hours or until a toothpick inserted in the middle comes out clean.
  • Leave to cool completely.
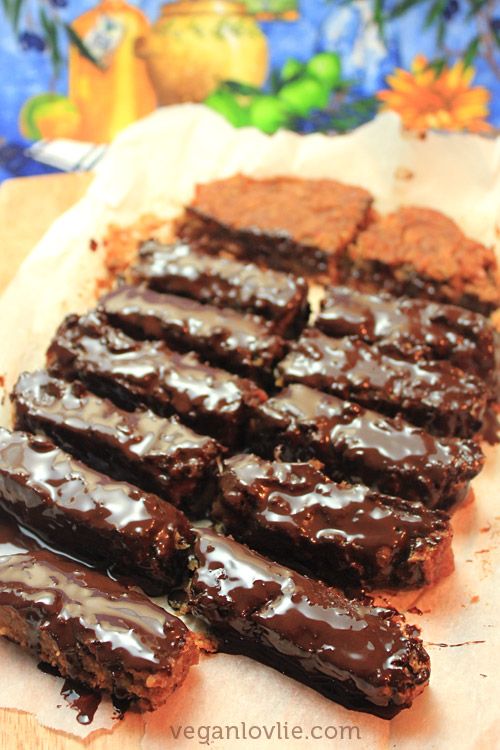
  • Lift parchment paper and remove from pan. Leave cake onto the parchment paper and cut into logs or squares, whichever shape you like.


For chocolate coating:
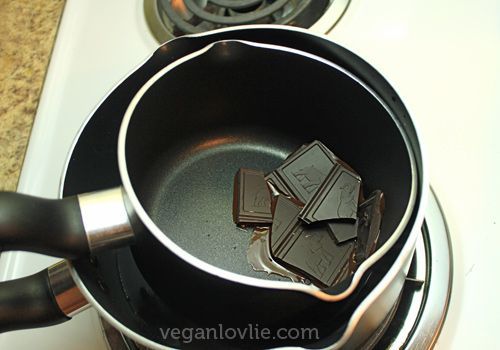
  • Melt about 150g chocolate in a double boiler. You can make your own by using a smaller pan inside a larger one. Fill the larger one with enough water so the smaller pan floats. Place chocolate in smaller pan and heat the water until it melts.


  • Coat each log on the three sides.


  • Place in the freezer for 15 minutes.
  • Meanwhile you can melt the remaining 50g of chocolate.
  • Remove and turn the uncoated side up. Coat with a layer of chocolate.
  • Put back in the freezer for 15 minutes. Then remove and store in the fridge.


Nutrition Facts per bar:

Nutrition Facts
Serving Size
1 serving (57.6 g)
Amount Per Serving
Calories
116
Calories from Fat
8
% Daily Value*
Total Fat
0.9g
1%
Saturated Fat
0.5g
3%
Cholesterol
0mg
0%
Sodium
6mg
0%
Total Carbohydrates
24.9g
8%
Dietary Fiber
3.6g
14%
Sugars
16.2g
Protein
3.3g
Vitamin A 0% Vitamin C 1%
Calcium 3% Iron 6%
* Based on a 2000 calorie diet

*Reference: http://www.ncbi.nlm.nih.gov/pubmed/21788351

Tuesday, 25 December 2012

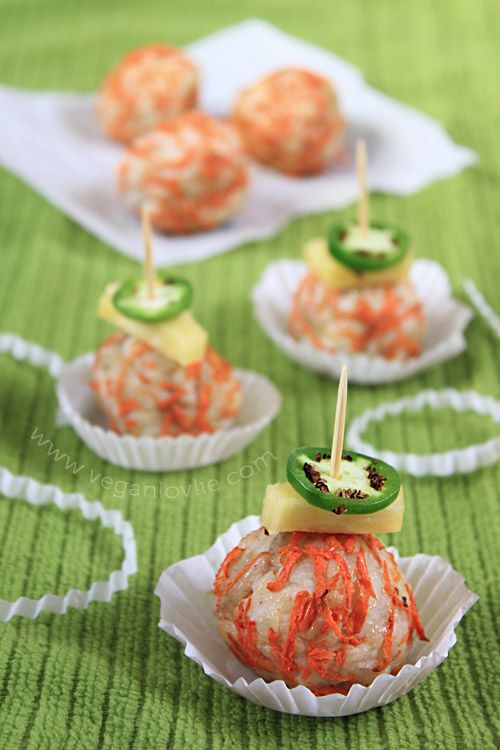
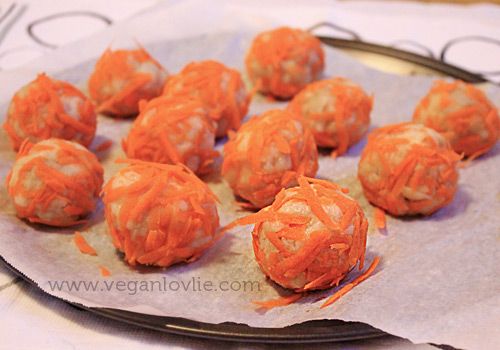
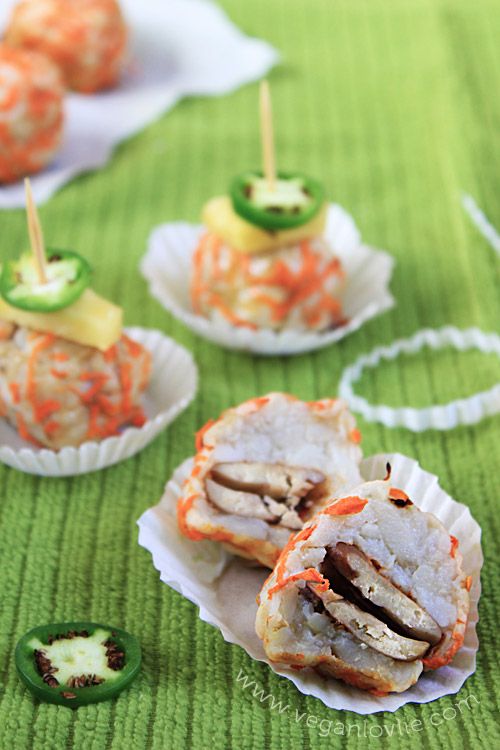
Potato Balls Stuffed With Fava Beans: Not Your Usual Potato Balls!


The family being miles away, it has been a very quiet Christmas day for us today. However, there is something in the air on Christmas day, I find, that makes it merry and peaceful. Hopefully, you've all had a wonderful time.

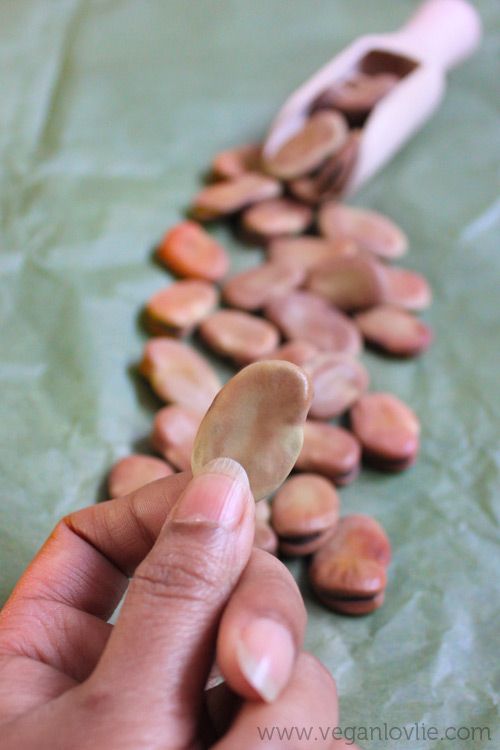
Some fava beans caught my attention at our local supermarket the other day. I don't recall having seen those in the UK or Ireland. In consequence, I had actually never cooked or eaten them before. They look close to a butter bean size-wise with a reddish brown colour.


After a google search for some recipe ideas, I've found them to be used pretty much like most beans, cooked in sauces, pureed as dips or mashed and made into burgers and balls. Well, I thought I'd make use of their size in a recipe rather than mash them all up.

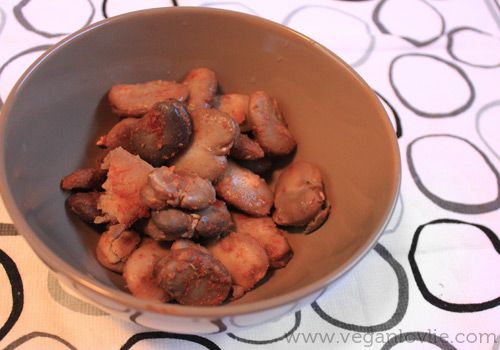
Soaking time took 24 hours, during which I changed the water twice. Then I boiled them for about 20 mins with the skin on. After boiling, I peeled them and tasted one. I would say they are 80% close in taste to a butter bean but with a slightly more nutty flavour.


To save time on this recipe, pre-boil the fava beans and freeze with the skin on until required. Then defrost and warm a little by pouring some boiling water on the beans, allow to cool slightly before peeling. I find that the skins come off easier when the bean is still a little warm.

In this recipe, I've used red potatoes which are slightly on the waxy side. So, this gave these balls a somewhat chewy texture. If you prefer the floury type, baking potatoes might work too but they will need to be more compactly formed into balls for them to hold without breaking when being baked or served.

Potato Balls Stuffed With Fava Beans (Fat-free, Gluten-free)

Ingredients (12 - 14 balls)


5 medium-sized red potatoes (about 350g)
12 - 14 fava beans, boiled and peeled
1 medium-to-large carrot (grated)

Seasoning:
1/2 teaspoon paprika
1/4 teaspoon cumin
Salt to taste

Garnish
Pineapple
Fresh jalepeno chilies

Toothpicks


Add the paprika, cumin and salt to the fava beans, mix well and let sit while preparing the other ingredients. (You can also make this the day before and leave the beans to marinade overnight in the fridge).


Boil potatoes until soft. Peel and mash. Add salt to taste.

Take some of the mashed potato, slightly less than the size of a pingpong ball, roll to form a ball and then flatten a little.
Place 1 bean in the centre and enclose with the potato, forming a ball with the hands.


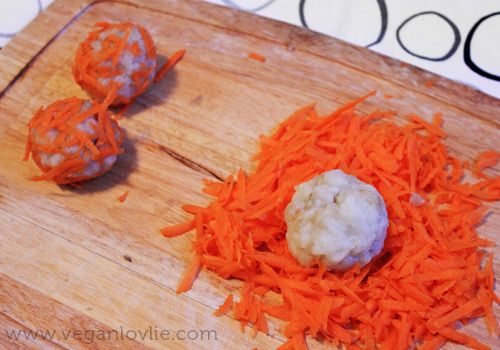
Roll potato ball in the grated carrot. Press between the hands so that they are well adhered to the potato ball.


Repeat with remaining beans and potato mash. You may need to wash your hands in between a few balls as they will tend to get sticky.

Place on a baking tray over some greaseproof paper. You can brush with some sunflower oil if desired although this is not necessary.


Bake at 200 degrees Celsius (390 degrees Farenheit) for 30 minutes or until slightly firm / crisp on the outside.

A spicy dipping sauce is a good condiment choice to go with these. Tabasco was perfect with these but I found fresh jalepenos gave them a nice kick!
Add a pineapple piece (for some sweetness) and a fresh slice of chili to make these a spicy tasty appetiser at your party.
Have a very Happy Holiday!


Saturday, 25 August 2012

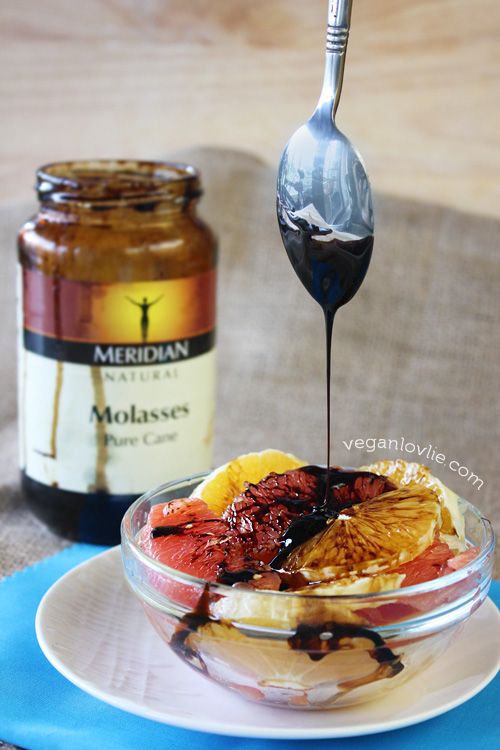
Where Do I Get My Iron? Molasses.


Molasses is something that reminds me of many childhood memories. There was one particular molasses fudge that was available at the deli counter of one particular store in Mauritius. Back in the days, we wouldn't go there often but whenever Mum would take us, it was really something we looked forward to. However, as time passed, this store no longer made the molasses fudge and seemed to have replaced the ingredient with just brown sugar, or so it tasted like it.

Mauritius is a sugar producing country and you would think molasses would be readily available in the stores. Ironically enough, it is not. And still the biggest irony is that I can find molasses here in Europe, produced in Mauritius! Yep, this is how it goes. If I were in Mauritius, I wouldn't readily find molasses. The only way you can get hold of some molasses is if you know someone working at a sugar mill.

Well, I am thankful that I can find it here at least because molasses is one thing I really love! It lends a distinctive flavour into many baked goodies; I always put a tablespoon or so in my chocolate cakes or cookies. I sometimes add it to my smoothies but particularly love it in oats porridge too. Recently I've tried it drizzled on some oranges and grapefruit and it makes a distinctly tasty fruit snack! If you don't like the bitter taste of grapefruit, try it with some molasses. Somehow both the slight bitterness in molasses and that in the grapefruit counteracts each other to make one definitely tasty combo!

I've found molasses to be particularly helpful in relieving cramps during exercise and strenous physical activity. So, do try it if you haven't already!

But if you've tried it and don't like it, give yourself a second chance: try everything twice! Also, check out Lysa's Breakfast Bouddha Bowl. It got me drooling!


So, Why Should We Eat Molasses?

Carbohydrates

Molasses is an excellent source of carbohydrates. A 1/4 cup serving supplies nearly 250 calories of energy in the form of simple sugars. Providing your body with enough carbohydrates enables it to make proper use of your dietary protein. Since your dietary proteins are spared, the body can utilise them to maintain your muscle mass.

Magnesium
Magnesium assists in keeping the immune system healthy and also helps maintain the nerves, muscles and bones. A 1/4 cup serving of molasses supplies about 200mg of magnesium which is half or more of the daily recommended allowance for magnesium (which is between 310 and 420 mg).

Manganese
Manganese is required in the body as a co-factor for many metabolic enzymes and also aids in anti-oxidant reactions. A 1/4 cup of molasses contains 1.3 mg of this trace element and the body requires between 1.8 and 2.3 mg of manganese daily. This is more than 50% of the daily requirement.

Copper
Copper assists in the metabolism of iron and also in extracting energy from the foods we eat. It is an integral component of the nervous system. 1/4 cup of molasses provides almost half of our daily need for copper which is 0.9 mg.

Iron
Iron deficiency can lead to anaemia. Regular consumption of molasses can help maintain the iron level in the body at an optimum level.
Molasses contains 4 mg of iron per 1/4 cup. This amounts to between 25 and 50 percent of your daily requirement, depending on your age and sex.

Potassium
Potassium assists in many functions in your body. These include transmission of nerve signals, muscle contraction, regulation of blood pressure, maintenance of fluid balance and proper heart function.
Molasses is rich in the mineral potassium, with 1/4 cup providing more than 1,200 mg, or 25 percent of the amount you need each day.

Reference:
Livestrong.com

Saturday, 30 June 2012

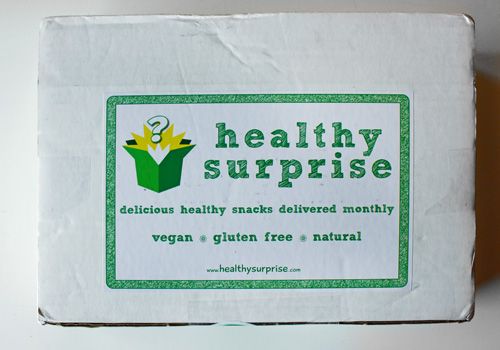
Healthy Surprise!

Are you an anime fan? Japanese ones? I am! And I watch them every single night after dinner! Among the ones that I've watched for far, here's my list of favourite ones:

One Piece, Naruto, Berserk, Death Note, Trigun, My Neighbor Totoro, Spirited Away, Bleach, Yu-Yu Hakusho...

And currenlty watching: Monster.

The list will keep increasing for sure! And who says anime-watching thinks about snacking! Although I try to limit my snacking habits to a minimum, sometimes some not-so-healthy crisps do find their way in. Yikes! This kind of snacking after dinner is surely not a great idea. But what about healthy ones?!
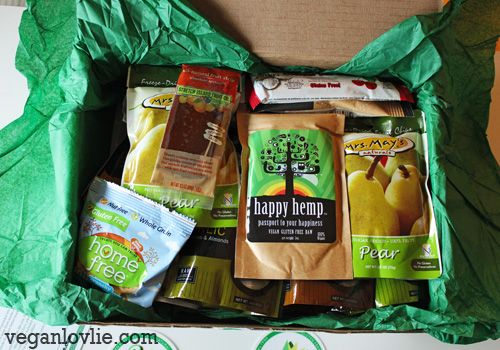
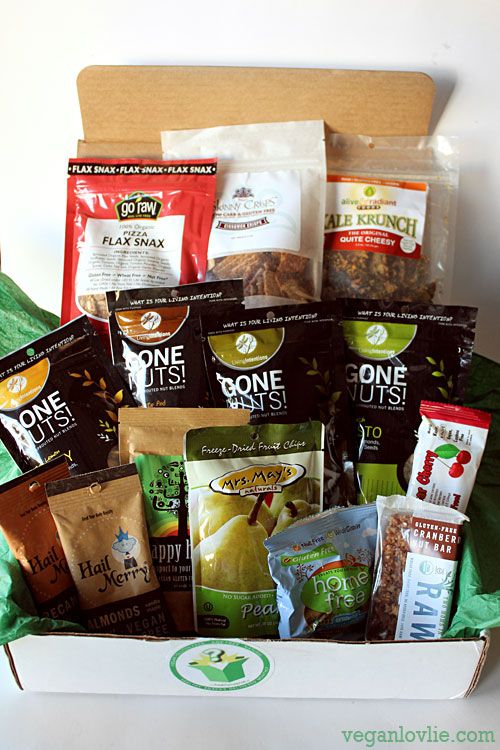
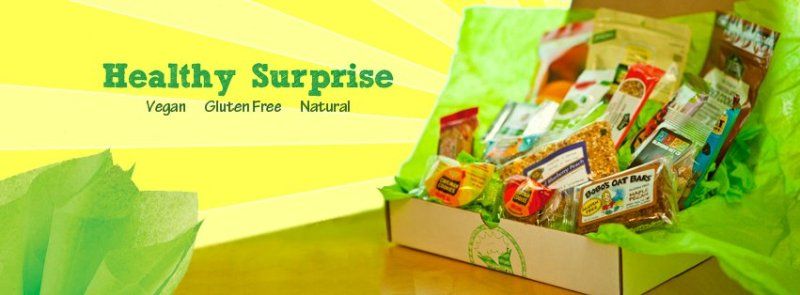
So, some two weeks ago, when Healthy Surprise proposed to send me a box of healthy snacks for a review, I said YES!


I didn't know this company before but after I checked their website I soon found their selection very interesting in that all snacks were vegan!

How could I refuse?!


I received a wonderful box with a selection of snacks ranging from sweet, savoury and spicy all carefully selected, vegan and some even raw. This was a really nice surprise indeed! And I did a little imaginary 'happy dance'! I couldn't do a real one because Boyfriendlovlie would have teased! Oh yes, he knows how excited I get about snacks! Well, he still teased watching me open the box and taking photos!


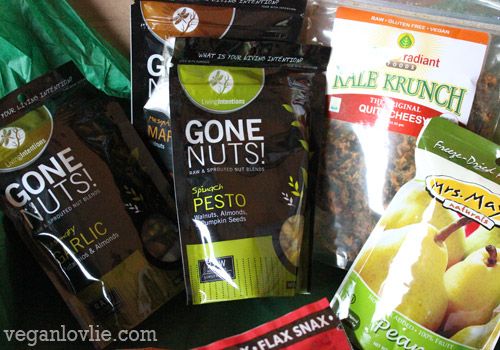
Both Boyfriendlovlie and I are allergic to nuts though. So, I will give the nut snacks to Sisterlovlie whom I'm sure will love them. If only there was a cure for nut allergies... because these flavoured nuts look so delicious!


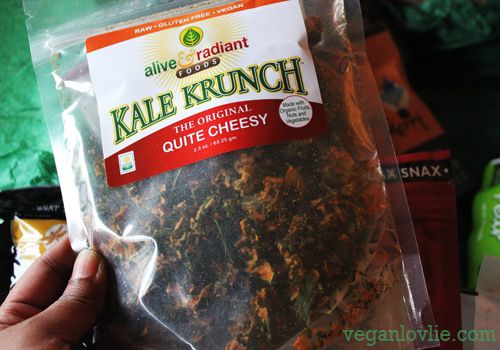
There were still a lot of other snacks that I could eat from the selection though, like these cheesy Kale Krunch! Yum!


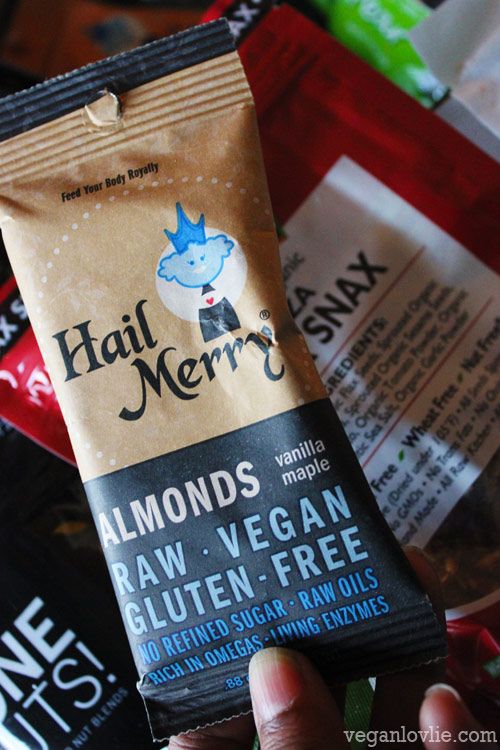
Vanilla Maple Almonds! Wow, I could have just a few of those at a time, I am less allergic to almonds.


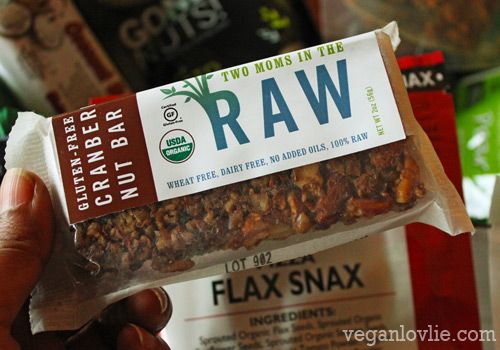
Raw bars!


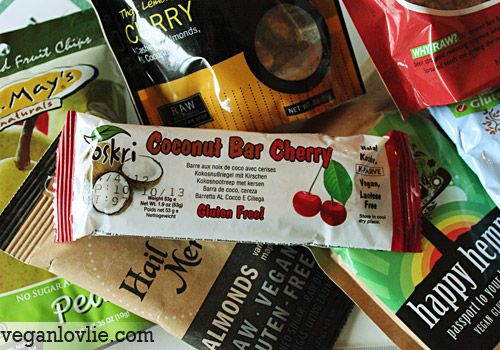
Coconut Bar Cherry! I love all things coconutty!


Fruit strips. Those remind me of the fruity logs I used to eat as a kid but they were certainly not the healthy types back then with sugar and flavourings. These ones are natural fruit concentrate with no added sugar.


Healthy Surprise will deliver to your door (or office) and they have mainly four subscription options to suit your needs and even gift options. As for international shipping they do so too (but check with them for shipping costs). For international orders, it works out cheaper to order the larger sizes every other month or so to save on shipping and airmiles.

Check them out also on Facebook; you can like them to receive their newsfeeds.


Full disclosure: Though I was mailed this box of healthy snacks free of charge for a review, I was not asked to write this post or compensated for doing so. This post is my own personal review of the snacks and the company. I was happy with what I received and thought it would be a shame not to share this with you.

Friday, 4 May 2012

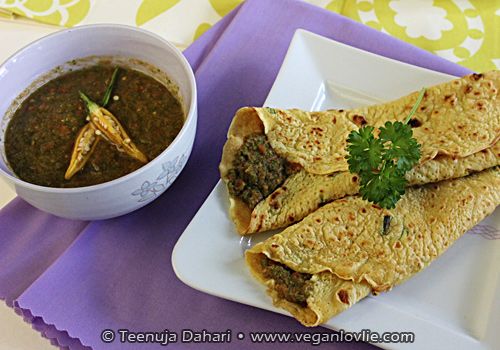
Coriander Chutney with Savoury Crêpes

vegan savoury crepes, coriander chutney

Coriander chutney is a popular raw condiment in Mauritius, usually eaten as part of a main meal or with snacks to enhance flavour. It is a nice sauce to go with many savoury cakes and in this case savoury crêpes.
I like to use leftover chutney as a salad dressing too.

The recipe is very quick and easy to make; it is also raw and a great way to eat raw coriander. Originally it is made with onions and garlic but since I don't eat those, I have substituted with ginger. Feel free to add these in if you like, 1/2 small onion and 1 garlic clove should be enough.


Easy Coriander Chutney
Ingredients
3 - 4 salad tomatoes
1 bunch coriander (about 25g)
2 - 3 green chilies (or to taste)
1 teaspoon ginger, minced (or use an-inch cube size piece, cut into fine pieces)
1/2 teaspoon salt

  • Place all ingredients in a blender (or use a hand blend) and blend until a puree consistency is obtained.
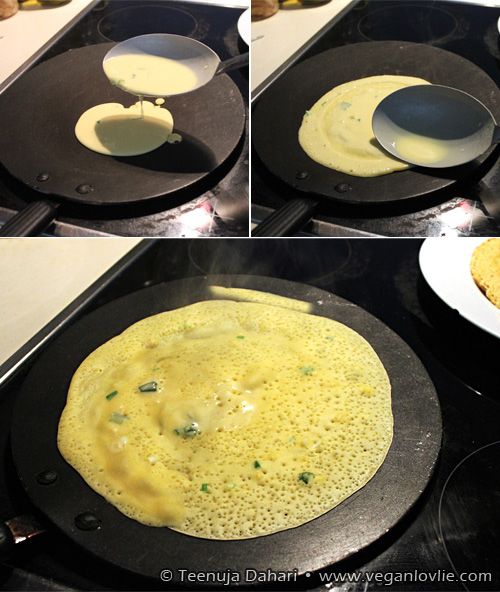
vegan savoury crepes, coriander chutney


And here's an easy peasy vegan crêpe recipe:

Savoury Vegan Crêpes
Ingredients (about 16 - 20 crêpes)

1 cup plain white flour
1 cup strong white flour (substitute with plain white if you don't have this)
550 ml  water
100 ml oat milk (I found oat milk to give the best results among other non-dairy milk)
3/4 teaspoon baking powder
1/2 teaspoon curcuma or turmeric
1/2 teaspoon salt
2 - 3 stems scallions or coriander, finely chopped

  • Mix flours with baking powder, curcuma and salt. Add water, stirring with a hand whisk to avoid lumps. Add oat milk and scallions.
  • The crêpe batter should be smooth.
  • Heat a crêpe pan on medium heat.
  • Laddle the batter and spread around into a nice circle shape.
  • Cook for about a minute until the bottom side is no longer sticky.
vegan savoury crepes, coriander chutney
  • Then flip over onto the other side and cook for another minute or two. You can flip again if required.
  • Remove and stack on a plate. Stacking them will keep them softer and warm.
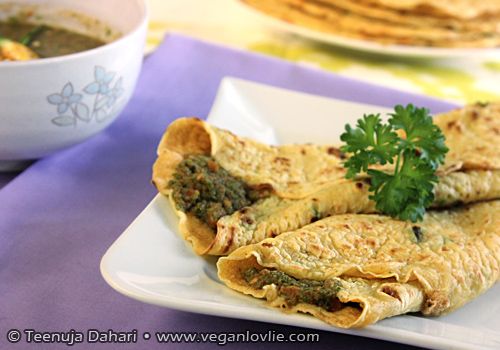
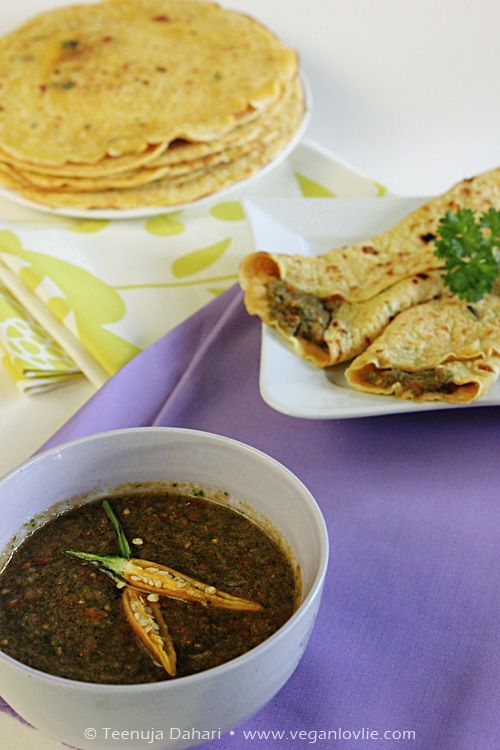
Spread with coriander chutney, roll and serve while still warm. This makes a delicious brunch or snack anytime.

vegan savoury crepes, coriander chutney

Sunday, 30 October 2011

A Recipe and an Announcement!

I haven't been very regular these days about posting, not that I'm not eating, but I have been working on a little side project recently about which I have an announcement to make! If you are very impatient about what it is then scroll down and skip the recipe. Else, here's a recipe for Potato Rosti Cakes. Yes, comfort food are finding their way in although it has not been as cold as it used to be this time of the year.


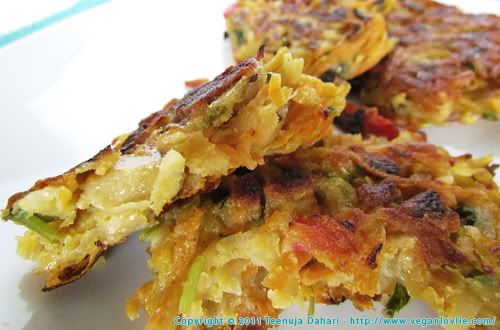
Now, I made these potato rosti cakes for brunch last Saturday and they turned out really nice. After I had eaten them, I went online to see how other people made them and I was surprised to see that a lot of recipes require the potato to be parboiled or if using raw to squeeze out all the liquid. I used mine completely raw and didn't squeeze out any liquids in the recipe and the cakes turned out really good nevertheless. What I did do differently though is to add a bit of flour in the mixture to absorb the liquid. Well, I just did this out of common sense and previous experience making veggie burgers.
I used a mixture of gram and rice flour to make the cakes gluten free but plain flour will work fine too.

I also added some other veggies and chillies just for a little twist since I like it hot!

Potato Rosti Cakes
Ingredients (about 10 small cakes, depending on the size you make them)
5 - 6 potatoes, peeled and grated (I used an organic one that is good for boiling, roasting and mashing...)
2 large carrots, grated
5 - 6 mushrooms, roughly chopped
2 - 3 green chillies, finely chopped
3 tablespoons gram flour (plain or all purpose flour is also fine)
3 tablespoons rice flour (plain or all purpose flour is also fine)
Fresh coriander to taste, finely chopped
1/2 teaspoon asafoetida (optional)
Peri peri seasoning or a dash of paprika
Salt to taste
Oil for pan frying
  • Mix all ingredients together until well combined in a big bowl.
  • Heat 3 tablespoons of oil in a frying pan; I used a quite deep one.
  • Drop 2 generous tablespoons (or use an ice cream scoop) of the mixture in the frying pan. If you can fit a few cakes in, drop a few more but don't place them too close or it will be difficult to turn over.


  • Don't touch the rosti and cook for about 5 minutes on one side until a slight golden crush is formed.
  • Carefully turn it over and cook for another 3 minutes or so on the other side.
  • Repeat with remaining mixture.
  • Serve warm.


Now, the annoncement! Maybe you already know about it already if you've seen my updated sidebar. I have recently opened a shop - Bijouxlovlie - on Etsy. I am featuring handmade cruelty-free jewellery and accessories. The idea of having this shop came from Boyfriendlovlie. I have been making my own jewellery and accessories for a while and he suggested that I put some online for people who might be interested in purchasing cruelty-free jewellery.
At the moment, I also have a section in the shop - 'Gaia Collection' - where 30% of all sales are going to the TreeSisters Organisation to support their plan of reforesting parts of Asia and Africa.
I hope you will also support them by making a contribution and spreading the word.

If you want to follow my adventures in jewellery making and more, I have created another blog for this - Bijouxlovlie.
I am not abandoning this blog though! Veganlovlie will still be around featuring recipes and stuffs.

Here's a glimpse of Bijouxlovlie on Etsy:

Sunday, 14 February 2010

February 2010 Daring Cooks Challenge: Mezze

mezze,dhal chili cake,cucumber raita,canneli humous,preserved lemons,pita bread

This is going to be a very long post! But this was a great challenge though!

The Daring Kitchen

The 2010 February Daring Cooks’ Challenge was hosted by Michele of Veggie Num Nums. Michele chose to challenge everyone to make mezze based on various recipes from Claudia Roden, Jeffrey Alford and Naomi Dugid.
Pita Bread – Recipe adapted from Flatbreads & Flavors by Jeffrey Alford and Naomi Duguid
Hummus – Recipe adapted from The New Book of Middle Eastern Food by Claudia Roden
Cucumber Raita – Recipe adapted from The Indian Grocery Store Demystified by Linda Bladholm
Falafels - Recipe from Joan Nathan and Epicurious.com
Preserved Lemons – Recipe from Paula Wolfert and Epicurious

*Mezze is a Middle Eastern way of serving a selection of small dishes or appetizers all at once.

The pita bread and hummus were mandatory and the rest were up to your creativity and imagination.

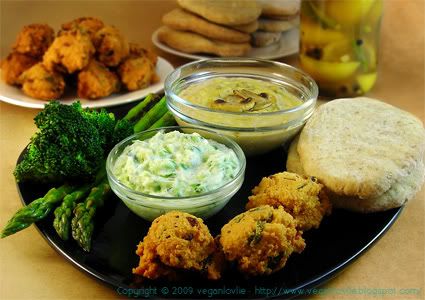
My mezze was a vegan one and consisted of:
  1. Half wholewheat and half white flour pita
  2. Vegan cucumber raita (with basil and coconut milk)
  3. Mushroom and sweetcorn cannelli bean humous
  4. Dhal-chili cake
  5. Preserved lemons with green chilies and whole black pepper (these were not pickled enough to be eaten on the day, but now they are delicious!)
  6. Sauteed broccoli and asparagus

Much to my surprise this challenge didn't really take much of my time! Just the usual time I take to make dinner (well, except for the waiting time of the pita bread to rise...). I actually took more time to write this post and the recipes!


Pita Bread
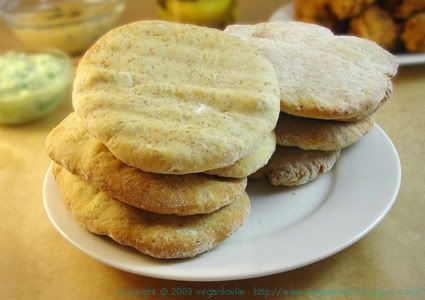
pita bread

For the pita bread, I pretty much used the recipe provided in the challenge which is adapted from Flatbreads & Flavors by Jeffrey Alford and Naomi Duguid
I did not follow the exact measurements of water and flour as these need to be adjusted anyway while making the dough. I also omitted the olive oil in the recipe (because I forgot to add it in!) and it didn’t make a difference.

Ingredients (about 16 pita breads, depending on size)

2 teaspoons regular dry yeast (.43 ounces/12.1 grams)
2.5 cups lukewarm water (21 ounces/591 grams)
5-6 cups flour (50% whole wheat and 50% strong white flour) (17.5 -21 ounces/497-596 grams)
1 tablespoon table salt (.50 ounces/15 grams)
2 tablespoons olive oil (optional)

  • In a large bread bowl, sprinkle the yeast over the warm water. Stir to dissolve. Stir in 3 cups flour, a cup at a time, and then stir continuously for about 1 minute, in the same direction to activate the gluten. Let this sponge rest for at least 10 minutes, or as long as 2 hours. (I left mine for more than an hour).
  • Sprinkle the salt over the sponge and stir in the olive oil at this point (if adding). Mix well. Add more flour, a cup at a time, until the dough is too stiff to stir. Turn it out onto a lightly floured surface and knead for 8 to 10 minutes, until smooth and elastic. Rinse out the bowl, dry, and lightly oil. Return the dough to the bowl and cover with plastic wrap. Let rise until at least doubled in size, approximately 1 1/2 hours.
  • Place a two small baking sheets (I used a pizza tray), on the bottom rack of your oven, leaving a 1-inch gap all around between the sheets and the oven walls to allow heat to circulate. Preheat the oven to 230 degrees Celsius (450F).
  • Gently punch down the dough. Divide the dough in half, and then set half aside, covered, while you work with the rest. Divide the other half into 8 equal pieces and flatten each piece with lightly floured hands. Roll out each piece to a circle 8 to 9 inches in diameter and less than 1/4 inch thick. Keep the rolled-out breads covered until ready to bake, but do not stack.
  • Place 2 breads, or more if your oven is large enough, on the tray or baking sheets, and bake for 2 to 3 minutes, or until each bread has gone into a full balloon (I left my pitas to bake for more than 5 minutes though, because I didn’t think they were ready yet). If for some reason your bread doesn't puff up (some didn’t in my case), don't worry it will still taste delicious.
  • Wrap the baked breads together in a large kitchen towel to keep them warm and soft while you bake the remaining rolled-out breads. Then repeat with the rest of the dough.


Mushroom and Sweetcorn Canelli (or white) Bean Humous (or dip)
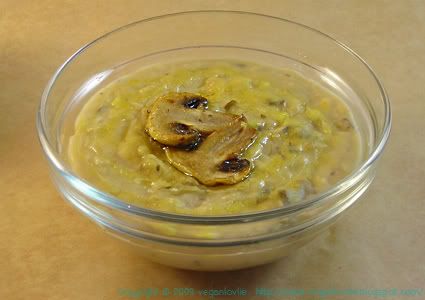

canneli humous

Mushrooms and sweetcorn were sauteed then mixed with the cannelli bean pate. This was a nice change to traditional chickpea humous.

These are not exact measurements. I didn’t weigh the ingredients but just used the cup.

Ingredients

1 cup canelli beans (boiled to almost a mush)
1 tablespoon olive oil
1 tablespoon vegan margarine
½ teaspoon cayenne pepper
Salt and pepper to taste
1 cup chopped mushrooms
2 tablespoons frozen (or canned) sweetcorn
75 ml water (more or less)

  • Heat the margarine on medium. Add in the mushrooms and sweet corn. Sautee for a few minutes.
  • Place the rest of the ingredients in a blender. Blend to a smooth paste.
  • Add more water if necessary to desired consistency.
  • Add in mushrooms and sweetcorn. Serve warm or cold.


Vegan Cucumber Raita
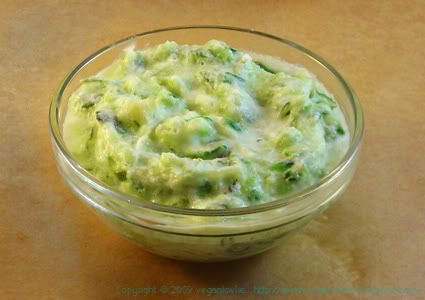

cucumber raita

Raita couldn’t be easier to make! Traditional raita is made with yogurt. It is so easy to veganise this with coconut milk. I didn’t use any garlic in the raita but you can add some finely chopped garlic or garlic powder to yours if you like.

Ingredients

1 whole green cucumber (I didn’t peel it or remove the seeds because they were very tender, but you can do so if you prefer)
Few leaves basil, finely chopped
5 tablespoons coconut cream (if using coconut milk, you may want to increase the amount and remove more juice from the cucumber)
¼ teaspoon salt (or to taste)
A few dash ground black pepper

  • Grate the cucumber. Squeeze out some of the juice from the cucumber. (You can save the juice for drinking or use it in your green smoothies! But don’t keep it for too long before consuming.)
  • Add in the rest of the ingredients. Keep chilled until ready to serve.


Dhal-chili Cake


dhal chili cake

This is a regular Mauritian favourite at Lovlie’s Cocoon! I’ve posted some recipes about these before (here in a soup and another version here). I usually customize these cakes slightly with whatever I have on hand when I’m doing them.

This time I used fresh basil as herb. And wow! What flavour combo! I think the best dhal-chili cake I’ve made so far.

Ingredients (approximately 25 cakes)

1½ cups (250g) channa dhal (yellow split is also fine) soaked for at least 8 hours (preferably overnight)
1 small onion, finely chopped
10 - 12 basil leaves (or 2-3 stems with the leaves), finely chopped
¼ teaspoon aniseed
5 green chilies chopped (adjust quantity to your taste)
Salt to taste
Vegetable oil for frying

  • Drain dhal completely. Grind the dhal to a paste in a food processor or blender to a combination of fine and not so fine consistency. (There must be enough fines to bind the chili cake together).
  • Add the rest of the ingredients – onion, basil, chilies and salt.
  • Mix well. This is best mixed by hand.
  • Preheat oil on medium heat.
  • Drop the dough in small loose balls in the hot oil. (Do not compress the dough balls too much otherwise the centre will remain uncooked).
  • Turn occasionally until golden brown. Adjust heat if necessary to ensure thorough cooking.
  • Remove and allow to drain on kitchen absorbent paper to absorb the extra oil.


Preserved Lemons
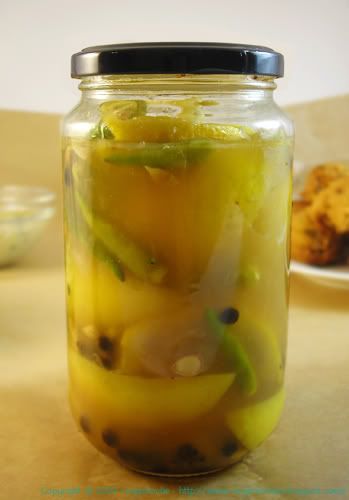
preserved lemons

They remind me of my Mum who used to make huge jars of preserved lemons that we would use in salads, chutneys or just accompaniment.

The challenge recommended Meyer lemons. “To most closely approximate the flavour of Moroccan lemons, Wolfert recommends Meyer lemons for this recipe. This lemon/mandarin orange hybrid, in season in January and February, has yellow-orange flesh, a smooth rind, and a sweeter flavour than other lemons.”

I couldn’t find those so I just used organic unwaxed lemons.

Ingredients

5 lemons
¼ cup salt (2 ounces/60 grams)
1 teaspoon whole peppercorns
10 whole green chilies
Freshly squeezed lemon juice to taste, only if needed
Rice vinegar, (optional) if required

Special Equipment: 1 pint Mason Jar – Sterilized. I just sterilized an empty jam jar.

  • Quarter the lemons, sprinkle salt on the exposed flesh.
  • Place 1 tablespoon salt on the bottom of the jar. Pack in the lemons and push them down, adding more salt, and the peppercorns and chilies between layers. Press the lemons down to release their juices and to make room for the remaining lemons. (If the juice released from the squashed fruit does not cover them, add freshly squeezed lemon juice or I added some rice vinegar — not chemically produced lemon juice and not water.)
  • Leave some air space before sealing the jar.
  • Let the lemons ripen in a warm place, shaking the jar each day to distribute the salt and juice. Let ripen for 30 days.
  • To use, rinse the lemons, as needed, under running water, removing and discarding the pulp, if desired — and there is no need to refrigerate after opening. Preserved lemons will keep up to a year, and the pickling juice can be used two or three times over the course of a year.
I hope you've enjoyed reading about these recipes just as much as I've enjoyed making them!

Sunday, 10 May 2009

Aubergine and Veggies in Beancurd Fried Wrap

Photobucket

I’ve had beancurd before finely chopped and just sautéed in tomato sauce or in curry. But I always tend to think beancurd skin is more appropriate as a wrapping ingredient. And indeed I liked it better used in this way.

Depending on what type of beancurd skin you are using, you might need to re-hydrate it according to package instructions, usually soaking in warm water. I used moist beancurd skin and I only had to brush with a bit of warm water to soften it slightly more.

Ingredients (4 wraps)

1 large aubergine, cut lengthwise in quarters
Bunch green beans, sliced
2 - 3 carrots, finely cut in julienne
3 - 4 mushrooms, sliced
½ cup black beans, boiled (any other beans will do)
2 – 3 tablespoons black bean sauce
2 cloves garlic, minced
Few sheets beancurd
Salt to taste

For the batter:

3 – 4 tablespoons flour
1 teaspoon black bean sauce
Salt to taste (if required)
Water (enough to make a thick consistency)

Oil for sautéing and frying

  • Smear the aubergines on the sides with some black bean sauce. Shallow fry them on each side until tender but still firm in a frying pan. Remove, set aside.
  • Sautee the sliced green beans, carrots, mushrooms and garlic in 1 tablespoon oil and 1 teaspoon black bean sauce for 3 – 4 minutes.
  • Remove, set aside to cool.
  • Lay the beancurd sheets on a large chopping board or on the kitchen work space.
  • Moisten and soften them by brushing with some warm water.
  • Cut into squares (so that the aubergines and veggies would fit in leaving some extra width on the sides. Allow for at least 2 turns of skins around). You may also want to make them half the length by cutting the aubergines.
  • Place aubergine, veggies and black beans on beancurd sheet.

tags: aubergine beancurd

  • Start rolling from one end, fold over the 2 sides towards the centre.

Aubergine and veggies in beancurd

  • Continue rolling to enclose everything nicely inside.

aubergine beancurd

  • Preheat some oil on medium heat in a frying pan for shallow frying.
  • To make the batter, place flour, black bean sauce and salt in a large bowl (large enough to accommodate the length of the wraps). Gradually add water to make a thick batter.
  • Carefully dip each wrap (one at a time) into the batter. Gently roll to coat every side evenly with batter.
  • Place each wrap (one at a time) in the pan. Adjust heat if necessary so that the skin is not cooked too quickly, allowing the veggies to cook a little bit more inside. Turn frequently on every side until golden.
  • Remove and drain on kitchen absorbent paper.

Enjoy with some salad! This is nice for a packed lunch for work!
tags: aubergine beancurd

Share This Post

Share This Post

Related Posts Plugin for WordPress, Blogger...