Join the Veganlovlie Cocoon!
Receive an occasional burst of sunshine and a little flower, recipes, craft projects and FREE resources.
Showing posts with label Lunch Box. Show all posts

Tuesday, 18 June 2013

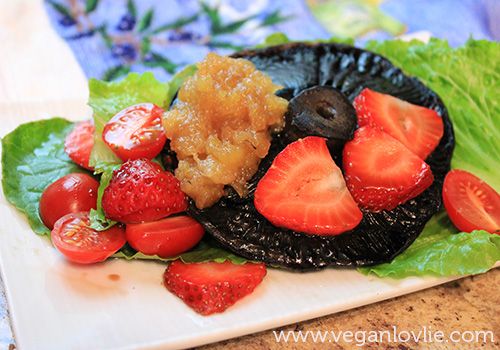
Sour Strawberries, Portobello Mushroom and Fruit Puree Salad

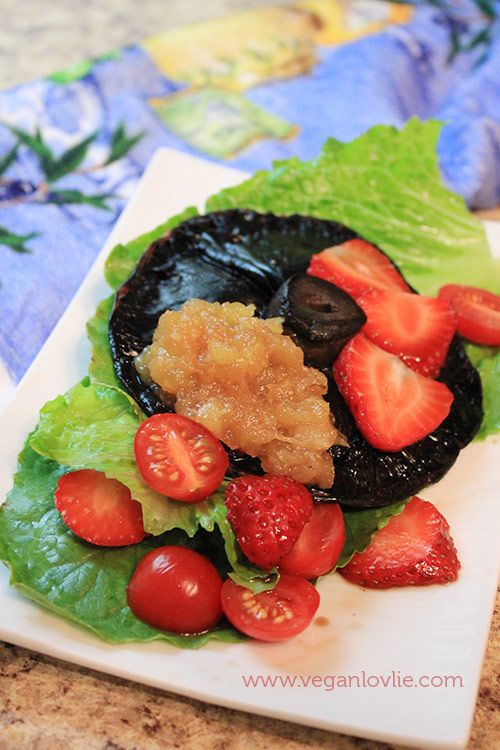
Strawberry, Portobello Salad

I was disappointed with 2 things from this week's grocery shopping: the sour strawberries and the floury apples (that weren't suppose to be!). I dislike eating either of these on their own. So, generally I'd add the sour strawberries to some vegan yogurt, if I happen to have any, and eat them in this way.
But as for floury apples, I would usually just use them as a fat substitute in baking.

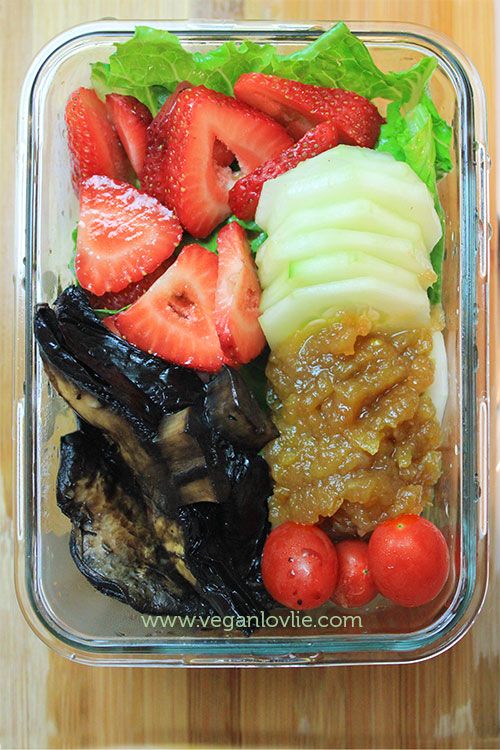
This time I tried something different and added the strawberries to my salad, combined with some pan fried portobello mushrooms, drizzled with a little coconut oil and some Braggs liquid aminos seasoning. As for the apples, I turned them into a fruit puree.
The fruit puree is nothing but a floury apple, one overriped pear and a tablespoon of soft brown sugar. Peel, chop and cook all on low-medium heat until they are soft enough to be mash with a wooden spoon. Cook a little more to allow the liquid to reduce.

So, if you are like me and don't like greasy salad dressings, a spoonful of sweet fruit puree to the salad makes a tasty combo!


Strawberry, Portobello Salad

And that is a great lunchbox idea too!

Strawberry, Portobello Salad

Tuesday, 28 May 2013

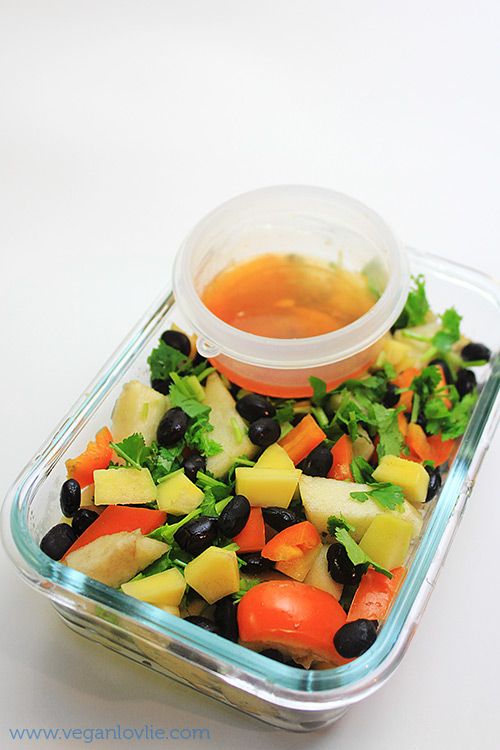
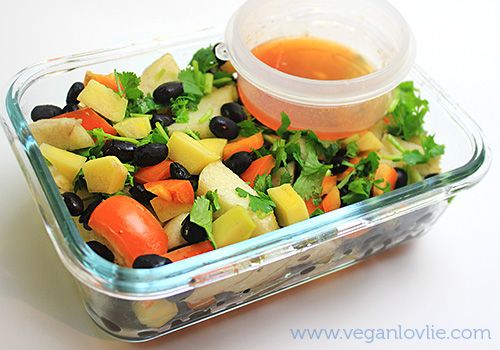
Black Bean, Mango and Apple Salad with Maple Butter-Sriracha Lemon Dressing

Black Bean Mango and Apple Salad with Maple Butter-Sriracha and Lemon Dressing photo blackbeanmango_salad_zpsf7235a73.jpg

Most of my Sunday afternoons now have gone back to routine as it was before, that is preparing a few meals ahead of time for the week. Since I cook all my meals from scratch, a bit of preparation during the weekend saves some precious time during the week and mostly help in staying on the healthy-eating side.

While I don't like cutting up vegetables in advance because I believe they lose valuable nutrients and vitamins when being cut into pieces and stored, I do however make things like boiling big batches of dried beans, quinoa, lentils, dal etc for the week.

Most of my lunches are tasty salads, not only because they are quick and easy to make just the night before, but also because I can then considerably reduce my gluten intake. If I am having a big salad with some filling protein like beans or lentils, I don't usually have the need to go for any bread or other gluten-based carbohydrate.

I don't have any intolerance to gluten but I have heard so much about its not-so-good effect on the body that I decided to try a low-gluten diet for myself and see if I notice any difference. After 2 weeks, I did feel a lot different, much lighter and far less bloated. So, I am sticking to this low gluten diet for a while with some occasional cake / bread or pasta but not as much as before.

So, my newest bean salad that I've enjoyed today is this Black Bean, Mango and Apple Salad that I dressed with maple butter, sriracha and lemon juice. It was really tasty, I enjoyed the medley of flavours.
You can substitute maple butter with maple syrup or other natural sweetener of choice.

This is not really a recipe but just take it as a guide and customize with what you have on hand.

Ingredients
1/2 cup boiled black beans
1//3 mango, peeled and diced
1/2 apple, peeled and diced
1/3 pepper (orange or any other color), diced
Handful of chopped coriander

Dressing
1/2 teaspoon maple butter (or 1 tablespoon maple syrup)
2 tablespoons lemon juice
1/4 teaspoon sriracha (or hot chilli sauce)

Mix all salad ingredients together, keep in a tupperware or glassware until ready to serve. Mix dressing ingredients separately and keep in a small container. Add dressing about 10 minutes before serving.

I didn't add any salt as the flavours were just right and didn't require any but adjust to your taste.

Black Bean Mango and Apple Salad with Maple Butter-Sriracha and Lemon Dressing photo blackbeanmango_salad2_zps4db44625.jpg


Saturday, 2 March 2013

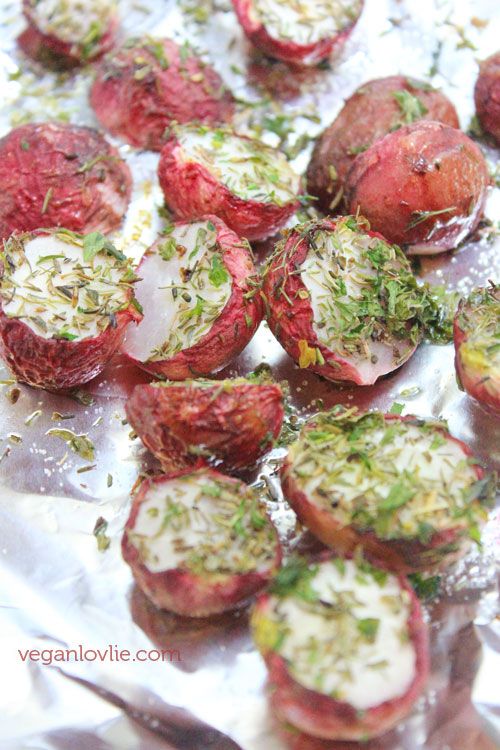
Roasted Radish Salad


Radishes have always been a raw vegetable in my salads or sandwiches. Two weeks ago I purchased a whole bunch of them as I had not had them in a while. But I went a little overboard with grocery shopping the last time and bought too many salad items, way more than I could eat before they start to go off. After 10 days the radishes were still sitting in the bottom drawer of the fridge with all the leaves starting to disintegrate.
There was about 10 radishes and eaten raw I could probably just eat 1 or 2. Then it came to my mind that I could try roasting them and maybe could eat more than two then.
So I did! Brushed with a little vegetable oil and sprinkled with some dried thyme and oregano, I got a nice tasty vegetable which I still enjoyed as part of a salad with some steamed sweet potato.
And I could definitely eat more than two when they are roasted. The skin of some of them (the bigger ones) did turn out a little chewy but it was okay nonetheless.


Sunday, 13 January 2013

Scrambling...

One of the most famous vegan classic meal is without a doubt the tofu scramble. As such, this recipe is so versatile that probably hardly anyone needs a recipe for it.
At the Lovlie Coccoon, tofu scramble is much enjoyed for breakfast with slices of homemade bread, lunch in a wrap as well as dinner over sphagetti ! May I even dare think, scrambled tofu is what keeps veganism alive?!

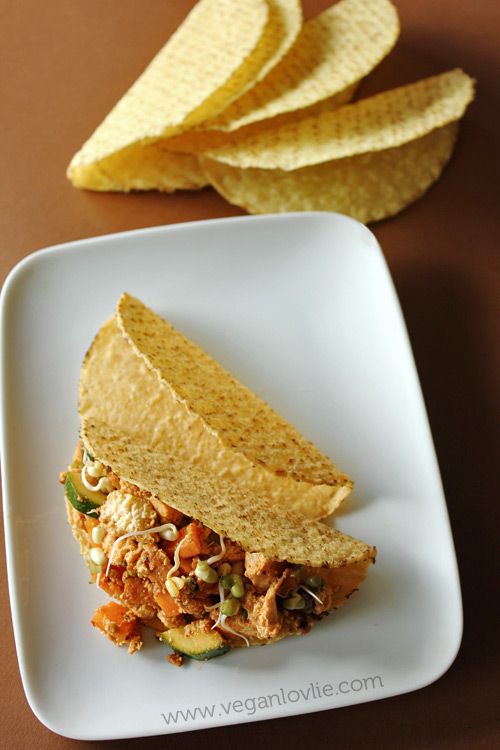
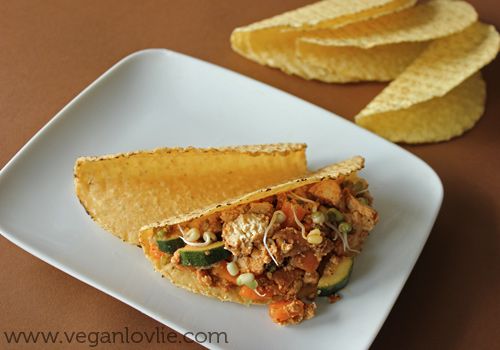
How you want to enjoy your tofu scramble is up to your imagination and really the sky is the limit! How about with some taco shells?

Taco shells indeed is a fun and tasty way of enjoying scrambled tofu and would even work when inviting friends over.

As mentioned, tofu scramble is infinitely flexible in terms of vegetable ingredients. So, this is probably more of a guide than it would be a recipe.


Vegetable Tofu Scramble

Ingredients (Serves 2)

1 tablespoon sunflower oil
1 carrot, peeled and finely diced
1 small zucchini (courgette), diced
3 button mushrooms, finely diced
250g extra-firm tofu, coarsely crumbled
1 tablespoons nutritional yeast
1 tablespoon soy sauce
1 teaspoon dried thyme
1/2 teaspoon paprika
1/2 teaspoon salt
Handful freshly sprouted mung beans (or beansprouts)

Tacos Shells

  • Add oil in a skillet or non-stick pan, tilt and turn pan to coat oil evenly. Heat for 1 minute.
  • Add tofu pieces.
  • Stir fry for a few minutes until lightly golden. You can press against big chunks in the pan and cut them with your wooden spatula if you like to make them smaller.
  • Add soy sauce and let cook for a few more minutes (about 5 minutes).
  • Add carrot, mushrooms and zucchini. Sprinkle nutritional yeast and thyme.
  • Stir fry for another 3 - 4 minutes until vegetables are soft (but don't allow them to turn mushy).
  • Add paprika and salt to taste.
  • Turn off heat.
  • Toss a handful of sprouted mung beans.
  • Warm tacos shells according to package instructions. Spoon scramble into shells and serve warm.


Wednesday, 22 August 2012

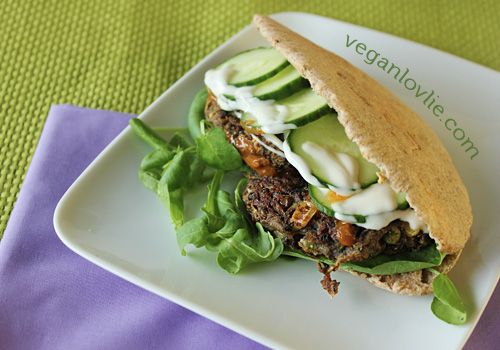
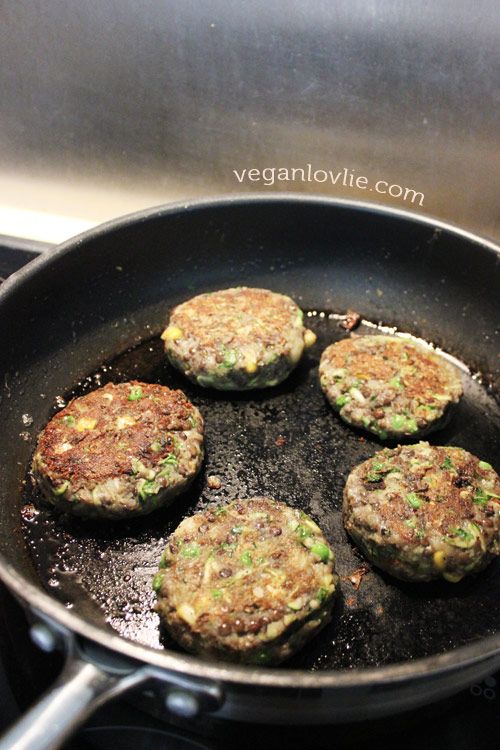
Lentil Veggie Burgers


With so many vegan burger recipes on the internet and recipe books nowadays, why would we need another recipe? Simply because we can't get enough of veggie burgers and they are just so tasty!

I am going to tell you a funny story. This actually happened to me a while ago. Boyfriendlovlie and I were invited at a wedding and our hosts were especially considerate to provide vegan food for us. So, at the buffet table there were burgers but the vegan ones were not labelled and we weren't sure we could have them; they could have been just vegetarian with eggs in them. But anyway, these burgers looked a lot more attractive than the other non-vegan food that was there and they soon disappeared! Later I went to ask about the vegan food and they said it was those burgers and there were none left. I was so disappointed but the chef agreed to bring out some more. And when I tasted them, I understood why they went so quickly! They were actually really tasty. Even omnis preferred them to the meat burgers on that day. Yep! That's what happens with vegan food most of the time I've found, they are devoured by omnis as well as vegans.

So here you go. We will never get tired of veggie burgers hence another yummy recipe to enjoy in burger buns or flat breads! These ones are baked and may be a bit dry if you are having them on their own. So, make sure you have a salad and some dressing to go with them if you are omitting the bread.

Ingredients (8 burgers, depending on size)
200g (1 cup) dry black lentils
2 medium (approx. 450g) potatoes
1 courgette (zucchini), shredded
100g frozen mixed sweetcorn and peas
1 teaspoon cornstarch
1/2 teaspoon garam masala
1/2 teaspoon ground cumin
1 teaspoon chilli powder (substitute by cayenne or cajun spice or paprika for a milder taste)
1 teaspoon salt (or to taste)
1 small bunch (about 10g) coriander (cilantro), finely chopped

  • Boil lentils, according to packet instructions, until tender but not mushy. Drain water if there is any left in the pot.
  • In another pot, put potatoes to boil covered in water. When soft with a fork test, turn off heat and allow to cool. Then peel and mash the potatoes.
  • Squeeze out the juice from the shredded courgette. (You can drink this juice if you want or mix it in your smoothies. But in any case don't throw it away, it's very nutritious). We are squeezing out the liquid here so that the burgers don't break with the juice coming out of the veggies while they are cooking.
  • Mix all ingredients together into a big bowl (including boiled lentils and potatoes).
  • Take a small quantity (like 2 - 3 tablespoons) and shape into balls then flatten into burgers. Leave them a little thick; you can flatten them later in the pan.
  • Drizzle a non-stick pan with some oil. Heat the pan.
  • Place a few burgers and cover. Cook for about 6 minutes on medium heat on one side. A golden crust should form, then turn and cook covered for another 6 minutes on the other side.


  • Afterward you can either:

    turn again and keep cooking in the pan for another 8 - 10 minutes, turning occasionally but carefully to avoid breakage. Adjust heat (lower the temperature) as required so that burgers don't burn but are allowed to be cooked inside,

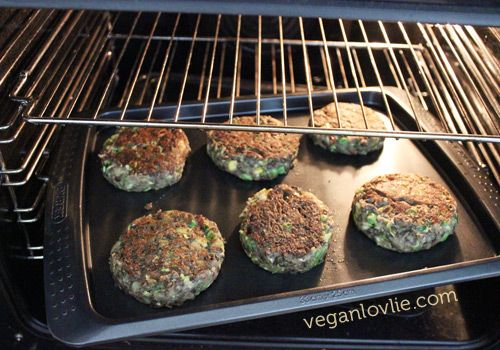
    Or, you can transfer the burgers onto a greased tray and bake in the oven for about 15 - 20 minutes at 170 degrees Celsius or until firmer and done.


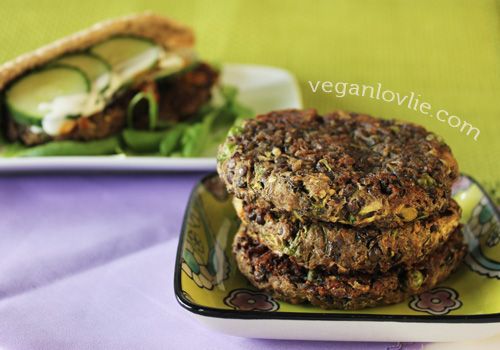
Burgers are ready, serve in burger buns or pita bread, with salad and your favourite sauce.

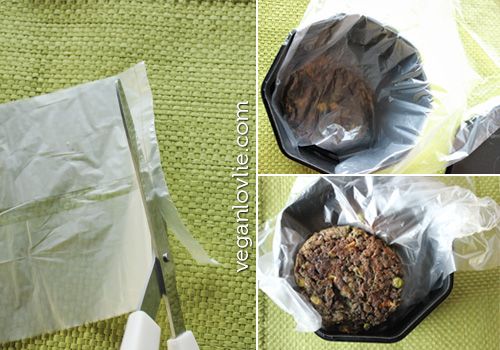
One thing I like to do with veggie burgers is to freeze them for later use. It makes it so convenient and a real time-saver. After the first pan fry of about 6 minutes on each side, remove gently from pan and allow to cool completely. Then simply arrange into freezer proof boxes (I love using my empty icecream tubs for that matter, instead of buying new boxes), separate each burger with a layer of plastic to avoid them sticking to one another when frozen. For the plastic bag, you can use a sandwich bag. Cut off the sealed base then cut through to open the bag into a single layer. This can be reused again and again.


Then, simply take out from the freezer and cook in the oven for 20 minutes at 180 degrees Celsius.


Nutrition facts per burger:

Nutrition Facts
Serving Size
1 serving (123.0 g)
Amount Per Serving
Calories
160
Calories from Fat
21
% Daily Value*
Total Fat
2.3g
4%
Saturated Fat
0.3g
1%
Trans Fat
0.0g
Cholesterol
0mg
0%
Sodium
305mg
13%
Total Carbohydrates
27.4g
9%
Dietary Fiber
10.0g
40%
Sugars
2.1g
Protein
8.3g
Vitamin A 6% Vitamin C 30%
Calcium 3% Iron 14%
* Based on a 2000 calorie diet

Saturday, 9 June 2012

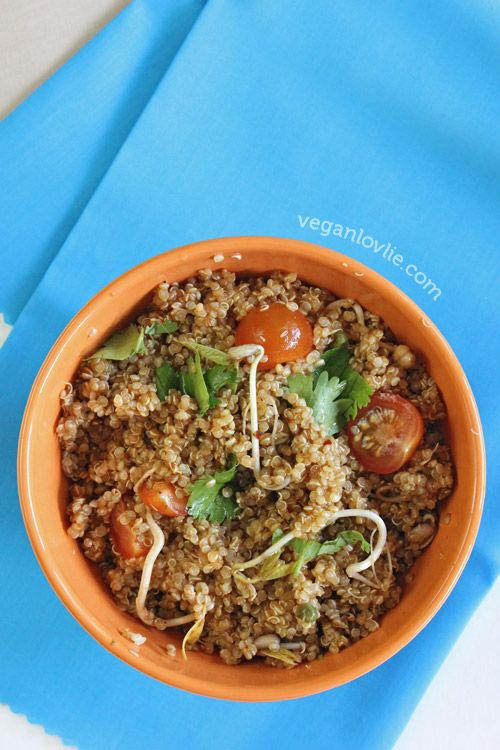
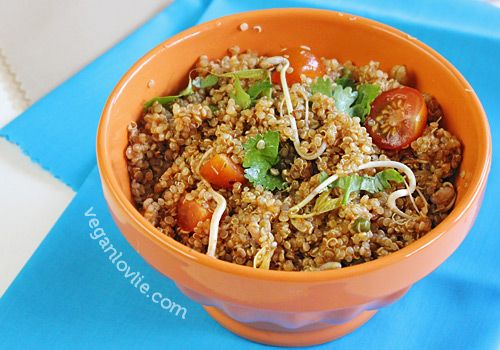
Quinoa Salad with Miso Orange Dressing

My allergy to nuts and seeds sometimes limit the different kinds of foods I could have. Beans and pulses are my main protein source although a good amount of raw fresh living foods do provide for amino acids which is essentially what the body needs. In that respect, if anything but for their great taste, nuts are not actually missed in my diet! Sure thing that they could be a handy snack but I tend to snack more on fruits which is much lighter and refreshing.

Quinoa is one tasty grain I resort to when I get tired of pulses and other beans. Much lighter on the stomach, yet very filling, it can replace rice while providing a higher amount of protein and amino acids. Quinoa is literally one of my regular packed lunches as it does not necessarily need to be consumed warm. Its preparation does not require much effort; it only takes about 20 minutes to boil, no pre-soaking required. Salad is quite handily my favourite dish from it and miso dressing marries it very well to my taste.

On another note, did you know that miso can actually help protect against radiation sickness? So does Wikipedia tell me:
"Some, especially proponents of healthful eating, suggest that miso can help treat radiation sickness, citing cases in Japan and Russia where people have been fed miso after the Chernobyl nuclear disaster and the atomic bombings of Hiroshima and Nagasaki. Notably, Japanese doctor Shinichiro Akizuki, director of Saint Francis Hospital in Nagasaki during World War II, theorized that miso helps protect against radiation sickness."


Quinoa Salad with Miso Orange Dressing
Ingredients (serves 2)

1/2 cup quinoa
4-5 cherry tomatoes
Handful beansprouts
Bunch parsley (a few stems), finely chopped

Dressing:
1 heaped teaspoon miso paste (I used dark hatcho miso)
1/4 or 1/2 of an orange
1 teaspoon maple syrup
Cracked dried chilies (optional)
Salt to taste

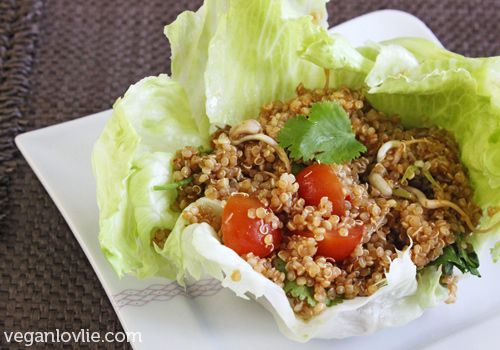
Iceberg lettuce leaves for serving

  • Boil quinoa according to package instructions. (All water should be absorbed). Let cool completely.
  • Cut tomatoes into halves or quarters.
  • Squeeze the juice out of the orange wedge. Mix all ingredients of the dressing into a smooth paste.
  • Add dressing to quinoa along with all the other ingredients.
  • Leave to macerate for about 10 minutes before serving.
This salad stores well overnight in the fridge for your next day's packed lunch.


You can serve this just tossed into a lettuce leaf.


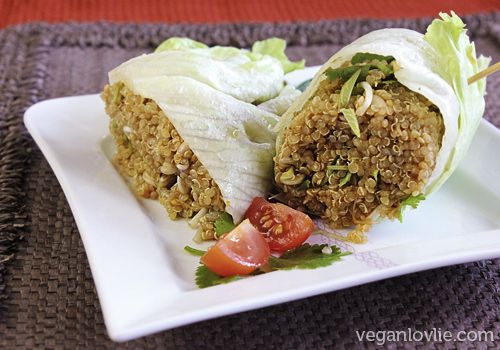
Or wrapped in an iceberg lettuce leaf. Secure with a toothpick.


The recipe yields 2 servings and the nutrition facts below are based on 1 serving.

Nutrition Facts
Serving Size
1 serving (186.8 g)
Amount Per Serving
Calories
218
Calories from Fat
33
% Daily Value*
Total Fat
3.7g
6%
Saturated Fat
0.3g
2%
Trans Fat
0.0g
Cholesterol
0mg
0%
Sodium
45mg
2%
Total Carbohydrates
38.5g
13%
Dietary Fiber
4.4g
18%
Sugars
8.3g
Protein
8.0g
Vitamin A 14% Vitamin C 37%
Calcium 7% Iron 15%
* Based on a 2000 calorie diet

*Nutrition values are an approximation based on ingredients that I have used in this recipe. It will vary with the ingredients (different brands) that you use and portion size.

Tuesday, 27 December 2011

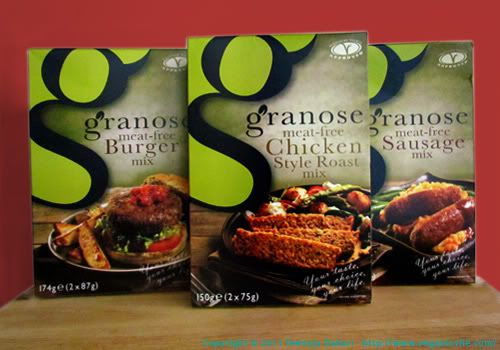
Granose Meat-Free Products

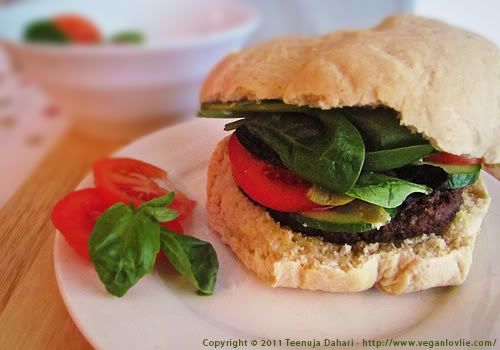
I mentioned the Granose Chicken Style Roast that we had for Christmas Eve dinner in my previous post. Here's the Burger mix that I had yesterday. I find these quite convenient sometimes; they only require water, shaped them into patties, then bake for 20 minutes or so.
Products available in the Granose range are :

Meat Free Lincolnshire Sausage Mix
Meat Free Burger Fix
Meat Free Nut Roast Mix
Meat Free Chicken Style Roast Mix
Sunflower, Lentil and Vegetable Roast Mix
Meat Free Falafel Mix
Soya Mince

In Dublin, I buy them at Holland and Barrett stores.

So far I have tried the Burger Mix, Sausage Mix and Chicken Style Roast.

Granose products

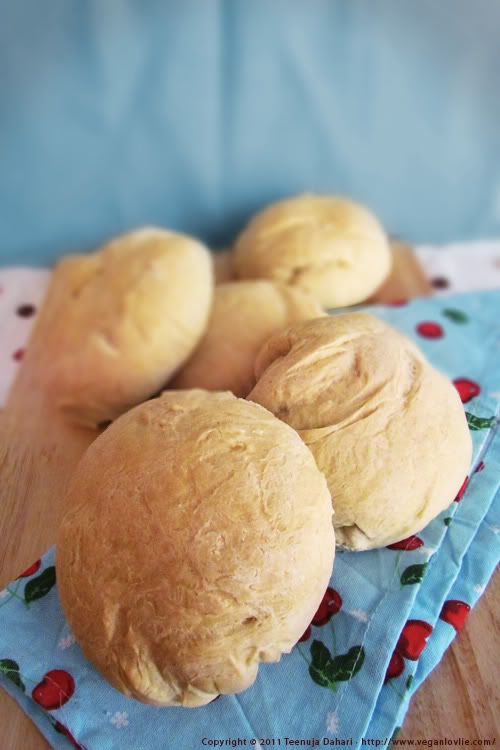
I had some homemade baps that I had made the night before.

Granose burger, homemade buns

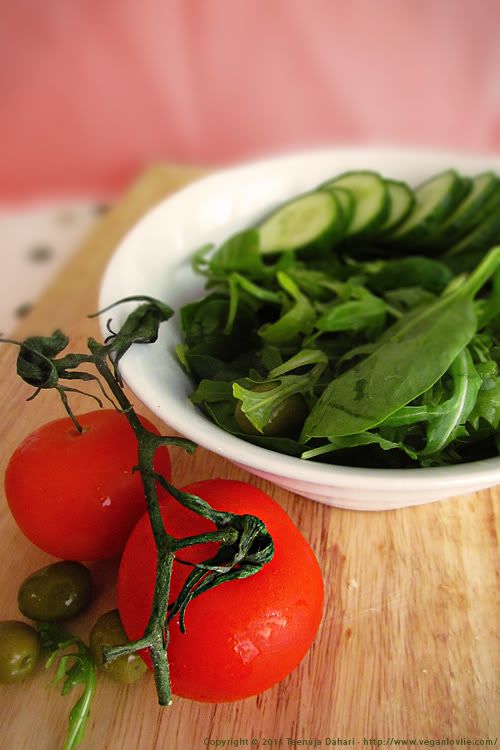
Added some salad.

Granose burger, salad

And voilà! Yummy!

Granose burger

Wednesday, 14 July 2010

DARING COOKS JULY 2010 CHALLENGE: NUT BUTTERS

asian salad

When I first saw this challenge, I thought oh no! Not a nut challenge! I am allergic to both nuts and seeds, although I do cheat and eat them from time to time in small quantities and hope that I don't fall sick! Haha! Ok, it's not funny when I do fall sick!

Anyway, I did not want to take any risk. Then, I saw that this challenge allowed fruit butters as well for nut allergy sufferers! I could have made a bean butter with chickpeas but I used this for a previous challenge to replace nuts in a satay. So I thought I'd try a fruit butter instead.


Fruit butter is similar to making jam except that it doesn't require any jellying agent and uses much less sugar. However, it is cooked for 2 hours. I was short of time. So, I only cooked it for 1/2 hour and it was fine. I only made a small quantity and did not add any extra liquid to the fruits, so it dried up quicker.


The Daring Kitchen

The July Challenge is brought to you by Margie of More Please and Natashya of Living in the Kitchen with Puppies.


DARING COOKS JULY 2010 CHALLENGE: NUT BUTTERS


This was a pretty quick challenge to make. I decided I would use my fruit butter as a dressing for an Asian salad. I made the fruit butter a few days before and had used half of it by the time I took the photo!


Apple and Pineapple Fruit Butter

I am not providing an exact recipe for the fruit butter as I can't remember the quantities I used! But I don't think quantities matter that much as basically the fruits are pureed, sweetened a little bit, water added, then cooked for 2 hours. In my case, I only cooked it for half an hour.

So, I took 2 apples, peeled and cut them into small pieces. I used about 1/2 pineapple, peeled and also cut into small pieces. Place all fruits in a blender and process to a puree (a hand blender is also fine for this). Add 2-3 tablespoons sugar and place in a thick bottom pan. Cook on low-medium heat for 30 minutes or until thick enough to use as a spread.


fruit butter

Asian Salad

I don't have an exact recipe for the quantities of the salad ingredients as I just picked and tossed in what I had on hand. Roughly for 2 persons, here are what I used:

200g Sweet potato noodles (boiled until soft, then rinse in cold water to prevent them from glueing with one another)
1 medium sized carrot (finely sliced with the vegetable peeler)
Mixed peppers (sliced)
150g frozen broad beans (immersed in boiling water for 10 minutes, then drained)
4-5 radishes (sliced)
70g raw green beans (sliced with the bean slicer)

Toss and blend everything together in a big salad bowl.

Fruit Butter Asian Salad Dressing

1 tablespoon fruit butter
1 teaspoon wasabi paste
1 tablespoon dark soy sauce
1/2 teaspoon (or to taste) fine chili powder
1 tablespoon rice vinegar
1 tablespoon fruit syrup (or maple syrup/agave nectar)
Salt to taste

Mix all ingredients together.

Pour on salad just before serving.

asian salad

Sunday, 13 December 2009

Daring Cooks Challenge December 2009: Tofu en Croute

pastry,en croute,tofu


I love everything pastry and pies! So this challenge was not only very exciting but the end product was delicious and made a very nice dinner (and leftover for lunch)!
It is something that I will surely make again and again!

The Daring Kitchen


The 2009 Daring Cooks challenge was hosted by Simone of Junglefrog Cooking. Simone chose Salmon en Croute (or alternative recipes for Beef Wellington or Vegetable en Croute) from Good Food Online.
Recipe source : Good Food online


THE DARING COOKS DECEMBER 2009 CHALLENGE: SALMON EN CROUTE (in my case: TOFU AND VEGETABLES EN CROUTE)


The most exciting part of the challenge for me was what to use for filling. Not that I didn’t have any ideas! I had loads and just couldn’t make up my mind. I have never actually used tofu as pie filling before. So, I went with tofu and experimented with some flavour combinations (for the marinade) that turned out really tasty! I even added some cayenne pepper for a little hot kick!


I used a loaf tin. And as I wanted to get clean slices, I layered the ingredients with a mixture of pureed tofu and soymilk so that everything will hold together nicely.


I made the shortcrust pastry myself. I made it by hand and then used a hand mixer (with the spiral hook; it’s the smaller swirly one that usually comes with hand mixers) to form the dough. For shortcrust pastry to always turn out nice, using metric measurements is best; it is much more accurate (especially in this case).


Ingredients (for 1 loaf tin, 6 servings)
Printable recipe

For the shortcrust pastry

(no cup measurement for this; it’s difficult to measure cold margarine by the cup!)
500g plain flour
220g vegan margarine/butter (as cold as possible)
14 tablespoons water (this may vary depending on how firm/soft the margarine is and also maybe on room temperature)

  • Cut margarine into small pieces.
  • In a big bowl add flour and margarine pieces.
  • Cut through margarine pieces in the flour to make them smaller while mixing with the flour.
  • Rub in the margarine into the flour using the tip of the fingers to make the lumps of margarine as small as possible. Try not to overwork the dough.
  • Lift the flour while rubbing in (to incorporate air into the mixture) until it ressembles fine bread crumbs.
  • Start mixing with a hand mixer (with spiral hook) while adding a few tablespoons of water.
  • Check to see if dough is holding together and soft (but not sticky).
  • Test by pressing with the hands. Knead only 2-3 times.
  • Wrap in cling film and refrigerate for 2 hours to overnight. (Can also be frozen for later use).
I found this video (provided in the challenge post) very helpful: Making shortcrust pastry


For the filling


The mushrooms:
4 portobello mushrooms (250g)
1 teaspoon minced garlic
1 tablespoon margarine
Salt to taste

  • Heat margarine in a non-stick pan. Add garlic and mushrooms. Add salt.
  • Sautee until mushrooms are soft. Remove from heat. Set aside.
  • There will be quite some liquid coming out. Either discard the liquid (or use as part of the marinade for the tofu).

The tofu:


1½ block (375g) firm tofu
½ teaspoon Chinese 5 spice
½ teaspoon turmeric
2-3 tablespoons soy sauce
½ teaspoon cayenne pepper
Salt to taste
3 tablespoons vegetable oil for shallow frying

  • Cut tofu into large slices (to fit in the width of the tin).
  • Mix all the remaining ingredients (except oil) together in a bowl.
  • Dip each piece of tofu in the marinade. (Or you can leave them to marinade for a little while if you like).
  • Shallow fry in the oil until golden and slightly crispy.

The green stuff:


150g watercress, spinach and rocket
¾ block (approx. 190g) firm tofu
¼ teaspoon cayenne pepper
½ teaspoon salt

  • Mix all ingredients in a blender. (I used a hand blender and it was fine). Set aside.

The tofu puree:


¾ block (approx. 190g) firm tofu
100ml soy milk
½ onion (or 1 shallot) chopped
¼ teaspoon salt

  • Mix all ingredients in a blender. Set aside.

Rolling and Arranging:


  • Separate the dough into two, one-quarter and three-quarter.
  • Roll the bigger dough out the size of the baking tin (accounting for the sides, of course, and little surplus.
    (This video, provided in the challenge, is a good one:
    Rolling out pastry)
  • Roll out the smaller dough for the top.
  • Preheat oven at 180 degrees Celsius.
  • Line the tin with some greaseproof paper. (This makes removal easier).
  • Place the dough inside the tin. Shape the corners by pressing lightly with a little ball of dough.
  • Top with a layer of pureed tofu.
    Then add another layer of tofu.
    And a layer of puree.
    A layer of mushrooms, then the tofu puree again.
    Finally pour in the green puree.

  • Cover with dough. Close the edges properly.
  • Make 3 clean cuts through the dough (to allow steam to escape).
  • Bake for 1 hour. Pastry should be golden and dry. Check by inserting a skewer in the middle. It won’t be super dry because of the moist ingredients inside but it should be fairly clean.
  • Allow to cool for a while then remove from tin by pulling the greaseproof paper and lifting. Slice using a serrated knife (preferably).

The f
lower decoration:


The flowers I placed on top were coloured using beetroot juice (because food colour usually freaks me out! So, I try to avoid them). Instead of using water, I used beetroot juice to form the flour mixture into dough. But you only need a little bit of the flour mixture and a tablespoon or so of the beetroot juice.
I just cut out small circles that I arranged into flowers.

The braid:

I braided leftover dough pieces and placed them around the edges of the loaf.

tofu en croute,vegan,pastry,tofu

Printable recipe

Saturday, 3 October 2009

VeganMoFo 03: Tofu Scramble with Parsnip

Tofu Parsnip Scramble


Parsnip is most often cooked in soups and gratin and less often in stir fries or sautés. I personally very much like the taste of sautéed parsnip.

If cooking time is kept short, I quite enjoy a more flavoursome fried taste with a reasonable level of intact nutrients.


Tofu Parsnip Scramble


There’s one thing I can never get enough of is scrambled tofu. And no MoFo would be complete with some delicious scramble tofu for a Saturday brunch!


I have long been tossing the idea of adding diced parsnip to my tofu scramble. I’m glad I tried because it was a well tasty brunch!


Ingredients (2 servings)

2 parsnips (diced)
1 block (250g) firm tofu
1 small red onion
3-4 green chilies, chopped
2 stems spring onions, finely chopped
1 salad tomato, diced
1 tablespoon black bean sauce
1 teaspoon dried thyme
1 teaspoon olive oil
Salt to taste

  • Heat oil in a non-stick fry pan. Add onions. Cook for a few minutes.
  • Add in parsnips. Cook for 3 minutes.
  • Coarsely mash tofu with a fork.
  • Add in the tofu. Stir and cook until tofu begins to lightly brown (about 10 minutes).
  • Add chilies and black bean sauce. Sprinkle with dried thyme.
  • Add diced tomatoes. Cook for 2 minutes.
  • Add salt.
I am so much enjoying

VeganMoFo

Thursday, 1 October 2009

VeganMoFo 01!

This is my first VeganMoFo post. And this is the plan:

  1. Blog about anything food, nothing specific, just eats and drinks, for the first few days, to get me started.
  2. Fusion dinners. I’ll try (try!) to make mix food from different cultures
  3. Anything brunch or snacks
  4. Food that reminds me of Mauritius or inspired from Mauritian cuisine (yes, I don’t blog enough about Mauritian food. So, here’s a chance! I’ll add in my own personal touch to them)

Well this is just the plan…I’ll try as much as possible to stick to this but we’ll see!

VeganMoFo

So, for my first post I’m going to talk about my experience of British food (or more so English food)!

When I first went to England in 2004, the food was a shock to me. It was plain and bland and I thought I could never ever like English food at all. One food that struck me most was the Jacket Potato more so because of the name than what it really was. Why do they call it ‘jacket’ potato? I would wonder. Well, it’s simply a baked potato served with the skin on. It is very commonly served with butter, sour cream and chives, but also very often stuffed with anything-that-comes-to-mind when the folks go bonkers! It is pretty interesting but I took a while to try and like it. But now, I totally looooooove it! Jacket potatoes can be a very nutritious meal if served with healthy low-fat ingredients.

Well my choice of filling this time was lentils sautéed in tomato sauce.

For jacket potatoes, the best potatoes to use are floury ones (or ones labeled as baking potatoes). They should be baked for an hour and half to two hours in the oven depending on the size. But I cheated and steamed them for 20 minutes first, then baked them for 45 minutes until the skin was crispy.


Jacket Potato with Lentils

Ingredients (4 servings)

4 medium to big baking potatoes

Filling:

1 cup (180g) black lentils
1 can chopped tomatoes
1 red onion, chopped
1 teaspoon olive oil
1 tablespoon demerara sugar
1 teaspoon cocoa powder
1 tablespoon dairy-free cheese powder (I used the Free and Easy Dairy Free Cheese Flavour Sauce Mix)
1 teaspoon dried thyme
1 teaspoon (or to taste) coarse sea salt
Parsley for garnish

  • Brush and wash potatoes.
  • Bake potatoes at 190 degrees Celsius (for 1½ to 2 hours) until the inside in cooked and the skin is crispy. (Or you can cheat like me!)

To make filling:

  • Boil lentils until tender but not too mushy. Drain water (or keep to use in soups later on) and keep aside.
  • Heat oil in a non-stick pan.
  • Add onions and sugar and stir for a few minutes.
  • Then add in tomatoes. Cook for a few minutes until liquid is slightly reduced. (Alternatively add water if required if too thick)
  • Add cocoa powder and cheese powder. Sprinkle with thyme. Cook for one more minute.
  • Add lentils. Stir and mix well. Adjust consistency with some water if required.
  • Add salt. Sprinkle with some chopped parsley.
  • Make a cross incision on the baked potatoes. Slightly open them and stuff with filling.
  • Enjoy warm!

jacket potato

Saturday, 19 September 2009

Warm Rice Salad

warm rice salad

For a few days Boyfriendlovlie has been having some inspiration about a warm rice salad with aubergine and lentils. So, most of the credit for this yummy dish goes to him!

Inspired by Boyfriendlovlie and made by me, this is the power of synergy and we could taste the love in every mouthful of this warm salad. The texture and flavour were wonderful, the graininess of the rice and lentils, crunchiness of the celery, mushiness of the aubergine and spiciness of the chilies! Simply perfect for the beginning of this autumn season.


Warm Rice Salad (3-4 servings)

1 cup (150g) brown and wild rice mix (or just brown rice)
1 can green lentils, (or 1 cup (150g when dried) boiled but still firm) well drained
1 red onion, finely sliced and chopped
1 aubergine
3 celery stalks, chopped to small pieces
2-3 sundried tomatoes, chopped into small pieces
2-3 green chillies, chopped
1 tablespoon black bean sauce
3 tablespoons vegetable oil
1 tablespoon vegan margarine
Small bunch chives finely chopped (for garnish)
Salt and pepper

  • Place rice in a deep container filled with water and bring to boil until cooked (but still firm and not mushy).
  • Drain well and lay on a plate. Allow to cool.
  • Cut the aubergine into relatively small pieces (bear in mind that they will be smaller when cooked). Sprinkle generously with salt, then cover with some water for about 2 minutes. Pour out the water and rinse out excess salt. Marinade in black bean sauce.
  • Pour the oil in a fry pan. Place aubergine pieces in the pan and fry, turning occasionally, until golden and soft. Remove from pan, set aside.
  • Place margarine in the pan. Allow to heat a little then add onions. Stir.
  • Then add lentils (make sure there is no water in lentils) and stir to coat every grain in the margarine.
  • Add chilies then sundried tomatoes and celery. Stir a few times.
  • Add rice (make sure rice is cool before adding, otherwise it will turn sticky in the pan). Stir a few times.
  • Add salt and pepper to taste.
  • Garnish with some chives.
  • Enjoy warm and with love!

Wednesday, 17 June 2009

Potato Salad with Santini Tomatoes

potato,santini tomato

I’m at home today! Yay! No work! It’s so good to have a day off with nothing to do on the schedule. I usually work just 3 days a week but I still have a lot of things to do for the remaining days. But today, I decided to just switch off from everything and spend a lazy day at home and have lunch decently in the comfort of the sofa!


I made this salad last night for dinner. I had it with roasted butternut squash, broccoli and humous. No photos of the dinner, I was too hungry! But I decided to have this salad again for lunch today. There was some leftovers, so I added a few more bits to it and rejuvenated my potato salad!


I saw these Santini tomatoes in M&S the other day and have been eyeing them since! I’m glad Boyfriendlovlie went to buy them! They are really good, bursting with flavour!

santini tomato


I’ve put vegan mayonnaise as one of the ingredients but if you don’t have any, then I definitely recommend
this Soy Mayo from Celine; so quick and easy to make and cheaper than vegan mayonnaise. I’ve actually used this in the recipe with a few changes to the recipe. I didn't have any agave nectar so I just used 1 teaspoon of demerara sugar, I also didn't put any lemon zest. I used lemon juice instead of apple cider vinegar.

This salad would be great for a lunch box too!

Ingredients (2 – 3 servings, depending on your portion size)
2 medium sized potatoes
5 – 6 santini tomatoes (cherry tomatoes are also good)
5 black pitted olives
5 green pitted olives
3 tablespoons small pickled mushrooms (I get those from Aldi. Canned mushrooms, chopped will also be fine)
3 - 4 tablespoons vegan mayonnaise (or this Soy Mayo)
Handful chopped parsley or any fresh herb of your choice
1 tablespoon shelled hemp seeds (optional)
Salt and pepper to taste

  • Boil potatoes skin on until tender but still firm.
  • Allow to cool, then cut into cubes. The skin pieces will come off while cutting them. You can leave them in or remove them.
  • Cut the santini tomatoes into 2 – 3 pieces. I decided to cut the santini tomatoes but you can leave them whole if you like.
  • Add all the remaining ingredients to the potatoes in a big salad bowl.
  • Sprinkle with some shelled hemp seeds if you like for some added protein.

potato,santini tomato

I had some leftover pasta shells that I tossed into the salad because I hate to waste food and I wouldn’t be using the pasta otherwise.

Sunday, 10 May 2009

Aubergine and Veggies in Beancurd Fried Wrap

Photobucket

I’ve had beancurd before finely chopped and just sautéed in tomato sauce or in curry. But I always tend to think beancurd skin is more appropriate as a wrapping ingredient. And indeed I liked it better used in this way.

Depending on what type of beancurd skin you are using, you might need to re-hydrate it according to package instructions, usually soaking in warm water. I used moist beancurd skin and I only had to brush with a bit of warm water to soften it slightly more.

Ingredients (4 wraps)

1 large aubergine, cut lengthwise in quarters
Bunch green beans, sliced
2 - 3 carrots, finely cut in julienne
3 - 4 mushrooms, sliced
½ cup black beans, boiled (any other beans will do)
2 – 3 tablespoons black bean sauce
2 cloves garlic, minced
Few sheets beancurd
Salt to taste

For the batter:

3 – 4 tablespoons flour
1 teaspoon black bean sauce
Salt to taste (if required)
Water (enough to make a thick consistency)

Oil for sautéing and frying

  • Smear the aubergines on the sides with some black bean sauce. Shallow fry them on each side until tender but still firm in a frying pan. Remove, set aside.
  • Sautee the sliced green beans, carrots, mushrooms and garlic in 1 tablespoon oil and 1 teaspoon black bean sauce for 3 – 4 minutes.
  • Remove, set aside to cool.
  • Lay the beancurd sheets on a large chopping board or on the kitchen work space.
  • Moisten and soften them by brushing with some warm water.
  • Cut into squares (so that the aubergines and veggies would fit in leaving some extra width on the sides. Allow for at least 2 turns of skins around). You may also want to make them half the length by cutting the aubergines.
  • Place aubergine, veggies and black beans on beancurd sheet.

tags: aubergine beancurd

  • Start rolling from one end, fold over the 2 sides towards the centre.

Aubergine and veggies in beancurd

  • Continue rolling to enclose everything nicely inside.

aubergine beancurd

  • Preheat some oil on medium heat in a frying pan for shallow frying.
  • To make the batter, place flour, black bean sauce and salt in a large bowl (large enough to accommodate the length of the wraps). Gradually add water to make a thick batter.
  • Carefully dip each wrap (one at a time) into the batter. Gently roll to coat every side evenly with batter.
  • Place each wrap (one at a time) in the pan. Adjust heat if necessary so that the skin is not cooked too quickly, allowing the veggies to cook a little bit more inside. Turn frequently on every side until golden.
  • Remove and drain on kitchen absorbent paper.

Enjoy with some salad! This is nice for a packed lunch for work!

tags: aubergine beancurd

Saturday, 7 February 2009

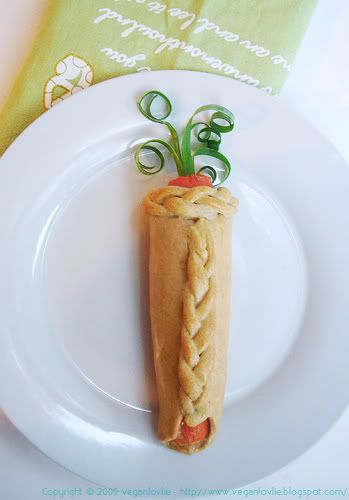
Crusted Stuffed Carrot

Photobucket


First of all I need to thank the sweet Shelly for all the nice words she said about me and for posting a Wipster interview about me! I love the idea to call the W.I.P participants Wipsters! And thank you for all your amazing comments about the W.I.P Wednesday logo! I wasn’t expecting such a big response! I’m really happy that you’ve liked the W.I.P logo! Hopefully, I’ll be able to get on some crafty creations to post on every W.I.P Wednesday!

Secondly, I’ve started a new job on Thursday (yay!) and I now have a new routine to adjust to. But I’m pretty excited as I have not worked for nearly four months.

Ok I think what you want now is the recipe for the Crusted Stuffed Carrot (that I featured the photo for in my previous post), right? I wanted to post before but have just not been able to find time.

It did not take that long to make, I don’t know how long exactly but it was under an hour including baking time, probably just 30 minutes preparation time. I made a creamy mushroom filling that was quite tasty. For me this was nice and so convenient as all the ingredients are just staples in my kitchen. So, all in all, this is something I’ll make again and I plan on taking it as lunch for work!

Crusted Stuffed Carrot

Ingredients (2 servings)

2 medium/large carrots

Crust:
1 ½ cup plain flour
4 tablespoons vegetable oil
Salt to taste
Water (about 7-8 tablespoons) to make the dough

Soymilk for glazing

Stuffing:
2-3 fresh mushrooms, finely chopped
1 small onion, finely chopped
Pieces of scooped carrots
½ teaspoon minced garlic
½ teaspoon minced/grated ginger
½ teaspoon dried basil leaves
Some finely chopped scallions / spring onions (optional)
¾ tablespoon plain flour
½ cup soy milk
1 teaspoon vegetable oil
Salt and pepper to taste

  • Place the carrots whole into a steamer and steam for 10 minutes when water starts to boil or until slightly tender. (Alternatively you can boil the carrots until slightly tender, about 12 minutes).
  • Remove and allow to cool before handling.
  • While carrots are steaming, prepare the crust.
  • Mix the oil with the flour. Work with the fingers until flour ressembles fine breadcrumbs.
  • Add water and knead to form a nice and smooth dough. (Adjust water if required, the dough should not be sticky.)
  • Divide into 2. Set aside.
  • Cut carrots into halves lengthwise. Slice out the middle portion of each carrot half, leaving enough shell so carrots won’t break. (I found this is best done with a small knife, you can cut a v-shape which is easier, but I tried to carve mine round and it wasn’t too bad). Scoop out carrot centers. Finely chop the carrot centers, set aside.
Photobucket
  • In a fry pan or skillet, heat oil. Add onion, garlic, ginger and sauté for a 2 minutes.
  • Add chopped carrots, mushroom. Stir and cook for a few more minutes.
  • Then add flour. Mix well and don’t allow to burn. Almost immediately add soy milk and stir well so that lumps do not begin to form. You have to be very quick at this stage. (If you are unsure, you can also stir the flour into the milk first then pour this over into the pan).
  • Sprinkle with dried basil, add in the scallions, salt and pepper.
  • Allow to thicken into a creamy consistency.
  • Remove from heat and let cool before stuffing into carrots.
  • Preheat oven to 200 degree Celsius.
  • Roll out dough to desired thickness and large enough to wrap the carrots with.
  • Place one carrot half onto the rolled dough.
  • Trim the sides. You can use these cut off pieces to make the braid decoration.
  • Add some stuffing, cover with the other half to enclose.
Photobucket
  • Wrap dough around carrot and close properly.
  • You can place some braided dough decoration to hide the dough seam. (I made the braid by using 3 thin pieces of left over dough, you even just use 2 pieces and twist them around).
  • Place on a greased baking tray (I usually place some foil to avoid sticking).
  • Brush with some soymilk; avoid dripping it on the tray as it will glue the crust to the tray which will make it hard to remove from.
  • Bake for 25 – 30 minutes or until crust is a golden light brown colour.Let cool slightly before removing from tray.
  • Decorate with some scallions. Cut the scallion to desired length (about 10cm or 4 inches), then slice it into 4 – 5 sections lengthwise. Leave about 1 cm uncut at the base. Then curl it up by running the blunt side of a knife along the length on the outside, applying slight pressure (the same way you would curl paper ribbons with scissors, if you’ve ever done that).
  • Insert this at the top of the carrot into the filling.

Photobucket

Enjoy with salad, fries, soup…or just on its own!

Tuesday, 3 February 2009

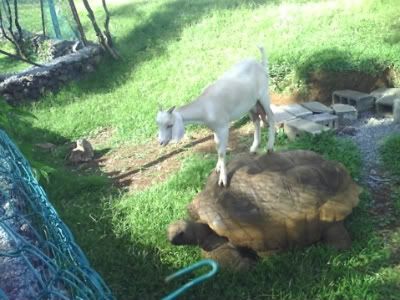
The story of the Goat that climbed on a Giant Tortoise

Photobucket

Photo taken by Boodan Tek, initially posted on carrotmadman6's blog


It’s been a while since I posted something here! Well today I have something other than a recipe to share with you.

What is it? A story!

Do you want to hear it? Do you?!

Yes! Of course you do!

Well here goes:

On this small island (called Mauritius) in the heart of the Indian Ocean, there lies a valley of astounding beauty, vivid and green with plant life. It is called ‘La Vallée des Couleurs’ (translated as The Valley of Colours). Indeed colourful pastures and beds of exotic plants extend to a range of foothills that appear a bluish purple in the distance. A walkway with several stone steps winds around down to the heart of the valley. It almost feels like a sacred place, so peaceful, so quiet – a stillness that every being longs to experience. And yet from that stillness, vibrant animal life co-habit with the plants.

One day, while grazing around Hop-Ho-Neo, a young smart playful goat, noticed the exotic palm-like tree in the middle of the meadow. Hop-Ho-Neo is always hopping and merrily galloping around; he brings some animation to this ever so tranquil valley.

This tree had always been there but he never paid any attention to it until that day. He was struck by the most wonderful idea that soon became his next challenge! He did not exactly quite know what kind of tree it was, but who cares! Hop-Ho-Neo was bored with grazing the grass underneath him and was up for some more exotic flavours instead!

The question remained how to get to those leaves he saw?! They were too high on the tree for Hop-Ho-Neo. “Ah ha! Master Sanchee!” thought Hop-Ho-Neo. And off he went towards Master Sanchee.

Master Sanchee, a rare species of giant tortoise, is probably more than a century old and peacefully lives with his family and friends in the heart of ‘La Vallée des Couleurs’.

“Meehhh! Meehhhhh! Mehh!” Hop-Ho-Neo said to Master Sanchee. (Translation: Hey! Sanchee, can you see those leaves over there? Do you think you could help me gain some height? I’m bored with grazing this same grass everyday mate!)

Master Sanchee nonchalantly lifted an eyelid without moving any other body part. Like all giant tortoise of his kind, movements are minimal but not meaningless. With time Hop-Ho-Neo has learnt to understand ‘tortoise language’ and the slow casual eyelid lift meant:

“You want to use me as a step ladder? Dear me! That tree is much too far away! I’m a century old you know, I cannot reach there in three hops like you! Go graze your grass Hop-Ho!”

“Mehhh! Meeehhh! Mehhhhhhhhh!” replied Hop-Ho-Neo, not giving up. (Translation: Oh come on! Sanchee mate! Aren’t we buddies? I could even grab a few of those leaves for you too! Apparently they taste great, an exotic variety!”

A somewhat less slow eyelid reply from Master Sanchee meant:

“Hhhh! Very well, very well, you smart ass! You win! Let’s go!”

Master Sanchee meticulously turned around facing the tree and slowly and leisurely started walking towards it. Hop-Ho-Neo, galloped to the tree and came back two times in his excitement and Master Sanchee had still not reached a quarter of the distance.

“Meehh! Mehhh!” called out Hop-Ho-Neo (Translation: Come on Sanchee! At this pace, I’m gonna die of starvation!)

Master Sanchee blinked with the right eye:

“I’m doing you a favour here and that’s the fastest I can go! Maybe you could go and watch the scenery in the meantime! And stop fluttering around like you have a pin in your ass!”

Hop-Ho-Neo felt his stomach twist with hunger and was getting impatient to bite into those exotic leaves.So, he decided to climb on Master Sanchee’s back! And up he was! Hop-Ho-Neo gently scrubbed Master Sanchee’s shell. He knew this would give him the tickle and would hasten him! This is something that Hop-Ho-Neo had learnt from the elders in the group – gently scratching the tortoise shell makes them move faster!

Master Sanchee lifted his head and became frantic with the tickling sensation that travelled from his shell to all over his body! His pace began to increase much to the delight of Hop-Ho-Neo. Sanchee almost vigorously shook his head from side to side meaning:

“Hop-Ho you have to stop this! Stop! Get off me!”

But Hop-Ho-Neo had only the exotic leaves in mind and would not get off!

Left with no choice than to keep advancing, Master Sanchee soon reached the tree. Finally! He stopped, panting and out of breath.

Hop-Ho-Neo, on the other hand, was jolly excited! He could not wait to bite into the exquisite leaves and boy they were! A medley of flavours – fresh, sweet and juicy with a slight tartness. The invigorating taste reached throughout his whole body and he felt reborn! For a minute he was drowned into another world. It was nothing like he had ever tasted before.

Coming back to his senses, he thought about Master Sanchee and had a look to what he was up to. Sanchee did not look particularly happy and was still slowly catching his breath.

“Hey! Sanchee! Have a bite into these! They’re divine!” said Hop-Ho-Neo in his ‘mehh, mehh’ talk.

But Master Sanchee was not impressed and he lifted his head ordering Hop-Ho-Neo to get off his back.

Realising that his friend actually had become very grumpy about the situation, Hop-Ho-Neo got off.

“Hey Sanchee! Really you should try these leaves mate! They’re awesome! I’m sure they’ll knock some 10 years off you!” said Hop-Ho-Neo.

“I nearly had a stroke there! I could have died walking at this pace! Rrrr!” grumbled Master Sanchee.

“Sorry dude, I was so impatient to eat those leaves,” Hop-Ho-Neo apologized, lowering his head to the grass, scrapping it with his hoof in a saddened gesture.

“Alright! Alright! Hop-Ho! But don’t you ever do that to me again!” said Master Sanchee.

And Hop-Ho-Neo was happy again as he offered a few leaves to his friend.

“Hmm! These are actually quite good! Hmm! More please! Hmmm!” munched Master Sanchee as he chewed and scoffed on the delicious leaves!

Photobucket

Photo taken by Boodan Tek, initially posted on carrotmadman6's blog


Well, I hope you’ve enjoyed the story! Makes you want to go to Mauritius? I’ve actually never been to La Vallée des Couleurs myself when I was in Mauritius. What a shame! But I have seen and ridden on a giant tortoise’s back when I was a child!

I got inspired to write this story when I saw the pictures that were posted on carrotmadman6’s post.

What I really wanted to point out here is that animals are intelligent creatures and certainly not dinner! Look how cute these creatures are and how they behave, respect and co-habit with one another!

You’ll find all the series of 5 photos of the goat that climbed on the giant tortoise’s shell to reach some leaves on carrotmadman6’s blog. The photos were actually taken by a friend of carrotmadman6.

As carrotmadman6 (who’s veggie, by the way) made my day, I got inspired to bake this Crusted Stuffed Carrot!
Photobucket

Coming up soon is the recipe for the Crusted Stuffed Carrot! Check back soon! Update: Recipe posted

Share This Post

Share This Post

Related Posts Plugin for WordPress, Blogger...