Join the Veganlovlie Cocoon!
Receive an occasional burst of sunshine and a little flower, recipes, craft projects and FREE resources.
Showing posts with label Dips and Chutneys. Show all posts

Monday, 5 October 2015

Traditional Mauritian Roti and Fillings — Part 3/3: Rougaille Sauce and Coriander (Cilantro) Chutney

Mauritian roti and fillings - plain rougaille sauce, rougaille touni

Before closing off this series of 3 posts, I have to admit that the idea of jumping on a plane to go and experience the roti from the streets of Mauritius did cross my mind. For sure, this whole series has taken my tastebuds for a little trip back in time, reminiscing about the mouthwatering aromas that steams out upon opening a pack of freshly purchased roti and the intricate flavour delight of biting into a hot roti.

Monday, 6 April 2015

Soy Sauce Substitute | Recipe for a Soy-free & Gluten-free Alternative to Soy Sauce

cheap soy-free gluten-free substitute for soy sauce

Every now and then I have an intermittent sensitivity to soy. I have been gradually reducing my soy intake after the first few years of going vegan when I started consuming it more than before. But striping soy out of a vegan diet, I must say does make things a little more laborious. For one thing, I miss out on a lot of the processed foods out there, which isn't a bad thing after all when I come to think of it. However, there are certain foods like soy sauce that I do use in a whole lot of recipes. Coconut aminos could do the job as a soy-free alternative but a small 200ml bottle of this salty/sweet liquid comes at quite a hefty price tag - the lowest I've seen is around $7.

Monday, 23 February 2015

My Version of Kimchi | Vegan

Vegan/Vegetarian Kimchi recipe, no onion and no garlic

A bite into a seemingly spicy piece of pickled napa cabbage opened up a whole new world for me when I discovered kimchi for the first time at this Korean restaurant called The Hop House in Dublin, Ireland. Crunchy, juicy, tangy and hot was really quite a mouthful of surprise from what looked like some humble morsels of cabbage neatly stacked in a small dish. I had never tasted kimchi before, nor did I know what it was. The menu labelled it as 'V' for vegetarian and it definitely caught my attention. Being the adventurous type when it comes to food, after confirming with the waitress whether it was also vegan, I had to order kimchi for the first time and was so glad I did. I even ordered more to take out at the end of my meal.

Monday, 19 May 2014

Cauliflower is the New Kale


A humble vegetable, bland on taste yet dense with nutrients, the cauliflower has pretty much been put under the spotlight this year. After being declared, across Canada, by food experts to be the New Kale for the 2014 food trends, it is no wonder that recipes are popping up across the blogosphere, getting more creative from one blog to the next: from an intriguing chocolate cake to a comforty Mac n Cheese, a delectable gluten-free pizza crust to scrumptious steaks, this rawsome cauliflower couscous to yet the traditional curry and classic stew.


Apart from the curry and stew, I have yet to try all the above while a whole new array of possibilities are opening up for my mind to toy with! And here I present: The Mash! Being an avid mashed potato lover, this lighter take on the mash is ridiculously easy and quick to make without the need for a food processor or ricer. Timely for the Spring & Summer, you could serve this as a dip but so far I have enjoyed it on its own and as a side dish with brown rice and salad.

Adapted from this recipe from the Undressed Skeleton. Her version calls for Parmesan, so I have veganised it here and made it a little lighter too.


Cauliflower-Avocado Mash

Serves 1- 2
1/2 cauliflower head
1 avocado
1 cup coriander (cilantro), finely chopped
1 lemon wedge
1 nori sheet, torn into small pieces (optional)
1/2 teaspoon paprika (or chili powder if you prefer a bit of heat)
Salt to taste

Cut the cauliflower in florets, wash then steam until soft.
Remove from steamer and mash with a fork.
Cut avocado in half, then dice the flesh.
Scoop out the dices and add to the cauliflower.
Next add the lemon juice and coriander.
Add nori pieces if using.


Add salt to taste. Dust with paprika and serve.

Friday, 4 May 2012

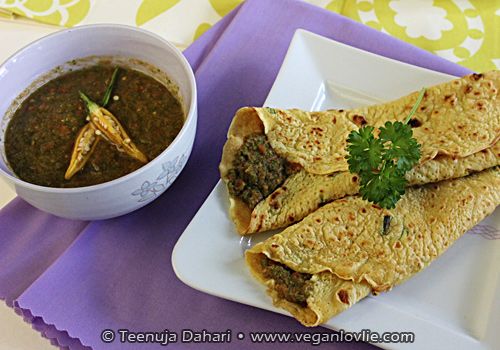
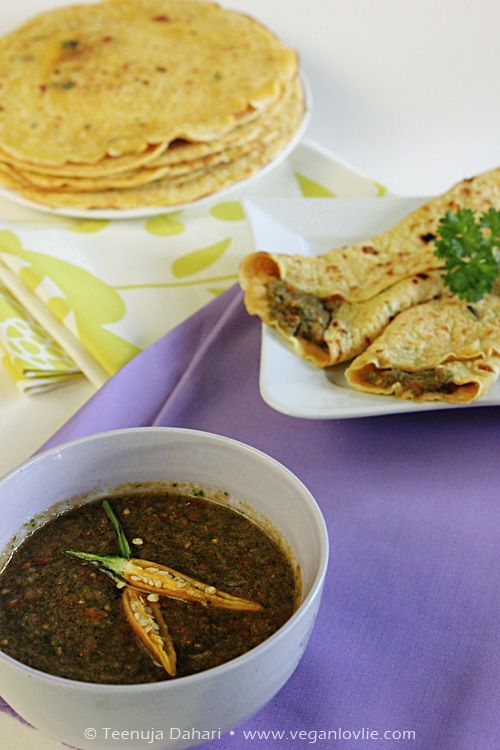
Coriander Chutney with Savoury Crêpes

vegan savoury crepes, coriander chutney

Coriander chutney is a popular raw condiment in Mauritius, usually eaten as part of a main meal or with snacks to enhance flavour. It is a nice sauce to go with many savoury cakes and in this case savoury crêpes.
I like to use leftover chutney as a salad dressing too.

The recipe is very quick and easy to make; it is also raw and a great way to eat raw coriander. Originally it is made with onions and garlic but since I don't eat those, I have substituted with ginger. Feel free to add these in if you like, 1/2 small onion and 1 garlic clove should be enough.


Easy Coriander Chutney
Ingredients
3 - 4 salad tomatoes
1 bunch coriander (about 25g)
2 - 3 green chilies (or to taste)
1 teaspoon ginger, minced (or use an-inch cube size piece, cut into fine pieces)
1/2 teaspoon salt

  • Place all ingredients in a blender (or use a hand blend) and blend until a puree consistency is obtained.
vegan savoury crepes, coriander chutney


And here's an easy peasy vegan crêpe recipe:

Savoury Vegan Crêpes
Ingredients (about 16 - 20 crêpes)

1 cup plain white flour
1 cup strong white flour (substitute with plain white if you don't have this)
550 ml  water
100 ml oat milk (I found oat milk to give the best results among other non-dairy milk)
3/4 teaspoon baking powder
1/2 teaspoon curcuma or turmeric
1/2 teaspoon salt
2 - 3 stems scallions or coriander, finely chopped

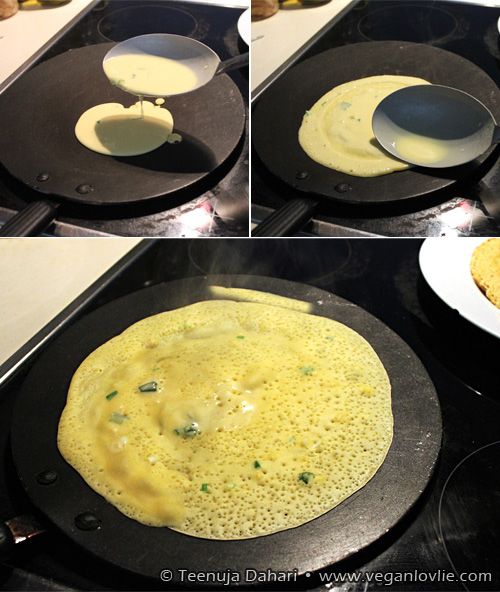
  • Mix flours with baking powder, curcuma and salt. Add water, stirring with a hand whisk to avoid lumps. Add oat milk and scallions.
  • The crêpe batter should be smooth.
  • Heat a crêpe pan on medium heat.
  • Laddle the batter and spread around into a nice circle shape.
  • Cook for about a minute until the bottom side is no longer sticky.
vegan savoury crepes, coriander chutney
  • Then flip over onto the other side and cook for another minute or two. You can flip again if required.
  • Remove and stack on a plate. Stacking them will keep them softer and warm.
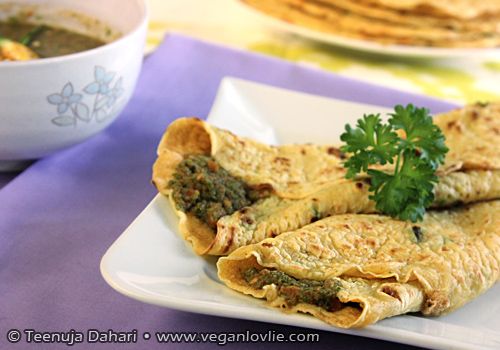
Spread with coriander chutney, roll and serve while still warm. This makes a delicious brunch or snack anytime.

vegan savoury crepes, coriander chutney

Monday, 9 January 2012

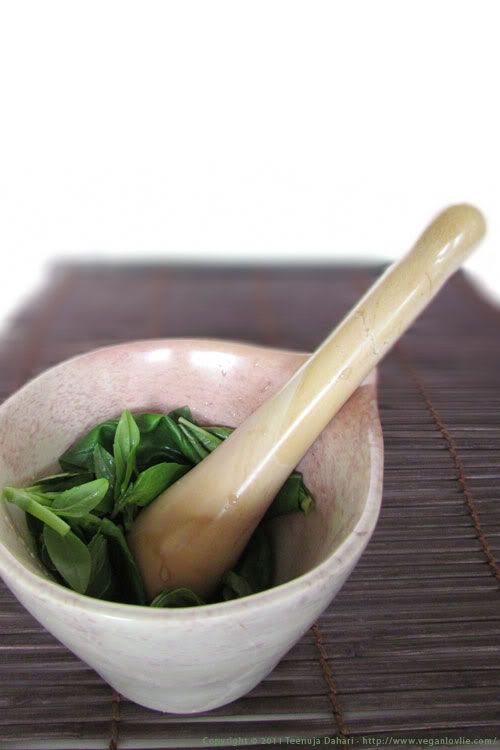
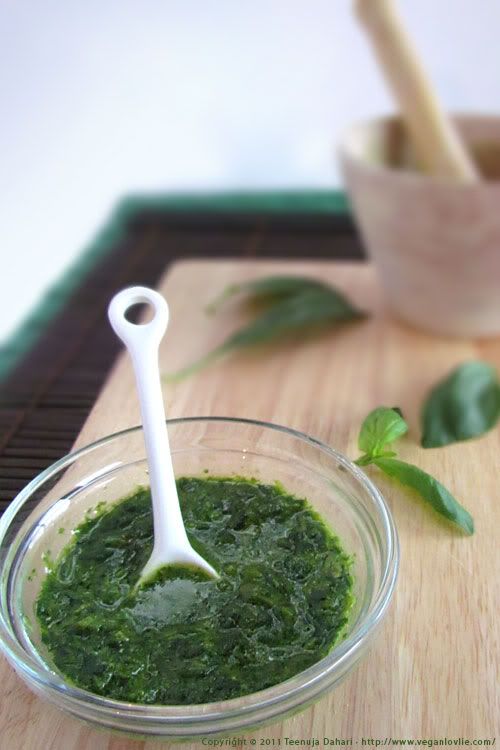
Vegan Pesto made in a Mortar and Pestle

I realised that I had never actually featured any pesto recipe here before. With my nut allergy, I don't actually make pesto that often. But I was inspired to make a nut-free version when I got this mortar and pestle as a Kris Kindle (Secret Santa) gift for Christmas in the office. What a thoughtful gift!

vegan pesto

Did you know that pesto infact originates from the use of a pestle to make it? (It's from the Genoese word Pestâ (Italian: pestare), which means to pound, to crush, in reference to the original method of preparation, with marble mortar and wooden pestle).

While it does sound like it involves a bit of work to grind pesto in this way, it actually is very agreeable. The fragrances that are released during grinding are really exquisite and the result is a much tastier pesto despite the fact that this one was a nut-free version.

This is also garlic free but feel free to add it in if you like.

Vegan Nut-Free Pesto

Ingredients (yields only about 2 tablespoons of pesto)

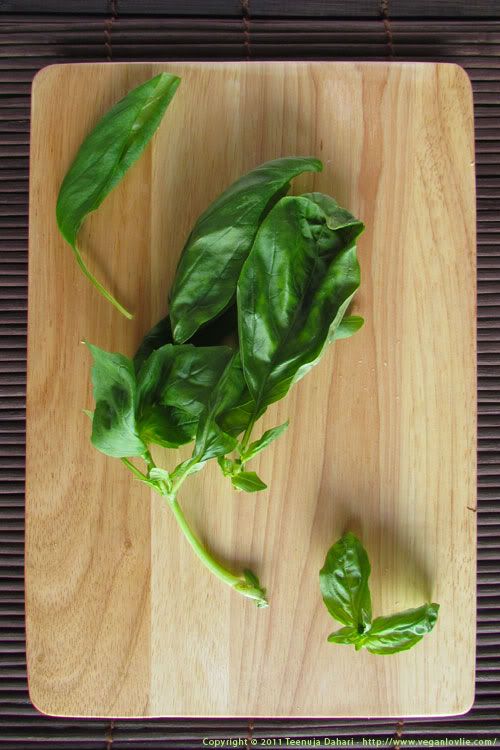
25g, washed, fresh basil leaves
1 tablespoons olive oil, as needed
1 tablespoon nutritional yeast (adjust to taste)
1 teaspoon lemon juice
Sea salt, to taste


vegan pesto, basil
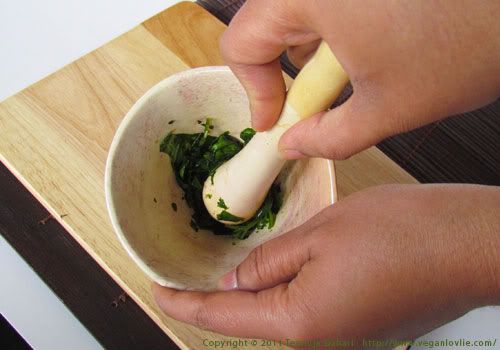
  • Grind basil leaves in mortar and pestle (or blender).
vegan pesto
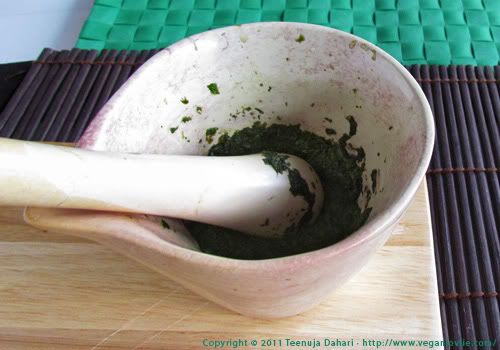
  • Add the nutritional yeast and salt (be careful with these two as nutritional yeast is already quite salty).

vegan pesto
  • Add lemon juice.
  • Lastly add enough olive oil to keep it moist and spreadable.
  • Cover and store chilled for at least an hour.
  • Pour a thin layer of extra olive oil, if you like, over the top to help keep it bright green.

vegan pesto

Sunday, 19 September 2010

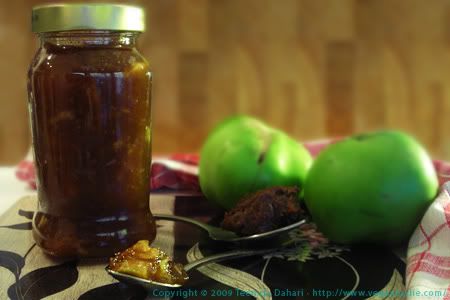
DARING COOKS 2010 CHALLENGE: FOOD PRESERVATION: THE APPLE BUTTER OF KNOWLEDGE

apple butter,daring kitchen,daring cooks

I am posting this 5 days late! Not that this was a tedious recipe to make. It was infact very easy and quick. Because I am allergic to nuts, I regularly make fruit butters to use as spreads. I have made apple butter a lot of times before and I like mixing it with other fruits.
This time I mixed it with some tamarind paste for a distinctive sweet and sour taste.
I really like this combination and more often I find myself eating a spoonful as dessert rather than a breakfast spread! The slight sour taste also makes it really good to use as a dipping sauce with corn chips or poppadums!

The Daring Kitchen

The September 2010 Daring Cooks’ challenge was hosted by John of Eat4Fun. John chose to challenge The Daring Cooks to learn about food preservation, mainly in the form of canning and freezing. He challenged everyone to make a recipe and preserve it. John’s source for food preservation information was from The National Center for Home Food Preservation.


DARING COOKS 2010 CHALLENGE: FOOD PRESERVATION: THE APPLE BUTTER OF KNOWLEDGE


For this recipe I used Irish Bramley apples. Bramley apples are usually slightly larger than a common regular apple and they have a tangy taste. They are mostly used as cooking apples in pies or crumbles.

Because I tend to eat these butters quite quickly, I don't usually use elaborated methods of preservation and these butters usually keep for up to 3 weeks in the fridge.

Bramley Apple Butter (with a hint of tamarind)
3 bramley apples (peeled and seeds removed, finely chopped/sliced)
1 tablespoon tamarind paste (seeds removed, dilute with a little water to make it easier to remove the seeds)
1 cup sugar

  • Place all ingredient in a non stick pan, cover and cook for 20 minutes or until apples are soft enough to mash. Occasionally add water if required to allow the apples to cook and not burn.
  • After cooking, you can either mash in a blender, with a hand blender or with a wooden spoon (which I did, as I like some chunky pieces to be left).
  • Put back in the pan and reduce to desired spreadable consistency.
  • Allow to cool then place in sterilised (boiled in water, then left to dry) pots and keep refrigerated.

Sunday, 13 June 2010

Daring Cooks Challenge June 2010: Pâtés and Bread


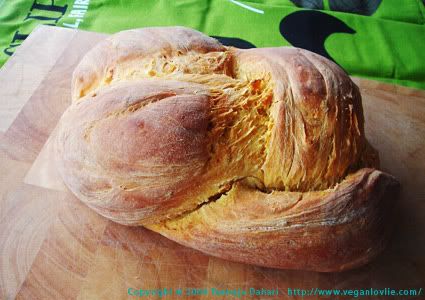
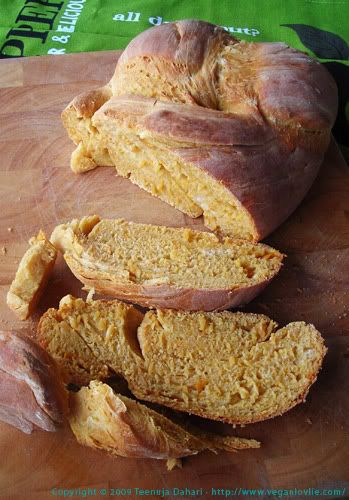
This month's challenge was different from what I expected but I liked it. I kind of make bean spreads quite often but never actually made a bean pâté before. The result was quite tasty I must say! However, the pâté is supposed to be eated cold with bread to go with the summery weather, in the northern hemisphere at present. Well, in Ireland, it's not very summery at the moment, despite being in the northern half of the planet. And especially, I chose to do this challenge just on the eve of the posting date. It was rainy and not warm. So, I decided to make a warm hearty bread to compensate - Sweet Potato Bread. And my, was that tasty! I'm not a great fan of bread in general but I am a fan of sweet potato and BoyfriendLovlie is quite the contrary. With this bread, it seems like we found common ground!


The Daring Kitchen

Our hostesses this month, Evelyne of Cheap Ethnic Eatz, and Valerie of a The Chocolate Bunny, chose delicious pate with freshly baked bread as their June Daring Cook’s challenge! They’ve provided us with 4 different pate recipes to choose from and are allowing us to go wild with our homemade bread choice.

THE DARING COOKS JUNE 2010 CHALLENGE: PÂTÉS AND BREAD
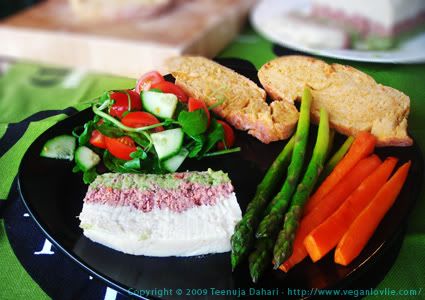
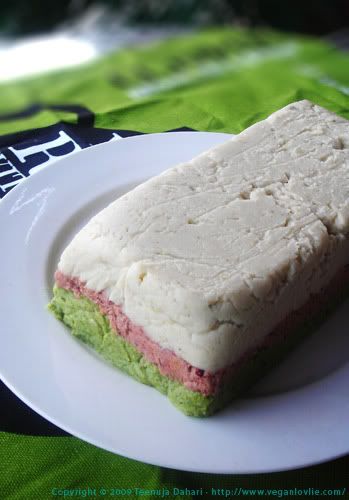
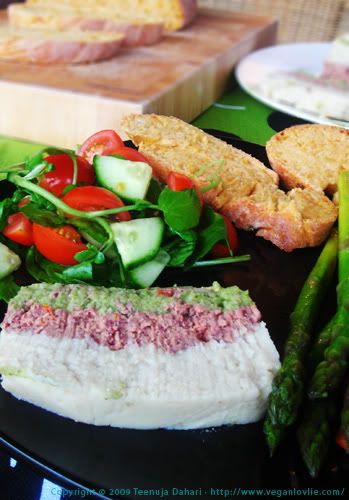
I chose to make the Tricolor Bean Pâté and it turned out tastier than I thought it would be. All three layers combined give a delicious taste. And eaten as a spread on the warm Sweet Potato Bread, it was just perfect for this moist evening.
I can't believe how easy and quick it was to whip this pâté together. I already had boiled butter beans, red kidney beans and cannelli beans. I usually regularly boil a big batch of beans, divide them into small portions and freeze them in freezer bags. This makes preparing meals that call for them so much quicker.
The pâté took me a little over half an hour to do. The bread was a very easy one but it does require about one and a half hours to rise. So, if you are making both on the same day, you may want to start with the bread first and leave it to rise while you make the pâté.

Easy Sweet Potato Bread
Ingredients
2 1/2 cups (275g) strong white flour
1 rather big sweet potato (350g)
1 sachet (7g) yeast
100ml warm water
1 teaspoon sugar
5 tablespoons rice milk (soy milk is fine too)
2 tablespoons coconut oil (melt first, if hardened, then take 2 tablespoons of the liquid oil. Vegetable oil should also be fine)
1/2 teaspoon salt

  • Place sweet potato with the skin on in the microwave and cook for 5 minutes or until soft. Prick with a fork to test. (You may also boil the sweet potato).
  • Peel and discard the skin. Mash the sweet potato to a fine puree. Set aside to cool.
  • Place yeast and sugar in warm water. Stir to dissolve and let stand for 10 minutes.
  • Meanwhile, add oil and milk to flour.
  • Add sweet potato then the yeast mixture.
  • Mix with the hand until well combined. Then knead for 8 - 10 minutes. You may want to add a little more flour if too sticky or 1 - 2 tablespoons more milk if too dry. (This also depends on the moisture content of the sweet potato.)
  • Oil a large bowl and place in the dough. Cover with cling film and leave to rise for 1 and a half hours in a warm place.
  • The dough should double in size.
  • Preheat oven to 170 degrees Celsius.
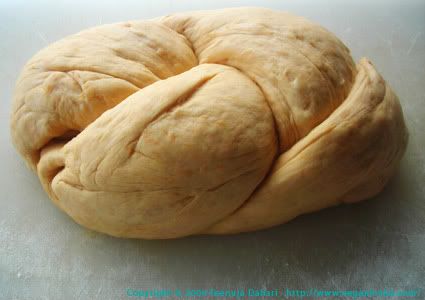
  • Divide dough into 3 equal parts. Take one part and roll into a log. How long or thick you roll it will depend on the size or length of bread you want. I made mine rather short and fat, a bit like a country style bread. So, I leave this up to you. Repeat with the other 2 pieces.
  • Join the 3 pieces at the top and start braiding. Press to secure them at the end, then reshape to nice rounded smooth ends.

Sweet Potato Bread

  • Place on a baking tray and bake for 1 hour (rotate bread 180 degrees on itself halfway through for even baking).
  • Remove from oven and allow to cool a little before slicing.

Sweet Potato Bread

Sweet Potato Bread

Tricolor Bean Pâté
Ingredients (for 1 loaf pan)
White Layer
3 cups (450g) boiled butter beans, well drained
3 - 4 pieces pickled/oil-preserved artichoke hearts
1/2 teaspoon asafoetida (optional, you may also use some dried herb seasoning)
1 tablespoon vegan cheese powder (or vegan parmesan or nutritional yeast)
1/2 teaspoon salt (or to taste)

Pink/Reddish Layer
2 cups (300g) red kidney beans
4 sundried tomato halves (I used the ones preserved in oil. If you are using dried ones, rehydrate them by soaking for a few minutes in some warm water first)1/4 teaspoon asafoetida (optional, you may also use some dried herb seasoning)
1 tablespoon vegan cheese powder (or vegan parmesan or nutritional yeast)
1/4 teaspoon salt

Green Layer
1 1/2 cups (250g) broccoli florets, boiled1 tablespoon vegan cheese powder (or vegan parmesan or nutritional yeast)
1/2 cup (120g) boiled canneli beans1/4 teaspoon salt

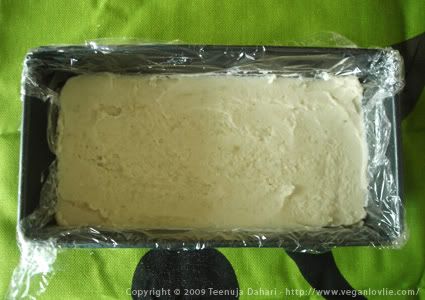
  • Start with the white layer, place all ingredients in a food processor or blender. I used a hand blender. Process to a thick puree.
  • Line a loaf pan with cling film; this is for easy demolding. Pour the puree and spread with a spoon to a smooth surface.
bean,pate,butter bean,daring cooks,daring kitchen
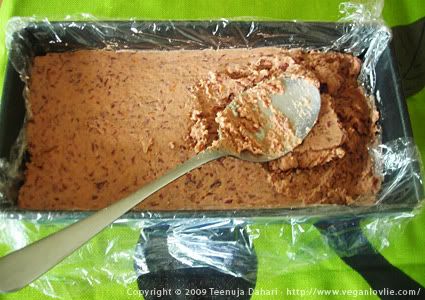
  • Repeat with reddish layer.
bean,pate,butter bean,daring cooks,daring kitchen,red kidney bean,canneli bean,sweet potato
  • Then green layer. Because I was using a hand blender, I cut the boiled broccoli as small as possible before blending them.
  • Place the loaf pan in the fridge for 4 - 5 hours.
  • Freeze for 30 minutes before demolding, slicing and serving.
bean,pate,butter bean,daring cooks,daring kitchen,red kidney bean,canneli bean

I served this pâté with sweet potato bread, salad, some asparagus and carrots both tossed for a few minutes with some margarine in the a medium hot pan.
Both the pâté and the bread is something I will definitely be making again - a request from the boyfriend!

bean,pate,butter bean,daring cooks,daring kitchen,red kidney bean,canneli bean,sweet potato

Sunday, 14 February 2010

February 2010 Daring Cooks Challenge: Mezze

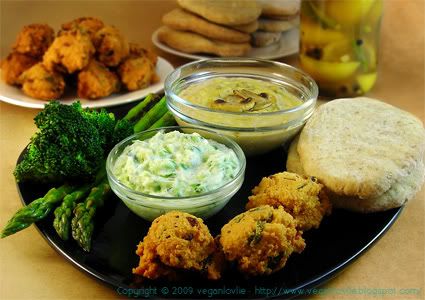
mezze,dhal chili cake,cucumber raita,canneli humous,preserved lemons,pita bread

This is going to be a very long post! But this was a great challenge though!

The Daring Kitchen

The 2010 February Daring Cooks’ Challenge was hosted by Michele of Veggie Num Nums. Michele chose to challenge everyone to make mezze based on various recipes from Claudia Roden, Jeffrey Alford and Naomi Dugid.
Pita Bread – Recipe adapted from Flatbreads & Flavors by Jeffrey Alford and Naomi Duguid
Hummus – Recipe adapted from The New Book of Middle Eastern Food by Claudia Roden
Cucumber Raita – Recipe adapted from The Indian Grocery Store Demystified by Linda Bladholm
Falafels - Recipe from Joan Nathan and Epicurious.com
Preserved Lemons – Recipe from Paula Wolfert and Epicurious

*Mezze is a Middle Eastern way of serving a selection of small dishes or appetizers all at once.

The pita bread and hummus were mandatory and the rest were up to your creativity and imagination.

My mezze was a vegan one and consisted of:
  1. Half wholewheat and half white flour pita
  2. Vegan cucumber raita (with basil and coconut milk)
  3. Mushroom and sweetcorn cannelli bean humous
  4. Dhal-chili cake
  5. Preserved lemons with green chilies and whole black pepper (these were not pickled enough to be eaten on the day, but now they are delicious!)
  6. Sauteed broccoli and asparagus

Much to my surprise this challenge didn't really take much of my time! Just the usual time I take to make dinner (well, except for the waiting time of the pita bread to rise...). I actually took more time to write this post and the recipes!


Pita Bread
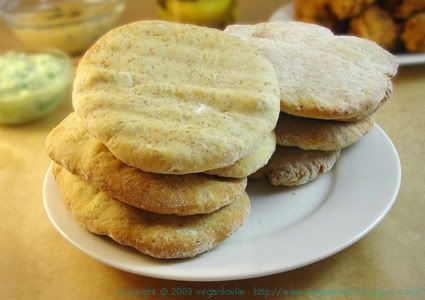
pita bread

For the pita bread, I pretty much used the recipe provided in the challenge which is adapted from Flatbreads & Flavors by Jeffrey Alford and Naomi Duguid
I did not follow the exact measurements of water and flour as these need to be adjusted anyway while making the dough. I also omitted the olive oil in the recipe (because I forgot to add it in!) and it didn’t make a difference.

Ingredients (about 16 pita breads, depending on size)

2 teaspoons regular dry yeast (.43 ounces/12.1 grams)
2.5 cups lukewarm water (21 ounces/591 grams)
5-6 cups flour (50% whole wheat and 50% strong white flour) (17.5 -21 ounces/497-596 grams)
1 tablespoon table salt (.50 ounces/15 grams)
2 tablespoons olive oil (optional)

  • In a large bread bowl, sprinkle the yeast over the warm water. Stir to dissolve. Stir in 3 cups flour, a cup at a time, and then stir continuously for about 1 minute, in the same direction to activate the gluten. Let this sponge rest for at least 10 minutes, or as long as 2 hours. (I left mine for more than an hour).
  • Sprinkle the salt over the sponge and stir in the olive oil at this point (if adding). Mix well. Add more flour, a cup at a time, until the dough is too stiff to stir. Turn it out onto a lightly floured surface and knead for 8 to 10 minutes, until smooth and elastic. Rinse out the bowl, dry, and lightly oil. Return the dough to the bowl and cover with plastic wrap. Let rise until at least doubled in size, approximately 1 1/2 hours.
  • Place a two small baking sheets (I used a pizza tray), on the bottom rack of your oven, leaving a 1-inch gap all around between the sheets and the oven walls to allow heat to circulate. Preheat the oven to 230 degrees Celsius (450F).
  • Gently punch down the dough. Divide the dough in half, and then set half aside, covered, while you work with the rest. Divide the other half into 8 equal pieces and flatten each piece with lightly floured hands. Roll out each piece to a circle 8 to 9 inches in diameter and less than 1/4 inch thick. Keep the rolled-out breads covered until ready to bake, but do not stack.
  • Place 2 breads, or more if your oven is large enough, on the tray or baking sheets, and bake for 2 to 3 minutes, or until each bread has gone into a full balloon (I left my pitas to bake for more than 5 minutes though, because I didn’t think they were ready yet). If for some reason your bread doesn't puff up (some didn’t in my case), don't worry it will still taste delicious.
  • Wrap the baked breads together in a large kitchen towel to keep them warm and soft while you bake the remaining rolled-out breads. Then repeat with the rest of the dough.


Mushroom and Sweetcorn Canelli (or white) Bean Humous (or dip)
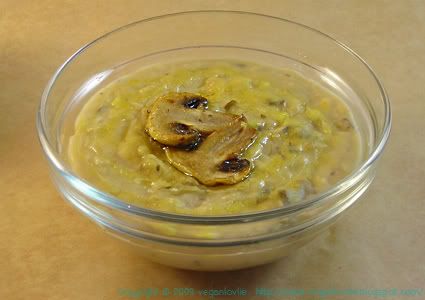

canneli humous

Mushrooms and sweetcorn were sauteed then mixed with the cannelli bean pate. This was a nice change to traditional chickpea humous.

These are not exact measurements. I didn’t weigh the ingredients but just used the cup.

Ingredients

1 cup canelli beans (boiled to almost a mush)
1 tablespoon olive oil
1 tablespoon vegan margarine
½ teaspoon cayenne pepper
Salt and pepper to taste
1 cup chopped mushrooms
2 tablespoons frozen (or canned) sweetcorn
75 ml water (more or less)

  • Heat the margarine on medium. Add in the mushrooms and sweet corn. Sautee for a few minutes.
  • Place the rest of the ingredients in a blender. Blend to a smooth paste.
  • Add more water if necessary to desired consistency.
  • Add in mushrooms and sweetcorn. Serve warm or cold.


Vegan Cucumber Raita
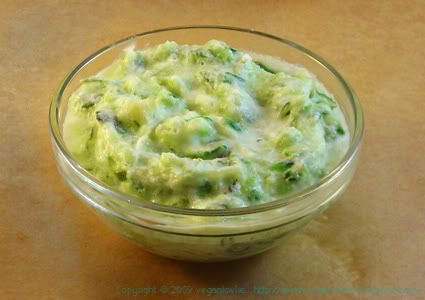

cucumber raita

Raita couldn’t be easier to make! Traditional raita is made with yogurt. It is so easy to veganise this with coconut milk. I didn’t use any garlic in the raita but you can add some finely chopped garlic or garlic powder to yours if you like.

Ingredients

1 whole green cucumber (I didn’t peel it or remove the seeds because they were very tender, but you can do so if you prefer)
Few leaves basil, finely chopped
5 tablespoons coconut cream (if using coconut milk, you may want to increase the amount and remove more juice from the cucumber)
¼ teaspoon salt (or to taste)
A few dash ground black pepper

  • Grate the cucumber. Squeeze out some of the juice from the cucumber. (You can save the juice for drinking or use it in your green smoothies! But don’t keep it for too long before consuming.)
  • Add in the rest of the ingredients. Keep chilled until ready to serve.


Dhal-chili Cake


dhal chili cake

This is a regular Mauritian favourite at Lovlie’s Cocoon! I’ve posted some recipes about these before (here in a soup and another version here). I usually customize these cakes slightly with whatever I have on hand when I’m doing them.

This time I used fresh basil as herb. And wow! What flavour combo! I think the best dhal-chili cake I’ve made so far.

Ingredients (approximately 25 cakes)

1½ cups (250g) channa dhal (yellow split is also fine) soaked for at least 8 hours (preferably overnight)
1 small onion, finely chopped
10 - 12 basil leaves (or 2-3 stems with the leaves), finely chopped
¼ teaspoon aniseed
5 green chilies chopped (adjust quantity to your taste)
Salt to taste
Vegetable oil for frying

  • Drain dhal completely. Grind the dhal to a paste in a food processor or blender to a combination of fine and not so fine consistency. (There must be enough fines to bind the chili cake together).
  • Add the rest of the ingredients – onion, basil, chilies and salt.
  • Mix well. This is best mixed by hand.
  • Preheat oil on medium heat.
  • Drop the dough in small loose balls in the hot oil. (Do not compress the dough balls too much otherwise the centre will remain uncooked).
  • Turn occasionally until golden brown. Adjust heat if necessary to ensure thorough cooking.
  • Remove and allow to drain on kitchen absorbent paper to absorb the extra oil.


Preserved Lemons
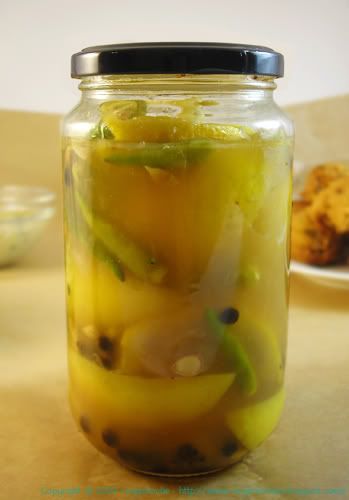
preserved lemons

They remind me of my Mum who used to make huge jars of preserved lemons that we would use in salads, chutneys or just accompaniment.

The challenge recommended Meyer lemons. “To most closely approximate the flavour of Moroccan lemons, Wolfert recommends Meyer lemons for this recipe. This lemon/mandarin orange hybrid, in season in January and February, has yellow-orange flesh, a smooth rind, and a sweeter flavour than other lemons.”

I couldn’t find those so I just used organic unwaxed lemons.

Ingredients

5 lemons
¼ cup salt (2 ounces/60 grams)
1 teaspoon whole peppercorns
10 whole green chilies
Freshly squeezed lemon juice to taste, only if needed
Rice vinegar, (optional) if required

Special Equipment: 1 pint Mason Jar – Sterilized. I just sterilized an empty jam jar.

  • Quarter the lemons, sprinkle salt on the exposed flesh.
  • Place 1 tablespoon salt on the bottom of the jar. Pack in the lemons and push them down, adding more salt, and the peppercorns and chilies between layers. Press the lemons down to release their juices and to make room for the remaining lemons. (If the juice released from the squashed fruit does not cover them, add freshly squeezed lemon juice or I added some rice vinegar — not chemically produced lemon juice and not water.)
  • Leave some air space before sealing the jar.
  • Let the lemons ripen in a warm place, shaking the jar each day to distribute the salt and juice. Let ripen for 30 days.
  • To use, rinse the lemons, as needed, under running water, removing and discarding the pulp, if desired — and there is no need to refrigerate after opening. Preserved lemons will keep up to a year, and the pickling juice can be used two or three times over the course of a year.
I hope you've enjoyed reading about these recipes just as much as I've enjoyed making them!

Tuesday, 19 August 2008

Muffins, pancakes and chutney!

Photobucket

We had a long weekend over here this weekend with Friday being a public holiday. The thing with long weekends is that I take 2 days to get back on track afterwards! I spent most of my Friday baking and cooking, of course! Then on Saturday, I went to the cinema to watch Narnia - Prince Caspian. I love going to the cinema! And the movie was good. I loved the first Narnia and the second is worth watching as well.

Now, let’s go back to the goodies I baked and cooked on Friday.
Thank you for all your suggestions about the apples, they were really great! I made
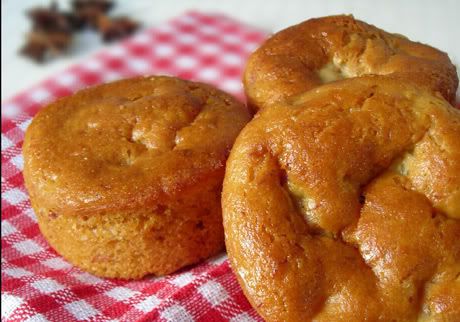
fat-free apple and banana muffins, pancakes, apple and carrot chutney and apple sauce (that I used in the muffins).
I searched the internet for recipes and then just cooked out of my head (like I always do!) except for the apple and banana muffins. I just followed the recipe pretty much as it was.


I’ll start with the fat-free apple and banana muffins.
It’s the first time I tried fat-free muffins and they were nicer than what I expected they would be! They were spongy and moist.

The only change I made to the muffins was that I added some almond pulp to the dough. Almond pulp is the left over that I keep from making almond milk at home. I usually keep the pulp as I think they still contain quite some nutrients and fiber and I don’t like wasting them away. I also used only one banana as I only had one left. And as I was using only one banana, I decided to use apple sauce instead of juice. I made the apple sauce by pureeing some of the pre-cooked apples with a little water in a blender.

_______________________

Photobucket

The pancakes.
I did not look for any particular recipe for the pancakes. I just used my own basic vegan pancake recipe to which I added the pre-cooked apples. One thing that I should have added to the batter and I only realised this afterward, is some coconut milk powder. It makes a softer pancake.

If you want the recipe, here it goes:

Ingredients (5 pancakes)

1 cup all-purpose flour
1 teaspoon baking powder
2 tablespoons brown sugar (or any that you prefer)
1/2 cup water
2 tablespoons coconut milk powder
1 cup pre-cooked apples
  • Mix all the ingredients in a bowl using a whisk or fork or in a blender except for the apples.
  • Stir in the apples.
  • (I don't use any oil for frying the pancakes. I use a non-stick pancake/frying pan.)
  • Scoop mixture using a large round spoon. Shape the batter on the pan toobtain a nice round pancake.
  • Cook for about 30 seconds to 1 minute or until bubbles start to form and the bottom is stiff enough to turn over without risk of tearing.
  • Cook until other side is done.
  • Remove and stack them on top of one another to keep them soft.

For myself I made twice the amount in the recipe and ate 3 while I was cooking them! I shared the rest of course!
_______________________

Photobucket

And finally the Apple and Carrot Chutney.
I went through several recipes online and I did not quite have all ingredients that they were calling for. So I just made up my own recipe and hoped for the best! And it was nice! The proof is half of it is already gone since Friday. That’s nearly 2 cups of chutney!


Ingredients (for about 3 standard jam pots of 340g each)

2 cups pre-cooked apples (or about 3 cups of raw peeled and chopped apples)
1 medium grated carrot
1 onion, finely chopped*
2 cups brown sugar
½ teaspoon cinnamon
5-6 cloves
2 star aniseeds
2 teaspoons whole mustard seeds
1 cup spirit vinegar (it’s the only one I had. Other recipes have called for rice vinegar, pure cane vinegar or malt vinegar)
½ cup raisins (mixture of golden and black raisins)
1-2 dried chilies to taste (I used green chilies as I did not have any dried ones. I think dried chilies will allow the chutney to preserve for longer)

*Ooops! I just realised I also had 1 onion in the chutney.
  • Mix everything in a sauce pan and cook on low heat for at least 2 hours or until liquid has reduced.
  • Let cool and store in jars.
  • Refrigerate to keep for longer.

This apple chutney tasted very much like the sweet and sour sauces I usually add to stir fries. Next time I make a stir fry I’m going to add some of this chutney instead! That sounds good! Yum!

Thursday, 29 May 2008

Coconut Chutney (Date and Sesame version)

Photobucket

Here’s another coconut chutney version. Coconut chutney is really very much like hummus in terms of how you flavour it. Add whatever ingredients you like, whip it all together and you have a nice accompaniment for snacks.

I do make coconut chutneys quite often. And if you haven’t had any coconut chutney yet, you should try it. It’s good healthy raw food which is also very tasty!

This one is a slightly sweeter version.


Ingredients

½ fresh coconut meat, finely sliced
½ tablespoon of tamarind pulp (separate the seeds by mixing with a little water)
4-5 stems fresh mint chopped
4-5 large dates (or more if you like!)
1 tablespoon sesame seeds
¼ teaspoon salt
2-3 green/red chillies (optional)
Juice from ½ lime (optional)
40 ml water

  • Place all the ingredients in a blender and grind to a smooth consistency.
  • Add more water as needed to make a thick paste.

Have this with poppadums; they’re great!

Friday, 2 May 2008

Okra Bhajis

Photobucket

May Day yesterday, but the stomach doesn’t take a holiday (unless you’re fasting or detoxing)!

On every public holiday, when everyone is at home, we like something to nibble on in the afternoon. There was some okra in the fridge that needed to be used. They had already been there for longer than enough!

I remember I had okra tempura batter croquettes once at a party I was invited to and they were quite nice. So I made some okra bhajis using gram flour (or chickpea flour) which could be a nice alternative to the famous UK Onion Bhajis.

These are a wonderful starter or just a little snack, so easy to make and also gluten-free.


Ingredients (10-12 bhajis)

10-12 small okras (leave them whole, leave the top parts on)
Water for boiling

Batter:
200g chickpea flour (gram flour)
125 ml water (adjust as required)
1 onion finely chopped
Spring onions (5-6 stalks depending on the variety, adjust to taste) finely chopped
1 teaspoon baking soda
Salt to taste

Oil as needed for deep frying

Dipping Sauce:
1 teaspoon soy sauce
½ teaspoon plum sauce (or sweet and sour sauce)
1 teaspoon vinegar
1 teaspoon sugar (optional)
Pinch salt
4-5 tablespoon water

  • Allow water to reach boiling point in a pan. Then put okras in.
  • Boil okras for 3 minutes until half cooked. Don’t allow them to turn soggy (watch them if you have very tender okras, they might need less time).
  • Remove from water, set aside.
  • Mix all batter ingredients together in a large bowl. I’ve put the amount of water to be 125 ml, adjust quantity to obtain a quite thick consistency.
  • Note: the amount of water required to make a thick batter will depend on the amount of the other ingredients you are adding as well.
  • Heat oil in a deep pan on medium.
  • Dip okras one by one in batter. Using a tablespoon, coat 1 okra at a time with batter. Spoon out the okra and drop in hot oil.
  • Fry a few at a time (how many fit in the pan without them sticking to each other.)
  • When golden, remove from oil.
  • Place on absorbent paper to remove excess oil.
  • For the dipping sauce, combine all ingredients together.


Serve hot.

Photobucket

Tuesday, 29 April 2008

Coconut Chutney with Tamarind

Photobucket

I’ve previously posted a Coconut Chutney recipe with the Vegetables in Coconut Milk recipe. There are quite a few versions of the Coconut Chutney that I know of and the previous one I posted was with green apple. I’ve made this one with tamarind puree which is the most common version of the Coconut Chutney.

What’s nice about Coconut Chutney is that it keeps for 2-3 days in the fridge and can be eaten as an accompaniment with several dishes. It can also be used as a dipping sauce with snacks or even as a spread on savoury crepes.

Some tamarind paste comes with the seeds. It's easy to separate the seeds by adding a little water to the paste and mixing with hands. The seeds will loosen and come out.


Ingredients

½ fresh coconut meat, finely sliced
1 tablespoon of tamarind paste
4-5 stems fresh mint chopped
1 tablespoon demerara sugar
¼ teaspoon salt
2 green chillies (optional)
40 ml water

  • Place all the ingredients in a blender and grind to a smooth consistency.
  • Add more water if required.

Monday, 28 April 2008

Butter Beans in Tomato Sauce

Photobucket


I really like the rich creamy taste of butter beans. And as all beans, they can be made in a number of recipes. For tonight’s dinner, they were perfect in tomato sauce with some spring onions, accompanied by some Mashed Aubergine with Potatoes and a Watercress Soup. I also had this with some Coconut Chutney and a little rice. But I could have done without the rice. Here’s the recipe for the Butter Beans in Tomato Sauce. The rest is coming up soon, the time it takes to type everything up! (Sometimes cooking is much quicker than writing a post, I reckon!)


Photobucket


Ingredients (4 servings)

1 can butter beans (drained)
½ can tomato puree (or chopped)
1 red onion sliced
4-5 stems spring onions finely chopped
2 garlic cloves finely chopped
½ cup of frozen peas (or as many as you like)
1 tablespoon vegetable oil
Salt to taste

  • Place oil in a deep pan. Add onions and garlic.
  • Cook until onions are semi-translucent.
  • Add tomato puree and peas. (If you are using canned peas, then add them at the end).
  • Allow to reduce for 10 minutes
  • Add butter beans.
  • Add spring onions
  • Cook for 5 minutes.
  • Add salt.

Photobucket

Sunday, 20 April 2008

Mum’s Exotic Pomme (Fruit) Citère (Cythère) Chutney

Photobucket

I have tried to find an English translation for this local fruit that we get over here in Mauritius but I haven’t been able to find anything. Apparently the Pomme Citère is from Indo-Malaysian origin. It is about the size of a passion fruit with a whitish flesh turning more yellowy when ripe. It has a lovely fragrance. The only annoying thing is the fibrous centre. The Pomme Citère is more commonly made into pickles.

My mum tried this chutney the other day and we all fell in love with it!

If you can’t find any Pomme Citère, then semi-ripe mangoes can also be used although the taste won’t be quite the same.

The first time Mum made this, she used green Pommes Citère. Then she tried ripe ones and I much prefer chutney made with the ripe ones; it has a nicer fragrance and is much tastier.

Ingredients

2 green/semi-ripe Pommes Citère
1 green apple
1 garlic clove
2-3 green chilies
¼ teaspoon salt
1 teaspoon unrefined sugar
5-6 tablespoons (or more) water for blending

  • Peel the Pommes Citère. Remove the flesh by cutting small pieces away until you reach the fibrous centre part.

Photobucket

  • Cut the apple into small pieces. (Do not peel).
  • Place all ingredients in a blender and grind until a smooth paste is obtained.

Photobucket

This can be used as a dipping sauce with your favourite snacks, accompaniment with a main dish or even spread on sandwiches/bread.

Share This Post

Share This Post

Related Posts Plugin for WordPress, Blogger...