Join the Veganlovlie Cocoon!
Receive an occasional burst of sunshine and a little flower, recipes, craft projects and FREE resources.
Showing posts with label Crafts. Show all posts

Monday, 1 September 2014

Hurray for Vegan Watercolor Paint!


The movement of watercolour pigments gliding freely with the water on paper has always captured my fascination of this painting style. Such effortlessness but yet a challenge to produce a believable 2D scenery from several translucent layers — typical of this "loose" style. I realise that really there is no ordinary moment. What seems to be a random flow from a dab of paint actually produces much better results than my controlled brush stroke could ever do.

Am I attracted by the watercolour painting style because of its somewhat "unfinished" aspect that reflects a fact of nature? I could literally lose myself for hours observing the imperfection of nature then translate it into watercolors.

When the guys at Colors of Nature offered to send me a sample card of their colour palette for a review, I was not only more than eager to try their paints but thrilled to hear that they were completely vegan! I had not yet come across an earth-friendly, petroleum-free, cruelty-free paint brand before. So, with much excitement, I awaited the sample colour card to arrive.

I have been painting, like most children, since childhood. But I have kept painting all the way into secondary school. During my final school years, I specialised in watercolour style because, as advised by my art teacher back then, it is a much quicker style once you master the technique. Back in the days, we were mostly working towards being able to finish the art examination in time. So, watercolour proved to be an efficient painting style with that regard. Charmed by the freshness of colors and translucent layering, I soon developed a deep connection toward this style and pretty much clung to it as my favourite even after school. For one thing, it involves much less chemicals compared to oil paints for example; the thinners can be quite sickening after spending several hours around them. But also, watercolors are quite economical; a little paint goes a long way. I now paint for a hobby whenever time permits.

The Colors of Nature palette is quite small with 13 hues, two kinds (light and dark versions) of each: Ochre, Burnt Umber, Raw Sienna and Raw Umber and then Ultramarine Blue, Chromium Green, Natural Red, Burnt Sienna and Titanium White.


I used cold pressed acid-free watercolour paper to try out the paints. Despite the limited palette and the challenge that this presented, the results were absolutely stunning. In contrast with other watercolour paints I have previously used, this brand does not lighten upon drying which is one common aspect of watercolor. This one pretty much keeps the same tone reducing the need for over layering where colors may tend to turn muddy and opaque. I loved the fresher feel and how the paint reacted with the paper. I used all the colours except the Burnt Sienna and Titanium White. I don't usually use white with watercolour except for corrections, so I did not have any use for the white in this painting.

Here's a short video I made while I was trying the paints. I am really looking forward to placing an order for more paints from Colors of Nature and I gladly recommend them. I can now paint with the peace of mind of a 100% vegan environmentally friendly set of colors. The folks at Colors of Nature said they were working on a range of oil paints and extending their palette with more blues, a red, some violets and a bright yellow; I will await these with much anticipation.


By the way, after being pecked at a few times by Boyfriendlovlie, I have decided to put this painting on Society6 if you wanted to get a print (or mobile cover) of it for yourself.

Use this link to get 10% off your purchase at Colors of Nature. They have got a range of kid's paint that is safe for children too!

Thursday, 1 May 2014

Throw in some Crochet for Sheer Joy


Carried away into this gentle sea of loops, crocheting has now become more than a hobby — it's my meditation. If patience comes to your mind upon seeing any work of crochet (or knit) then I think naught but the sheer joy I derive from every loop made. Isn't it amazing how a single strand can be transformed into pretty much any shape you can think of? Time, on the other hand, is definitely a required factor. Back in November last year, I bravely started on this throw — my largest crochet project to date — after getting a bargain mega big ball of blue yarn for $6 at Giant Tigre. Had I worked on this throw more steadily, I'd probably have finished it by mid-winter with enough of the season left to be wrapped in its warmth. But my flirtatious nature with my various hobby interests, leaves me with no desire of any kind to settle for one; consequently the throw only got completed a few days ago.

I used my own pattern throughout — a simple half double crochet and one chain. For the granny square border on the two ends, I followed this basic granny square pattern but started with the magic ring (instead of the chain) and used half-double crochet instead of treble crochet as indicated in the pattern.

Would I dare say I can't wait for winter, probably not. But I sure am going to enjoy the warmth of this throw with a good book and hot chocolate next winter.


Thursday, 17 April 2014

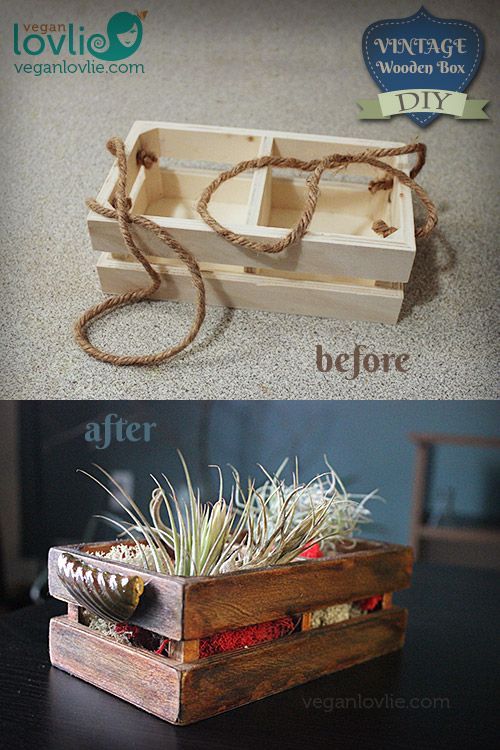
Coffee Stain You'll Love: DIY Vintage Wooden Box

DIY Vintage Wooden Box

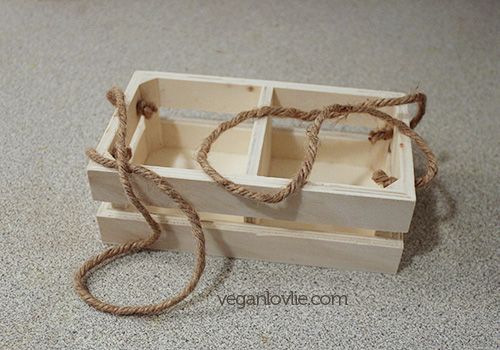
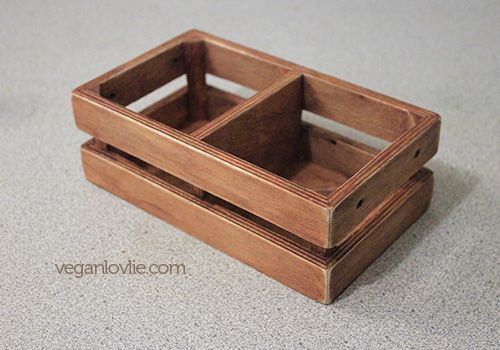
Lying in some corner of my ever growing pile of collected bits and bobs was this plain wooden box I picked up for a couple of dollars at Dollarama. You have got to love Dollarama not only for the cheapness but for the variety of stuffs you can find in there. Being the creative arty type, many a times have I found simple treasures in the craft aisle.

DIY Vintage Wooden Box

The box stayed for months without being used while I was making up my mind on a suitable project. The idea struck while doing some research on methods of dyeing wood; I found some tutorials on tea stain, coffee stain and adding nails or steel wood for a rustic effect. There are a lot of interesting experiments out there. Since we've only moved into our new appartment some five months ago, there are still ongoing DIYs, addition of fixtures, furnishings and decoration. Boyfriendlovlie and I have some furniture diy projects in mind. So, I wanted to experiment a little with wood stain before tackling the bigger projects.  And since I only paid $2 for this little box, I probably would feel that much of a heart pang if it turns out gross.

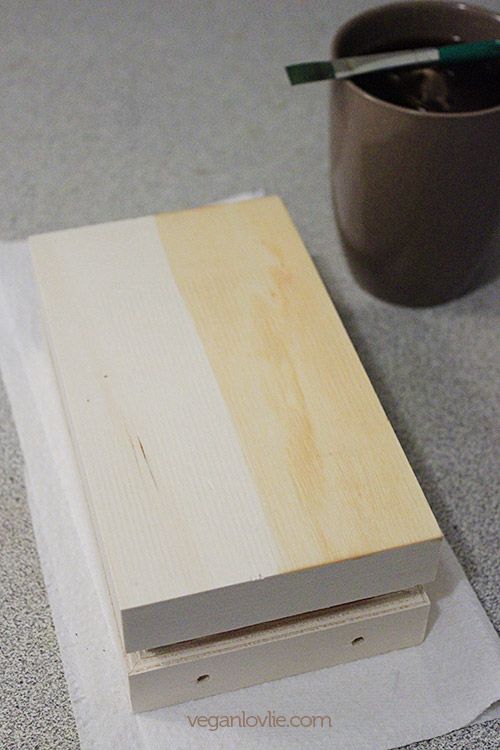
Tea stain was what I started with. This is a brew of extra strong tea: 6 black tea bags in half cup boiling water. This is the first layer applied using a small regular art paint brush.

DIY Vintage Wooden Box

I applied it everywhere and let dry for a whole day, then applied a second layer and let dry again in front of the radiator. After repeating the process for over 10 layers, the colour was nowhere near what I wanted. A rich dark desaturated tone was more what I was looking for.
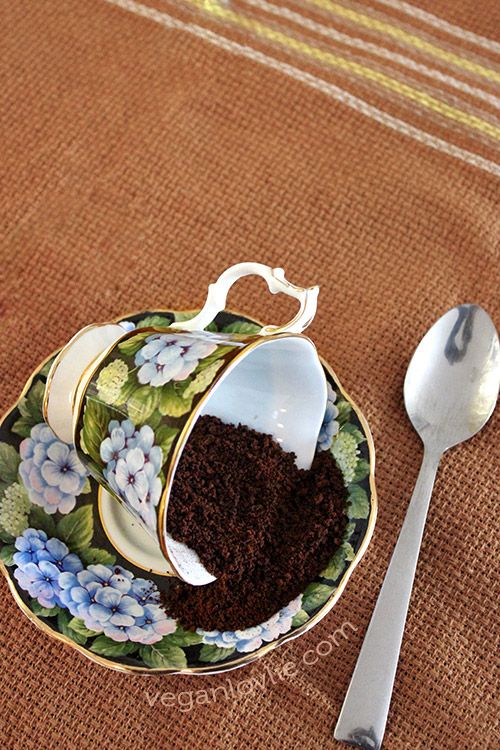
So, I switched to coffee stain instead. The brew is 5 - 6 tablespoons instant coffee granules dissolved in 1/3 cup boiling water.

DIY Vintage Wooden Box

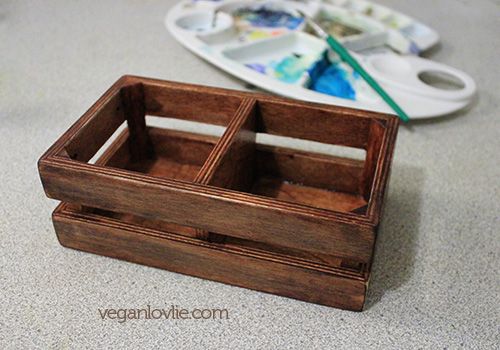
The intensity of the dye was really rich after the very first layer application.

DIY Vintage Wooden Box

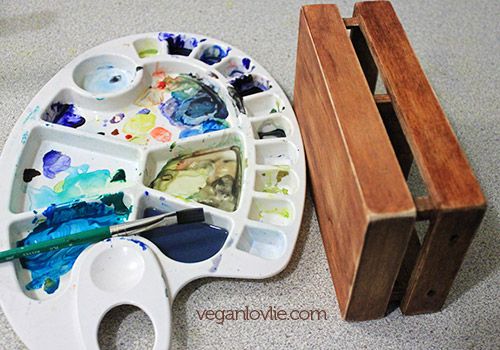
Nonetheless, I still wanted a desaturated feel. So, I took out the acrylic paint set and blended a greyish indigo hue. A watery application was getting closer to what I wanted with some thicker applications at certain areas to create more interest and a denser natural feel.

DIY Vintage Wooden Box

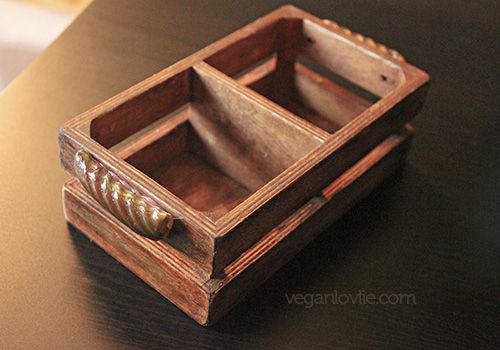
The result was pretty good and I was happy with the colour. It did have the vintage feel I was after. Did you notice that I sanded the corners a little? That gave it more of the used vintage aspect.

DIY Vintage Wooden Box

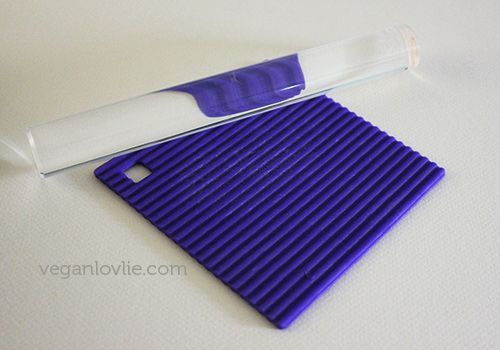
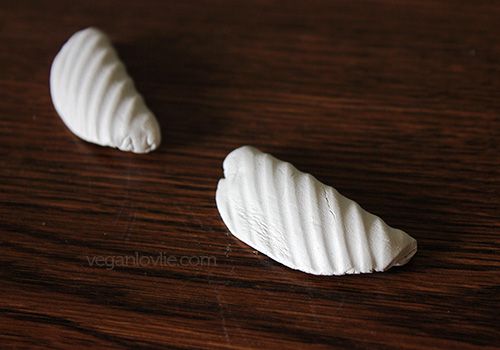
Now my box wouldn't be complete without some handles. After considering a few choices, I used what I had: air dry clay. I added some texture to the clay by rolling the dough on a silicon corrugated texture mat.

DIY Vintage Wooden Box

Next, I cut out 2 circles and rolled back one end towards the centre while curving it slightly like a crescent. This needs minimal handling otherwise the texture will start to fade.

DIY Vintage Wooden Box

After leaving them to completely dry, I painted them with acrylic paint in an ochre hue accentuated with tones of olive green and brown.
The handles were attached using a hot glue gun. I did a little bit of a poor job there because you can see some of the glue seeping out. Oh well! It's not like the "craft police" is going to come for inspection, so we're good!

DIY Vintage Wooden Box

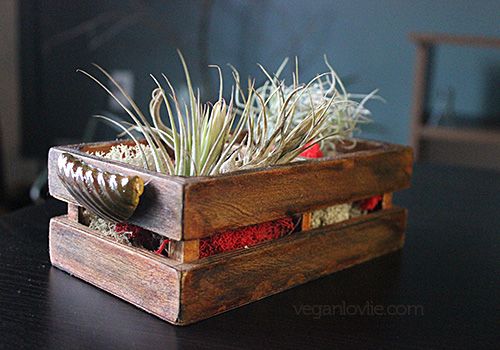
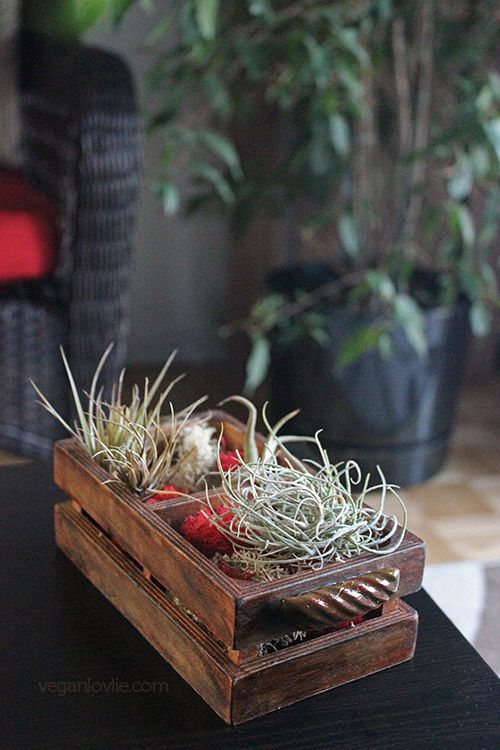
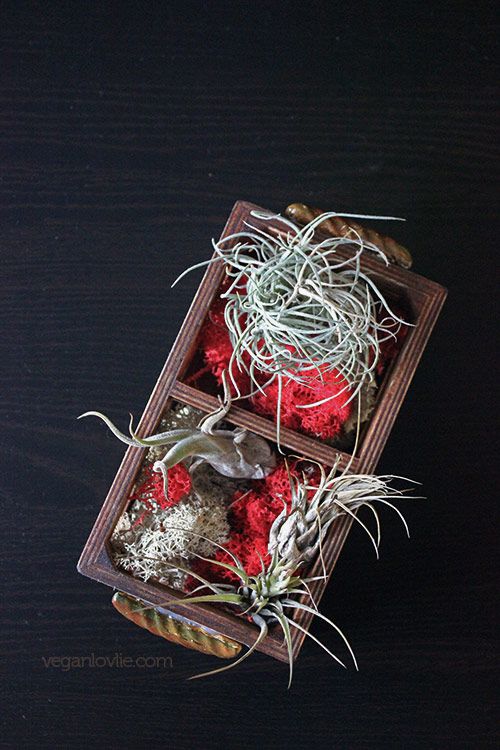
A good rub of olive oil gave the box a subtle sheen and would also protect the wood and colours; my vintage box was ready! You can use this box for anything or give it away as a gift. I decided to use it for my air plants.

DIY Vintage Wooden Box

I added some white and red dyed lichen for more texture and colour.

DIY Vintage Wooden Box

DIY Vintage Wooden Box

How do you like it? I find it pretty awesome that I didn't really have to buy anything new to make this box. Although I wonder how much coffee we'd need for larger projects. It might then be more cost effective to get some wood dyes if I can find a good one without the nasty smells and chemicals.

By the way, I have a newsletter brewing up soon. Subscribe by using the form right under the main menu above or here. You will receive more diy and craft stuffs like this, free recipes, resources and more, directly in your inbox. It's an occasional newsletter (since I do it in my spare time). So, I promise not to overflow your inbox.

You can also Follow Veganlovlie with Bloglovin.

Tuesday, 25 February 2014

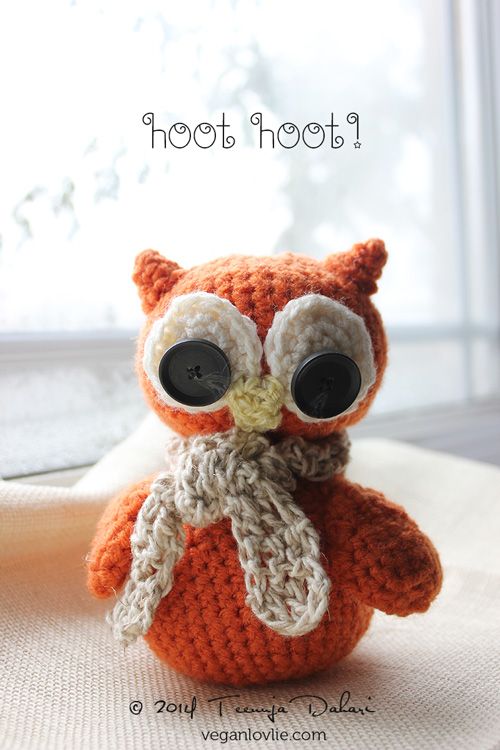
My new crochet project: Owl #amigurumi

owl amigurumi

Meet Baltazar. That is how Sisterlovlie has named her new little friend. As I am picking up on more crochet skills and working on bigger projects like throws, I thought tackling amigurumis would be the next step. And Sisterlovlie being so fond of owls, I couldn't help but make my first amigurumi project an owl just for her. To my surprise, making these little stuffed cuties aren't as daunting as they seem. Their cute-factor surely helps in getting the project progressing at amazing speed.
This cute owl one was made using this pattern from Little Muggles. Amy, the author of Little Muggles sure got a whole world of crochet cutie plush, books and tutorials.

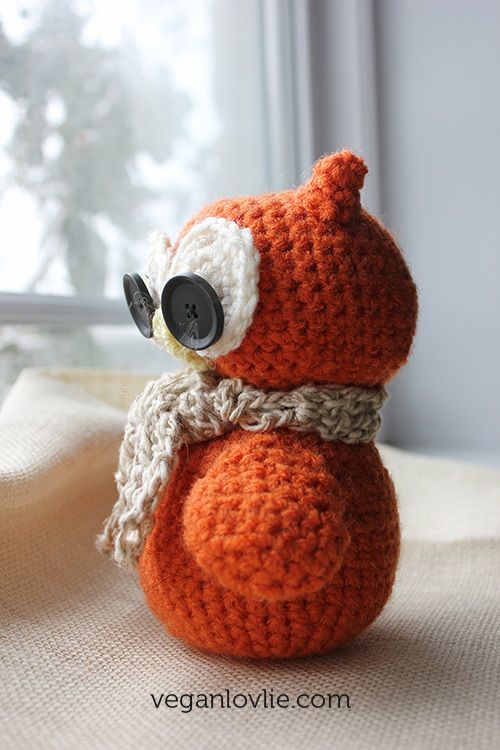
Just wanted to add a little note: I have used normal buttons that I've sewed on for the eyes. But if you are making these for children, make sure you use safety eyes which don't come off easily. That way the kids don't risk putting the buttons in their mouths and choke.

owl-amigurumi

Tuesday, 2 July 2013

The Peacock

peacock photo peacock_zpsb90344b8.jpg

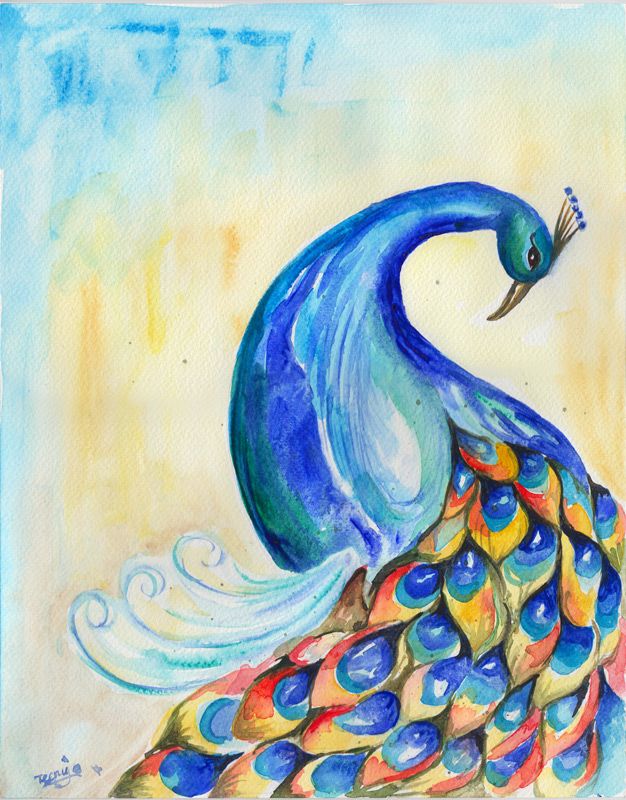
These days my creativity is really kicking in. I feel I could just sit and do all sorts of handmade crafts all day long. How I wish I could do just that sometimes but heck there's work to go to. But last night while chatting to Sisterlovlie on Skype, I started on this watercolor painting of a peacock. I've been wanting to paint a peacock in watercolor for quite a while now. But last night, I just took out the paint box and brushes and without much planning, I started layering water and paint onto paper. How good it felt!

Tuesday, 8 January 2013

Crochet Baskets Project


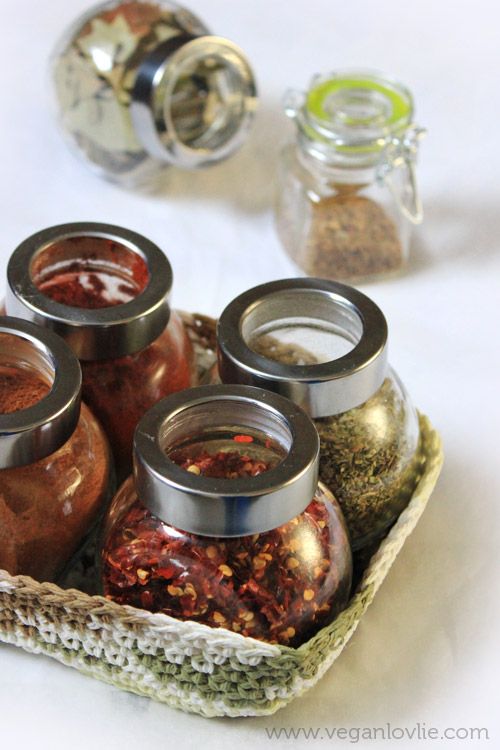
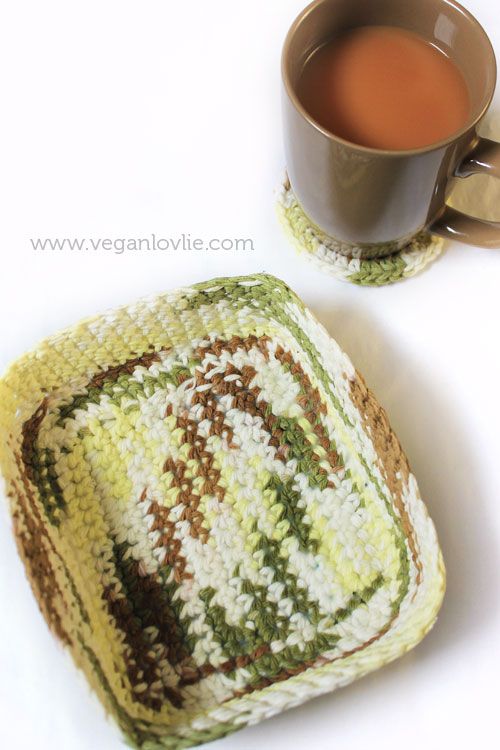
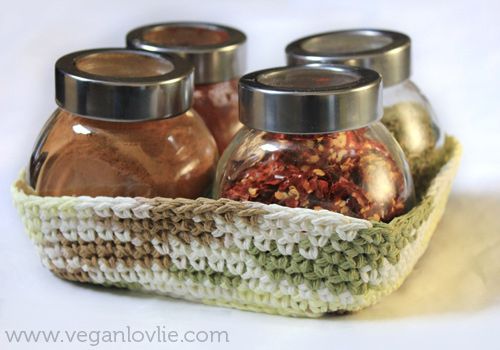
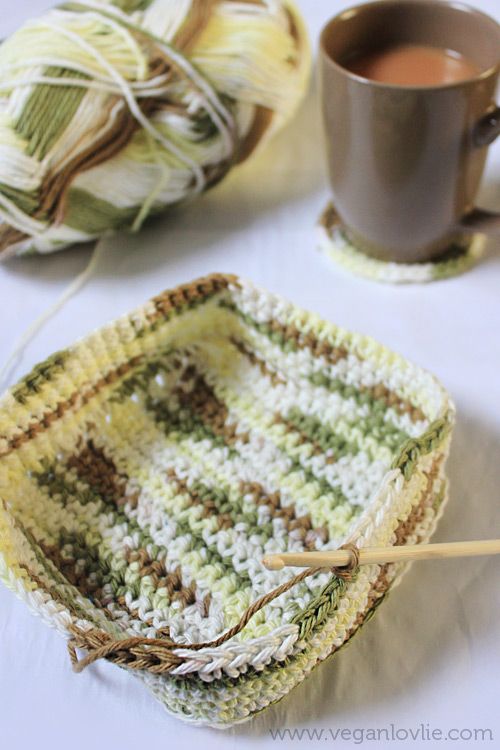
I'm getting more and more into the crochet gear these days, all curled up in bed with a cup of tea! Crochet is a really relaxing activity I find. My latest project are these square baskets which I'm going to use to organise my spices pots in the cupboard.


I've stiffened the basket with a cornstarch solution; it holds its shape better this way.


More on the way...
By the way, have a look at Zoom Yummy's awesome crochet creations and crafty ideas!


Saturday, 22 December 2012

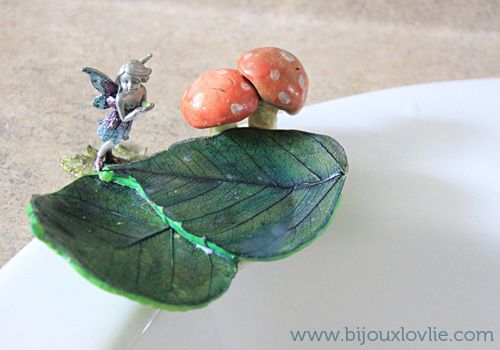
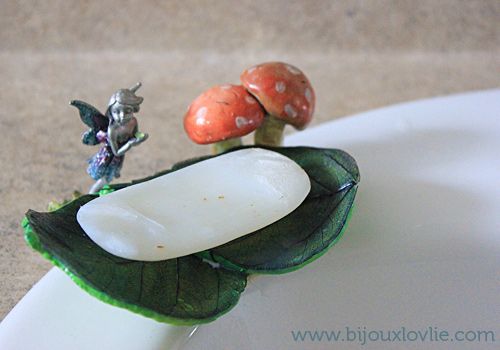
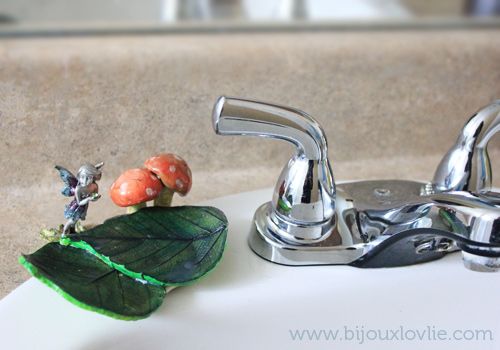
Handmade: Woodland Leaf and Mushroom Soap Dish

Woodland Leaf and Mushroom Soap Dish, Air Dry Clay

Where have I been? Ahhh! I've missed this blog and my Facebook page so much during these past two months. Well, there's been a lot happening for me and the biggest change is that I've moved country. It has been two incredibly busy months and I'm now in Canada! Yay!
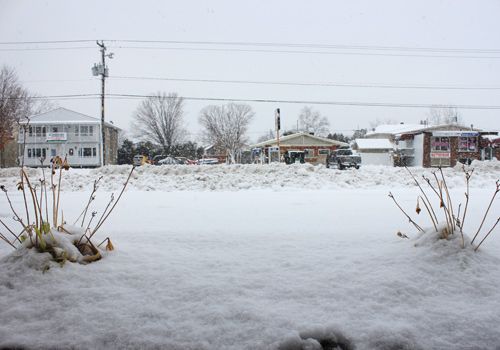
Boyfriendlovlie and I left Ireland last month and made it to Quebec in the beginning of November. It has been quite a change from Europe. But we really like it so far. We have already been blessed by 12 - 15 cm of snow! Here's what I can see from my window at the moment.

snow

So far, we are settling in okay. We have yet to see how our first winter in Canada goes through. We have been busy finding a place to live, initially, then finding some furniture and furnishings. Now things are smoothing out and I hope to be back posting more regularly.

Needless to say that I've already been around health shops and 'sniffing' around for vegan friendly places! Still getting used to some new ingredients and tastes. All in all, it is really quite fun to discover new things all over again.

With all the excitement of the move, I've been feeling really creative these days: crochet projects and crafty stuffs. And so, I went along and had a go at playing with air dry clay again. This time I though of trying something different to jewellery: a soap dish.

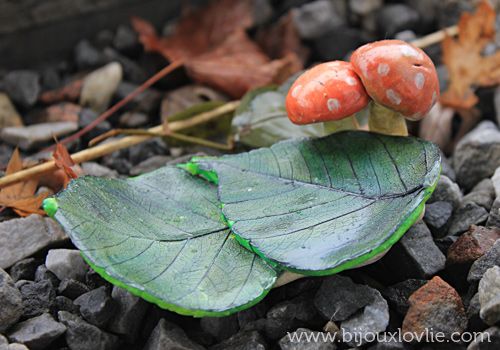
We needed a soap dish for the bathroom and a generic one from the stores wasn't quite appealing. A handmade one was much more inviting and I'm glad I made this soap dish as it added a lot more flair to the wash basin in the bathroom. The enchanted world has always attracted me; everything woodland will always catch my attention. So, I went with this Leaf and Mushroom theme.

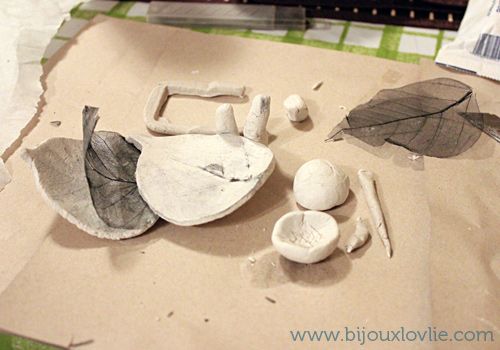
Here's a few working shots.

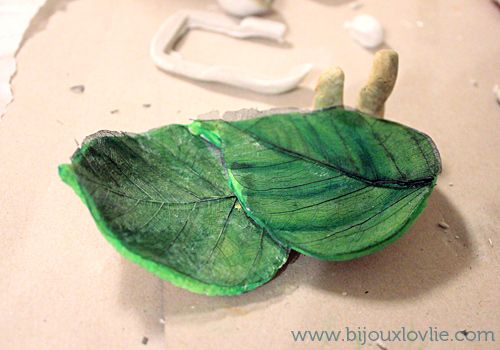
I started cutting out the shapes in clay and affixed a skeleton leaf to the bottom one. Also rolled out fat snakes for the mushroom stems that I tucked underneath the leaves.

Woodland Leaf and Mushroom Soap Dish, Air Dry Clay

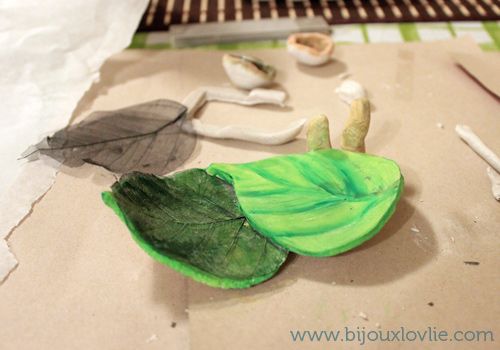
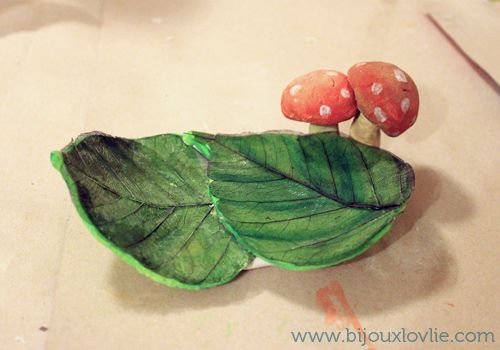
After drying (1 day later), I painted the leaves and mushroom with acrylic paint.

Woodland Leaf and Mushroom Soap Dish, Air Dry Clay

Then, I glued the skeleton leaves in place.

Woodland Leaf and Mushroom Soap Dish, Air Dry Clay

I glued the mushroom heads on the stems.

Woodland Leaf and Mushroom Soap Dish, Air Dry Clay

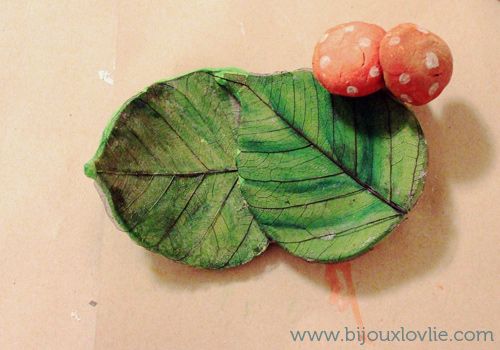
Here's a top view. All done and left to dry.

Woodland Leaf and Mushroom Soap Dish, Air Dry Clay

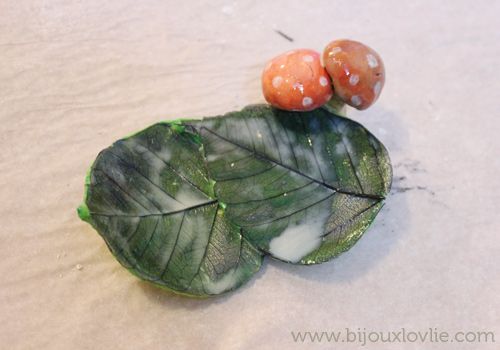
I then applied a 2-part resin mixture to make it waterproof. I left it to dry for 2 days, then applied resin onto the under side as well and left it to dry for another 2 days.

Woodland Leaf and Mushroom Soap Dish, Air Dry Clay

Boyfriendlovlie had to photograph this outside on the pebbles. I am pretty pleased with how it turned out.

Woodland Leaf and Mushroom Soap Dish, Air Dry Clay

Now the soap laid on this dish feels like fairy magic.

Woodland Leaf and Mushroom Soap Dish, Air Dry Clay

Woodland Leaf and Mushroom Soap Dish, Air Dry Clay

So, what do you think?
Stay tuned, I'll be back for more and more updates on my new adventures in food, jewellery and crafts!

Wednesday, 27 June 2012

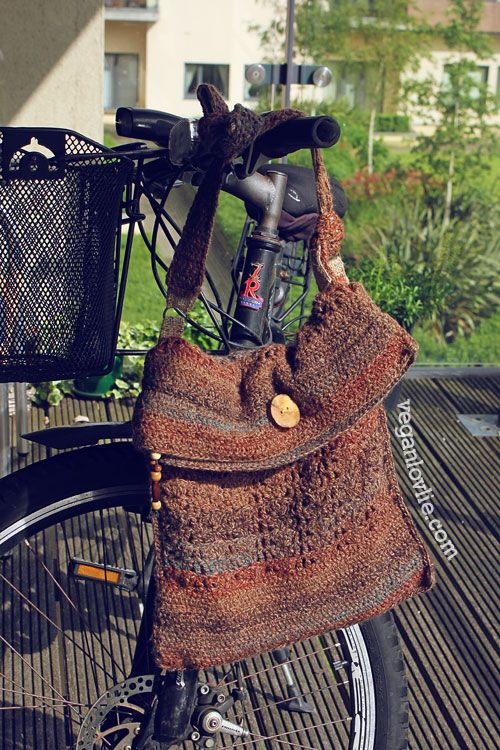
A Handmade Gift Project: Crochet Bag


Approximately a year ago when I started crochetting again (I did start to crochet at the age of 12 or so, learning from my mum), I got really hooked on it and found the array of projects to crochet pretty impressive but somewhat daunting too! The more I got into it though, the more confidence I gained with my crochet hooks; so much that my hooks started to move fast enough to work through even bigger projects!
Initially I started off with patterns and followed them to the letter. Gradually I started to slightly modify and tweak the patterns to create more customizable items to my liking. At this stage I am still testing waters and have yet to start writing my own patterns! That could still take a while to come; I still have a heck loads of crochet stitches to learn.

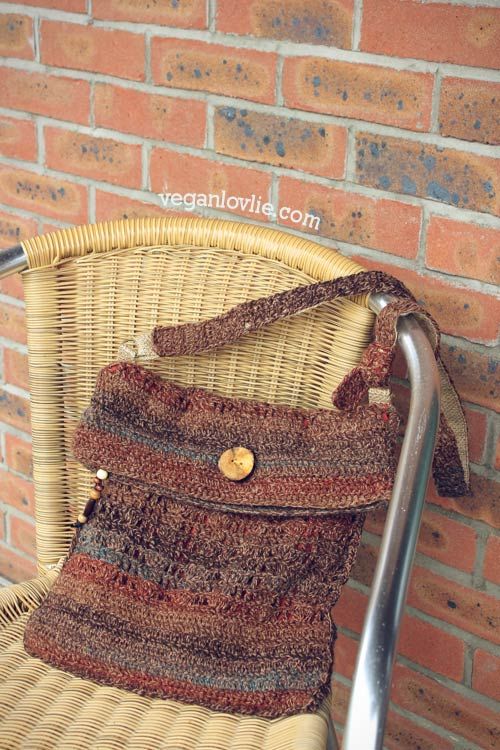
Well, today I'm sharing this bag project I made as a gift for Sisterlovlie whose birthday was about a month ago. This post is only coming up now because I never got round to finish it up sooner.

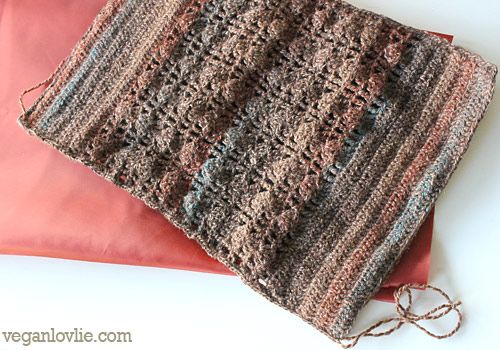
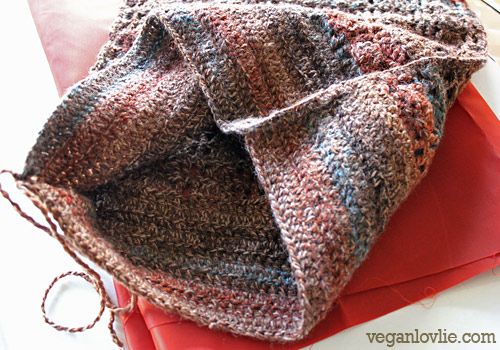
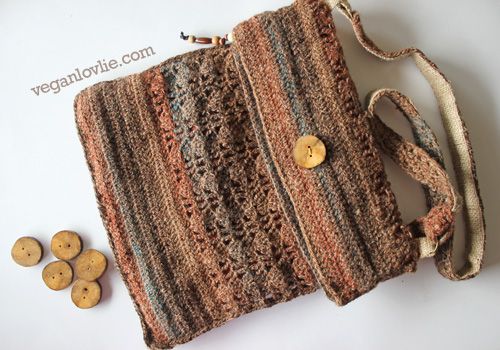
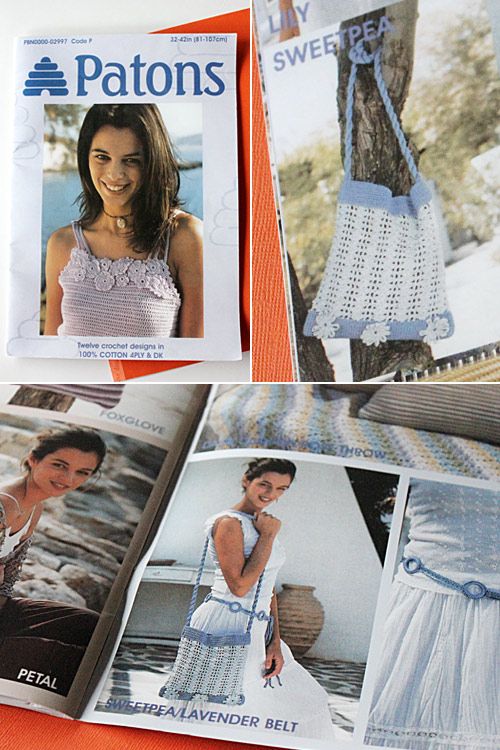
I started off with a Patons pattern which was for this Sweatpea Bag but I tweaked it to my liking and ended up with something really quite different.


The pattern calls for two rectangular pieces to be crochetted then seamed (crochetted) together around the edges.


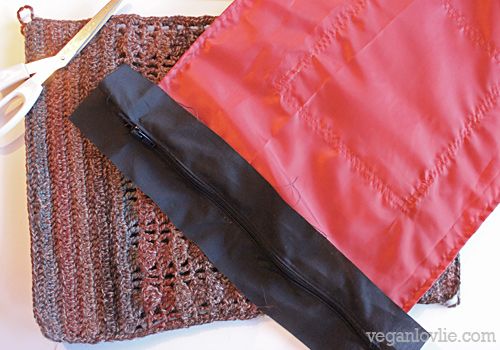
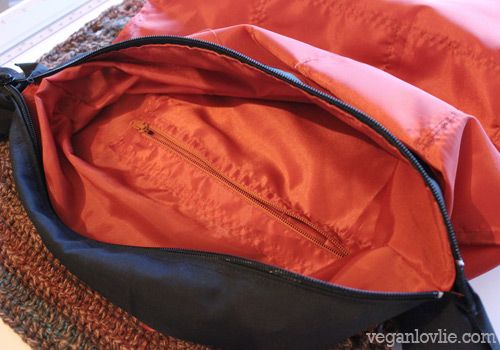
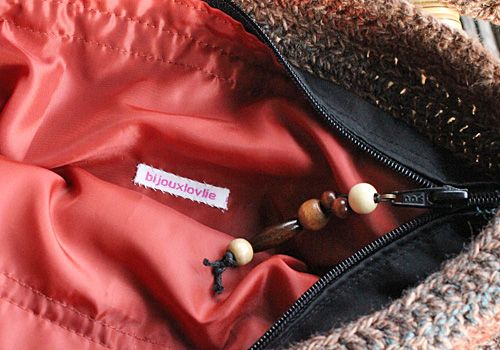
For the bag lining, I chose to use some bright rusty red coloured lining fabric to which I added a zip fastener; I like bags to be secure. The one in the pattern was only an open tote style bag.


Then I also went along adding some inside pockets to the lining. Inner pockets are so handy for the little things that would just get lost at the very bottom!


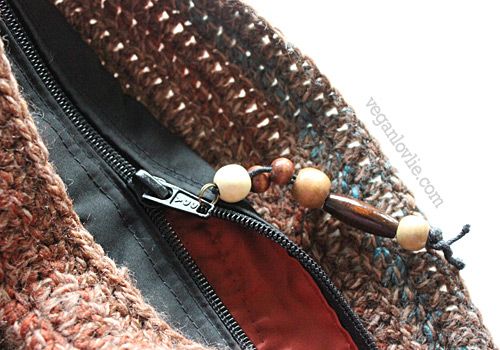
After the lining was (machine) stitched with the bag, I attached a few wooden beads to the zip.


And even my Bijouxlovlie label inside!


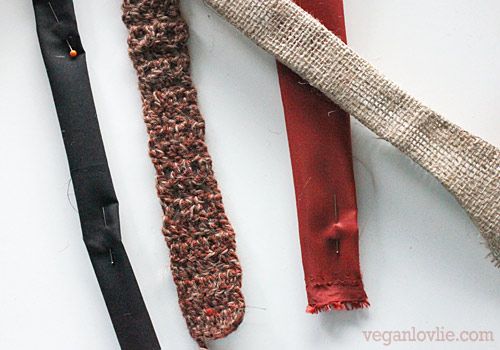
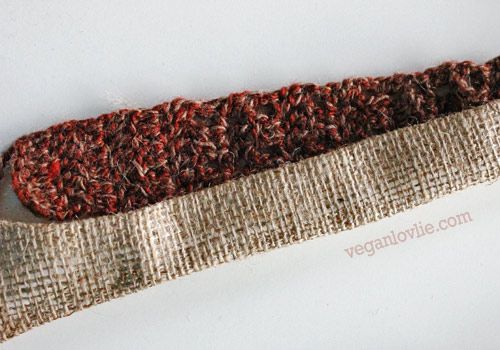
The pattern suggests making a kind of rope strap by twisting together a fair amount of yarns. I didn't go for this style. Instead, I crochetted a long strip which I lined with some other fabric. And so here was the decision to make: which fabric would be most suitable to line the strap?


Boyfriendlovlie (he's always my savior in matters of this nature!) suggested the linen canvas fabric and I was happy with that.


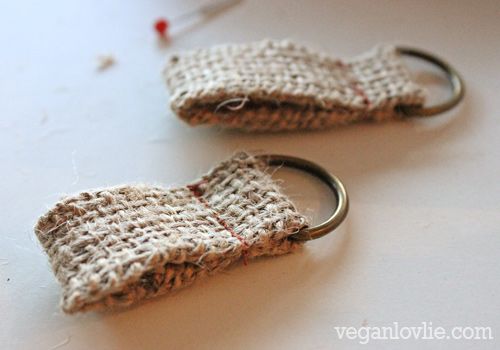
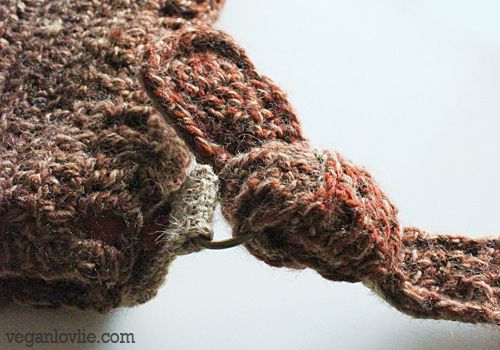
I made some small straps out of the linen canvas to attach the long one to the bag. I salvaged some D-rings from the pockets of an old cargo pants that I wasn't wearing anymore.


I stitched one end of the straps through the rings but the other end I secured with a knot so that the strap could be adjustable to body height.


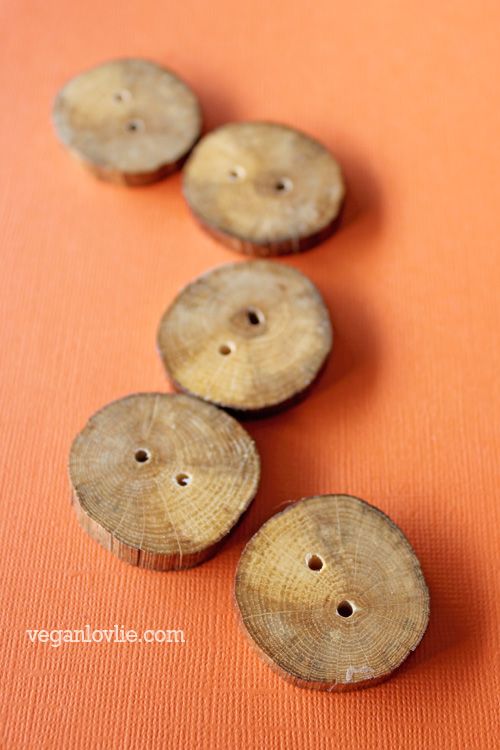
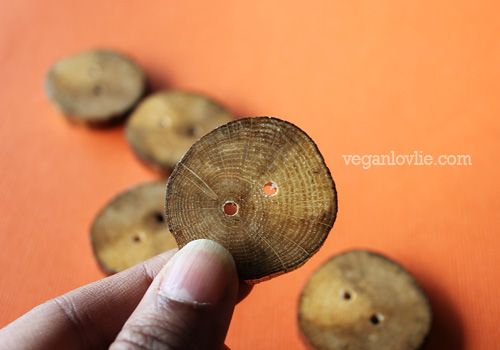
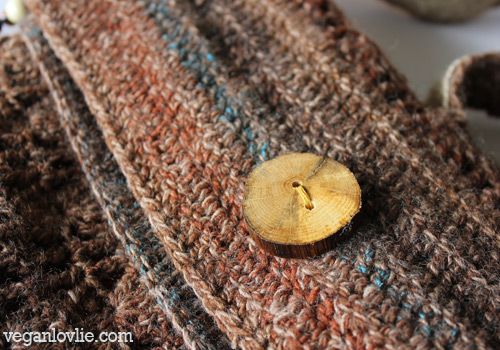
I bought some wood chip buttons from this Etsy shop a while ago. It's an eco-friendly shop that uses driftwood, reclaimed wood, salvaged stone and pottery. Natural surplus materials, wood in particular, that would otherwise go to waste are used in the making of these buttons and a lot more useful items. Check them out.


So for a natural organic touch, I added one of these buttons as an embellishment to the bag.


VoilĂ , crochetted with love! Sisterlovlie was pretty pleased!

Share This Post

Share This Post

Related Posts Plugin for WordPress, Blogger...