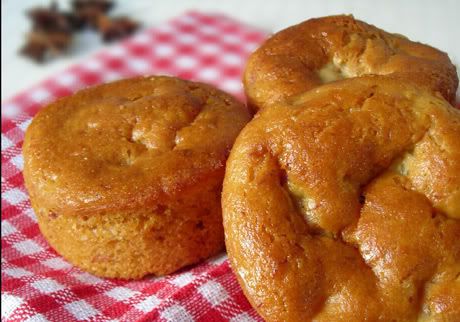
Join the Veganlovlie Cocoon!
Receive an occasional burst of sunshine and a little flower, recipes, craft projects and FREE resources.
Showing posts with label Sweet Spreads and Jams. Show all posts

Sunday, 19 September 2010

DARING COOKS 2010 CHALLENGE: FOOD PRESERVATION: THE APPLE BUTTER OF KNOWLEDGE

apple butter,daring kitchen,daring cooks

I am posting this 5 days late! Not that this was a tedious recipe to make. It was infact very easy and quick. Because I am allergic to nuts, I regularly make fruit butters to use as spreads. I have made apple butter a lot of times before and I like mixing it with other fruits.
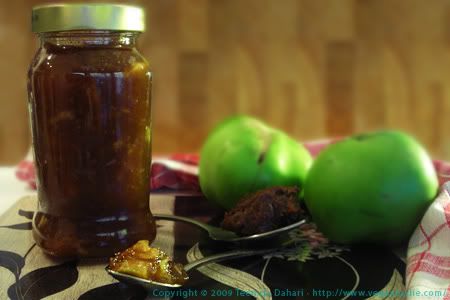
This time I mixed it with some tamarind paste for a distinctive sweet and sour taste.
I really like this combination and more often I find myself eating a spoonful as dessert rather than a breakfast spread! The slight sour taste also makes it really good to use as a dipping sauce with corn chips or poppadums!
The Daring Kitchen

The September 2010 Daring Cooks’ challenge was hosted by John of Eat4Fun. John chose to challenge The Daring Cooks to learn about food preservation, mainly in the form of canning and freezing. He challenged everyone to make a recipe and preserve it. John’s source for food preservation information was from The National Center for Home Food Preservation.


DARING COOKS 2010 CHALLENGE: FOOD PRESERVATION: THE APPLE BUTTER OF KNOWLEDGE


For this recipe I used Irish Bramley apples. Bramley apples are usually slightly larger than a common regular apple and they have a tangy taste. They are mostly used as cooking apples in pies or crumbles.

Because I tend to eat these butters quite quickly, I don't usually use elaborated methods of preservation and these butters usually keep for up to 3 weeks in the fridge.

Bramley Apple Butter (with a hint of tamarind)
3 bramley apples (peeled and seeds removed, finely chopped/sliced)
1 tablespoon tamarind paste (seeds removed, dilute with a little water to make it easier to remove the seeds)
1 cup sugar

  • Place all ingredient in a non stick pan, cover and cook for 20 minutes or until apples are soft enough to mash. Occasionally add water if required to allow the apples to cook and not burn.
  • After cooking, you can either mash in a blender, with a hand blender or with a wooden spoon (which I did, as I like some chunky pieces to be left).
  • Put back in the pan and reduce to desired spreadable consistency.
  • Allow to cool then place in sterilised (boiled in water, then left to dry) pots and keep refrigerated.

Wednesday, 14 July 2010

DARING COOKS JULY 2010 CHALLENGE: NUT BUTTERS

asian salad

When I first saw this challenge, I thought oh no! Not a nut challenge! I am allergic to both nuts and seeds, although I do cheat and eat them from time to time in small quantities and hope that I don't fall sick! Haha! Ok, it's not funny when I do fall sick!

Anyway, I did not want to take any risk. Then, I saw that this challenge allowed fruit butters as well for nut allergy sufferers! I could have made a bean butter with chickpeas but I used this for a previous challenge to replace nuts in a satay. So I thought I'd try a fruit butter instead.


Fruit butter is similar to making jam except that it doesn't require any jellying agent and uses much less sugar. However, it is cooked for 2 hours. I was short of time. So, I only cooked it for 1/2 hour and it was fine. I only made a small quantity and did not add any extra liquid to the fruits, so it dried up quicker.


The Daring Kitchen

The July Challenge is brought to you by Margie of More Please and Natashya of Living in the Kitchen with Puppies.


DARING COOKS JULY 2010 CHALLENGE: NUT BUTTERS


This was a pretty quick challenge to make. I decided I would use my fruit butter as a dressing for an Asian salad. I made the fruit butter a few days before and had used half of it by the time I took the photo!


Apple and Pineapple Fruit Butter

I am not providing an exact recipe for the fruit butter as I can't remember the quantities I used! But I don't think quantities matter that much as basically the fruits are pureed, sweetened a little bit, water added, then cooked for 2 hours. In my case, I only cooked it for half an hour.

So, I took 2 apples, peeled and cut them into small pieces. I used about 1/2 pineapple, peeled and also cut into small pieces. Place all fruits in a blender and process to a puree (a hand blender is also fine for this). Add 2-3 tablespoons sugar and place in a thick bottom pan. Cook on low-medium heat for 30 minutes or until thick enough to use as a spread.


fruit butter

Asian Salad

I don't have an exact recipe for the quantities of the salad ingredients as I just picked and tossed in what I had on hand. Roughly for 2 persons, here are what I used:

200g Sweet potato noodles (boiled until soft, then rinse in cold water to prevent them from glueing with one another)
1 medium sized carrot (finely sliced with the vegetable peeler)
Mixed peppers (sliced)
150g frozen broad beans (immersed in boiling water for 10 minutes, then drained)
4-5 radishes (sliced)
70g raw green beans (sliced with the bean slicer)

Toss and blend everything together in a big salad bowl.

Fruit Butter Asian Salad Dressing

1 tablespoon fruit butter
1 teaspoon wasabi paste
1 tablespoon dark soy sauce
1/2 teaspoon (or to taste) fine chili powder
1 tablespoon rice vinegar
1 tablespoon fruit syrup (or maple syrup/agave nectar)
Salt to taste

Mix all ingredients together.

Pour on salad just before serving.

asian salad

Saturday, 27 March 2010

Baby Orange Tian for a Daring Bakers March 2010 Challenge

orange tian


I thought I'd never get this post up! I've barely finished taking the pictures of this today and writing this post just now. This month has been very busy. I was thinking of opting out but this challenge looked like a dessert I would enjoy, so I gave it a go.

What also attracted me into it is the homemade orange marmalade which was part of the challenge. I rarely make desserts with orange. Orange is something I just buy as juice cartons. Of the citrus family, I most of the time buy lemons, grapefruits, satsumas and clementines. So it was a nice change to have some real oranges at home after a long time!

The Daring Kitchen

The 2010 March Daring Baker’s challenge was hosted by Jennifer of Chocolate Shavings. She chose Orange Tian as the challenge for this month, a dessert based on a recipe from Alain Ducasse’s Cooking School in Paris.

THE DARING BAKERS MARCH 2010 CHALLENGE: ORANGE TIAN


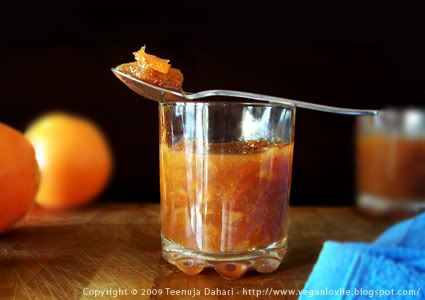
The homemade marmalade called for pectin which I couldn't find. There are some jam sugar in the supermarkets here but I didn't bother with that. I've made jams before with just the fruit and sugar and I really love it this way. I don't particularly like the jelly consistency of store bought jams and this is the reason I would make jam at home. I sometimes put a little agar flakes but this time I did not have any at home. I just used soft dark brown sugar and that was the only other ingredient apart from the oranges. More of a compote than marmalade maybe, but very nice!

The recipe suggested to slice the oranges with the peel, then blanch 3 times in water, pouring off the water each time, to get rid of the bitterness.
I, however, blanched the oranges whole, without peeling, 3 times, pouring the water off each time after 5 - 6 minutes of boiling. I found that the oranges retained more of their flavour in this way. And no bitterness at all, which I liked!

orange marmelade

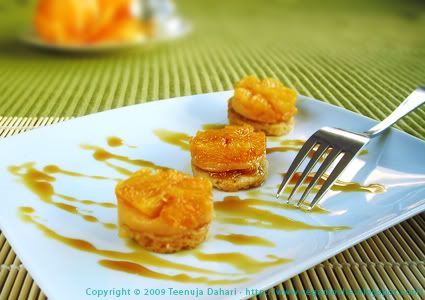
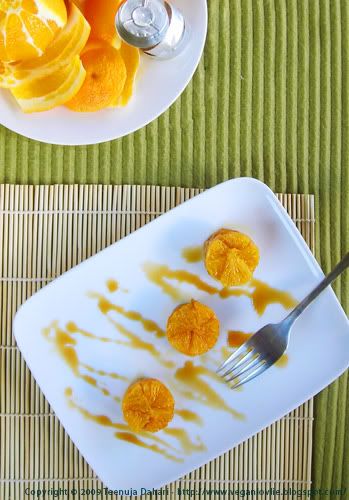
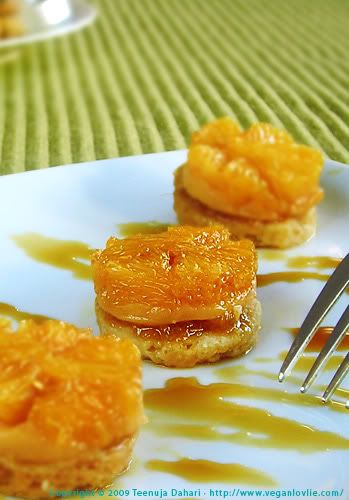
The dessert is made of different layers: a pate sablee with orange marmalade, a flavoured whipped cream topped with fresh orange segments and served with a caramel and orange sauce. It is built upside down and then unmolded so that the bottom layer (the orange segments) becomes the top layer.

My version of the tian is a bitesize baby orange tian. I made them in empty tealight holders. I usually like to keep my tealight holders for some reason after the candles melted away. I sometimes use them as cookie cutters.

orange tian

I used a pate sablee recipe that did not contain any egg. I don't think pate sablee really needs any eggs. Well, anyway, I can't remember where I got the recipe from but the proportions of
flour : icing sugar : ground almond : (cold) vegan butter is
2:2:1:1.
Also a pinch of salt.

As I did not use any ground almonds, I increased the butter by a little.

As for the whipped cream, I made thick custard instead using custard powder, soy milk and sugar.

This dessert was really nice and I liked the simple combination of pate sablee, custard, marmalade, caramel and oranges into something really yummy! It was very refreshing!

The marmalade I will definitely make again!


orange tian

Wednesday, 21 January 2009

Mung-Choc Spread

Photobucket

As I am relatively limited on store bought spreads (no peanut butter, as per my nut allergy, and I can’t find any vegan chocolate spread around here), I decided to make my own from one of my favourite beans which is mung beans. This is inspired from Celine's Carob Spread, Black Bean Version. However, hers is not cooked (apart from the beans). I've actually cooked all the ingredients together. I find that it actually keeps for longer in the fridge. After two weeks, I still have some in the fridge and it is still good.

What I do when using it from the fridge, as I don't like cold spreads in the morning, I smear this on my bread and then toast it in the oven. I love it this way. But I also like it on wheat biscuits like the Wheatabix kind. I don't like soaking wheat biscuits in soymilk and prefer them dry. So this is a nice spread to use on my Wheatabix. How do you like your wheat biscuits? I'm curious to know! Do you prefer them soaked or dry?

Ingredients (yield about 1 cup)

1 cup boiled/cooked mung beans
15 – 20 pitted dates
3-5 tablespoons coconut milk
2 tablespoons cocoa powder
1 cup water
Soft brown sugar to taste (or just add more dates for more sweetness if you prefer)

  • Mash the mung beans. (Or process in a blender with a little water if you want a smooth spread.)
  • Finely chop the dates. (Or process with the mung beans as above if using a blender).
  • If you’ve chopped the dates, place them first in a saucepan over medium heat with a little of the water and allow them to soften.
  • Then place all ingredients in the saucepan, cover and simmer.
  • Stir and mash occasionally.
  • When liquid has reduced, it’s done.
  • You can add some sugar if not sweet enough.
  • Allow to cool completely before storing in the fridge.

Photobucket

Tuesday, 19 August 2008

Muffins, pancakes and chutney!

Photobucket

We had a long weekend over here this weekend with Friday being a public holiday. The thing with long weekends is that I take 2 days to get back on track afterwards! I spent most of my Friday baking and cooking, of course! Then on Saturday, I went to the cinema to watch Narnia - Prince Caspian. I love going to the cinema! And the movie was good. I loved the first Narnia and the second is worth watching as well.

Now, let’s go back to the goodies I baked and cooked on Friday.
Thank you for all your suggestions about the apples, they were really great! I made
fat-free apple and banana muffins, pancakes, apple and carrot chutney and apple sauce (that I used in the muffins).
I searched the internet for recipes and then just cooked out of my head (like I always do!) except for the apple and banana muffins. I just followed the recipe pretty much as it was.


I’ll start with the fat-free apple and banana muffins.
It’s the first time I tried fat-free muffins and they were nicer than what I expected they would be! They were spongy and moist.

The only change I made to the muffins was that I added some almond pulp to the dough. Almond pulp is the left over that I keep from making almond milk at home. I usually keep the pulp as I think they still contain quite some nutrients and fiber and I don’t like wasting them away. I also used only one banana as I only had one left. And as I was using only one banana, I decided to use apple sauce instead of juice. I made the apple sauce by pureeing some of the pre-cooked apples with a little water in a blender.

_______________________

Photobucket

The pancakes.
I did not look for any particular recipe for the pancakes. I just used my own basic vegan pancake recipe to which I added the pre-cooked apples. One thing that I should have added to the batter and I only realised this afterward, is some coconut milk powder. It makes a softer pancake.

If you want the recipe, here it goes:

Ingredients (5 pancakes)

1 cup all-purpose flour
1 teaspoon baking powder
2 tablespoons brown sugar (or any that you prefer)
1/2 cup water
2 tablespoons coconut milk powder
1 cup pre-cooked apples
  • Mix all the ingredients in a bowl using a whisk or fork or in a blender except for the apples.
  • Stir in the apples.
  • (I don't use any oil for frying the pancakes. I use a non-stick pancake/frying pan.)
  • Scoop mixture using a large round spoon. Shape the batter on the pan toobtain a nice round pancake.
  • Cook for about 30 seconds to 1 minute or until bubbles start to form and the bottom is stiff enough to turn over without risk of tearing.
  • Cook until other side is done.
  • Remove and stack them on top of one another to keep them soft.

For myself I made twice the amount in the recipe and ate 3 while I was cooking them! I shared the rest of course!

_______________________

Photobucket

And finally the Apple and Carrot Chutney.
I went through several recipes online and I did not quite have all ingredients that they were calling for. So I just made up my own recipe and hoped for the best! And it was nice! The proof is half of it is already gone since Friday. That’s nearly 2 cups of chutney!


Ingredients (for about 3 standard jam pots of 340g each)

2 cups pre-cooked apples (or about 3 cups of raw peeled and chopped apples)
1 medium grated carrot
1 onion, finely chopped*
2 cups brown sugar
½ teaspoon cinnamon
5-6 cloves
2 star aniseeds
2 teaspoons whole mustard seeds
1 cup spirit vinegar (it’s the only one I had. Other recipes have called for rice vinegar, pure cane vinegar or malt vinegar)
½ cup raisins (mixture of golden and black raisins)
1-2 dried chilies to taste (I used green chilies as I did not have any dried ones. I think dried chilies will allow the chutney to preserve for longer)

*Ooops! I just realised I also had 1 onion in the chutney.
  • Mix everything in a sauce pan and cook on low heat for at least 2 hours or until liquid has reduced.
  • Let cool and store in jars.
  • Refrigerate to keep for longer.

This apple chutney tasted very much like the sweet and sour sauces I usually add to stir fries. Next time I make a stir fry I’m going to add some of this chutney instead! That sounds good! Yum!

Monday, 30 June 2008

Papaya Jam

Photobucket

I had 4-5 medium papayas at home that have gone very ripe. I love fresh papayas in the morning, they make a wonderful breakfast. But there were too many of them to eat up. Mum suggested we make some papaya jam and this is what I did on Sunday afternoon.

I always find store bought jams too sweet. So, I've put much less sugar in this one and besides, the papaya was naturally sweet enough. The only thing is that it might not preserve for as long as store bought jams. But then less sugar means I can eat more of it! So, it won’t even have the time to go off anyway!

It tasted very homemade on sliced bread. I had a big spoonful with porridge this morning. And SisterLovlie is having this as a warm dessert (lightly heated in the microwaved) tonight!


Ingredients:

6 cups (1 kg) papaya
1 cup (225 g) sugar
2 tablespoons grated orange rind
2 tablespoon crushed pineapple (optional)
1 teaspoon agar agar powder
100 ml water

  • Peel the papaya, remove the seeds and cut it into small pieces.
  • Add sugar to it and mash the papaya pieces well.
  • Add the orange rind and pineapple.
  • Cook the mash on a low heat, stirring constantly until sugar is dissolved.
  • Cook until papaya is well cooked and the liquid has reduced.
  • Mix the agar agar in the water until well dissolved.
  • Stir this into the papaya puree and simmer for about 7 minutes.
  • Fill the hot jam in sterilized pots. Close and refrigerate when cool.

Photobucket

Share This Post

Share This Post

Related Posts Plugin for WordPress, Blogger...