Join the Veganlovlie Cocoon!
Receive an occasional burst of sunshine and a little flower, recipes, craft projects and FREE resources.
Showing posts with label Bread Rolls. Show all posts

Friday, 12 December 2014

Virtual Vegan Potluck December 2014: Holiday Fruit Crown Bread

Vegan Christmas Holiday Sweet Fruit Crown Bread

The holidays is the time for sugar and spice. And everything nice! Today is special because bloggers around the world are all linking up to the awesome Vegan Virtual Potluck which is a bi-annual virtual event organised by Annie of An Unrefined Vegan.

Vegan Christmas Holiday Sweet Fruit Crown Bread

Much like a real potluck, each participating blogger is bringing a dish to the event in one of eight courses.

Tuesday, 22 July 2014

Merry-Go-Veggie-Kids Week #3: Helyn and a Nutritarian Diet

This is the third week of the Merry-Go-Veggie-Kids Summer 2014 event. In case you've missed the previous weeks of this event, here's a little recap - the Merry-Go-Veggie-Kids Summer 2014 a virtual event featuring a few blogging friends who are sharing with us their kid-friendly recipes, tips and pieces of advice. We hope you will be inspired by what our blogging friends have to say and their delicious recipes.

This week's featured blogger is Helyn of Helyn's Healthy Kitchen. Helyn, as I came to know when I stumbled upon her blog, follows a Nutritarian diet. If you are like me and had never before come across the term, here's a little description:

A Nutritarian diet focuses on food choices that maximize the micronutrients per calorie. A Nutritarian diet is designed with food that has powerful disease-protecting and therapeutic effects and delivers a broad array of micronutrients via a wide spectrum of food choices. The Nutritarian diet may not necessarily be vegan but since plant-based foods surpass animal-based food by far in terms of their micronutrient per calorie, plants are usually favoured. The foods with the highest micronutrient per calorie scores are green vegetables, colorful vegetables, and fresh fruits. The term Nutritarian was coined by Dr. Joel Fuhrman.

That's interesting to know as I couldn't agree more with Helyn when she says on her blog "Just because it's vegan, doesn't mean it's healthy!". So, let's get to know Helyn a little bit more.

1. When did you begin your blog, and what inspired you to start it?
I started Helyn's Healthy Kitchen in late 2012. I got so excited about my weight loss and the health benefits that I was experiencing on a plant-based diet, that I wanted to start sharing some recipes. It took off like a rocket!


2. You said that you love sharing delicious and healthy vegan recipes, can you explain why you chose a vegan lifestyle?
I originally chose a vegan lifestyle for health reasons. My weight was up, as was my blood pressure. I had some blood work done and found that my triglycerides were also quite high. Now that I have been vegan for over 2 years, I have also become more aware of the horrific abuse that factory farm animals endure both on the feed lots and in the slaughterhouse. Then there is the negative impact that factory farming has on our environment. So now I am vegan for all of those reasons.


3. How long did it take you to become fully adapted to a vegan lifestyle, what has been the most challenging part?
It took about 2 months to where I was not craving fats and oils and other junk food. I didn't have too much trouble giving up meat because I was never really a meat and potatoes kind of person. Butter was the hardest for me to eliminate. Now, if I eat those kinds of foods, they don't taste good to me anymore! :)


4. What impact has the vegan diet had on your health?
40 pounds dropped with ease. Blood pressure lowered to normal. Triglycerides dropped to below "average." I also sleep better, my skin is smoother my hair is thicker and I have more energy.


5. How do people respond when you tell them you are vegan?
People are more responsive now than ever about healthy eating/living choices. Most people are curious about what I eat and I'm happy to share with them my plant-based recipes and adventures!


6. What advice do you have for vegans mums or parents looking to make the change to a vegan lifestyle?
Start slowly. Children are such creatures of habit. Introduce foods that are fun/look fun and transition with things that they already like, such as mac & cheese. There are many vegan versions of mac & cheese floating around the web that are really yummy.


7. What type of vegetable dishes have you found to be most successful with children?
As I mentioned, start with things they already like... If your child likes cereal, try a homemade granola with healthy nuts, seeds and fruits. Pizza can be a good choice (what kid doesn't love pizza?) because you can load it up with veggies and use just a small amount of vegan cheese like Daiya brand. And let them help to prepare the food. That's KEY!! Kids love to help and when they help to create their own, fun meals, they are more likely to eat them. Visual appeal is also super important with kids. Make the foods look bright and fun!

-----------


Carrot Dogs

Marinade ingredients:
½ cup tamari or other low sodium soy sauce
¼ cup maple syrup
1 tsp onion powder
1 tsp garlic powder
½ tsp liquid smoke
TIP: use a quart sized mason jar to marinate the carrots, standing them on end. This way they will be evenly submerged. The jar will fit about 10 carrots.


To make the carrot dogs, simply cut the carrots into the length of a usual hot dog, then using a veggie peeler, shape each end so it's rounded. Then par boil them until a fork can pierce the carrot easily but not all the way to the center (about 10-15 minutes). Remove them from the water, pat them dry and soak in the marinade overnight. Then bake or grill until tender and top with your favorite condiments!

-----------

Thank you Helyn. Carrot dogs sound wonderful! By the way, check out the recipe for the spelt buns that Helyn has used in this recipe on her blog.

Connect with Helyn

Helyn's Kitchen Blog

-----------

Visit the Merry-Go-Veggie-Kids Summer 2014 event main page for updates on participating guest bloggers every week until August 2014.
If you haven't already, follow Veganlovlie by email by clicking on the envelope icon in the sidebar at the top then enter your email address. Or you can subscribe to the Veganlovlie's Sunshine Newsletter.

In case you missed our previously featured bloggers:


If you want to link to this event, grab the banner below.

Monday, 1 July 2013

English Muffins (It's Good, Make It Vegan!)

 photo english_muffins12_zps3b842ecb.jpg

Sunday (yesterday) morning debate (in my head):
Which should I make?
My all-time favourite scones or sweet potato bread (because I do have some sweet potato in the fridge that need to be used soon).

Hm, I was really in the mood for some bread baking to break my gluten-free fast. Yes, I've been reducing my gluten intake recently and have been feeling a lot lighter. But from time to time, I just love the smell of bread baking in the oven, as you may know by now of my love affair with homemade bread.

But it was rather warm today and I really didn't want to put the oven on for an hour, lest having Boyfriendlovlie (and myself!) complain about the unbearable heat. So, I was going to opt for some veggie pancakes instead when I thought about some stove top English muffins.
*hmm...thinking....thinking* They can be partly cooked on the stove then transferred 5- 8 minutes in the oven.
And also I realised that I had actually never featured any English muffins here. So, English muffins it was!

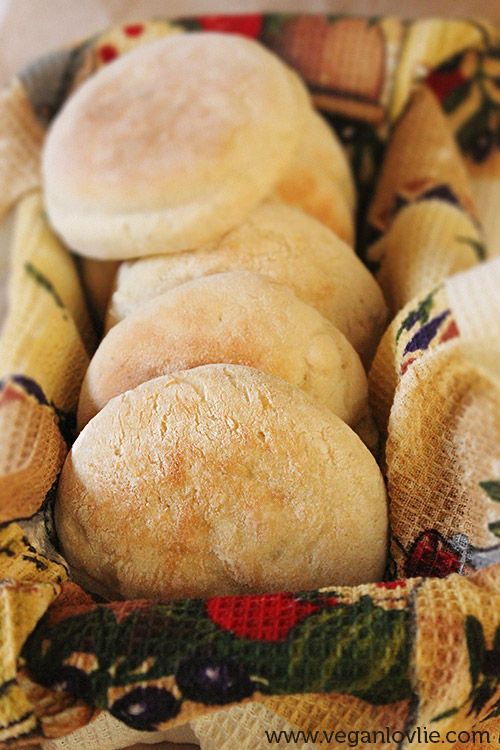
English muffins win my heart for their rustic homemade aspect. Not only do they taste great but they can be served just as much as a bread replacement or as a little afternoon tea-time treat. They are light, puffy and moist and despite being called muffins, they are very different to American muffins which are sweet small cakes.

The traditional recipe for English muffins usually call for milk which can easily be replaced with non-dairy milk. In this recipe I've used oatmilk, although I did not strain out the oat residue (as per my oatmilk recipe). I've left it in and I've found that it has actually improved the texture and taste.

Ingredients (8 - 9 muffins)
3 tablespoons porridge oats (dry flakes)
250 ml water
1 tablespoon dry active yeast
1 tablespoon maple syrup (or sugar)
3 tablespoons coconut oil
3 cups all purpose flour (I use a 220 ml cup measurement)
1/2 teaspoon salt

Cornmeal (for dusting)


  • Melt coconut oil (if not already liquid at room temperature). But do not heat, it should remain at room temperature. Leave aside.
  • Mix the oats with the water and blend for one minute on high. You can alternatively use a hand blender.
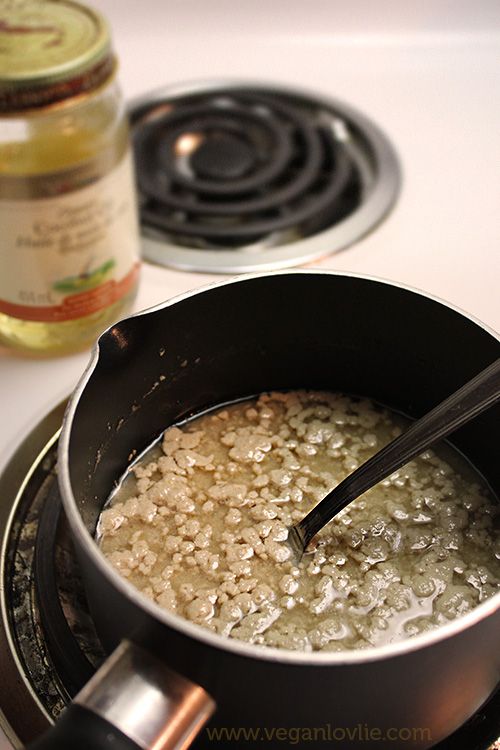
  • Pour oat mixture in a saucepan, add maple syrup or sugar and heat gently until it is lukewarm (not hot). We are going to use this as oatmilk but there is not need to strain out the oat residue for this recipe.
  • Sprinkle yeast on the warm oatmilk. Whisk and mix. Let sit for a couple of minutes.
  • Add the melted coconut oil and mix well.


Vegan English Muffins photo english_muffins02_zps83cb7af0.jpg


  • In a large bowl, add flour and salt. Mix well.
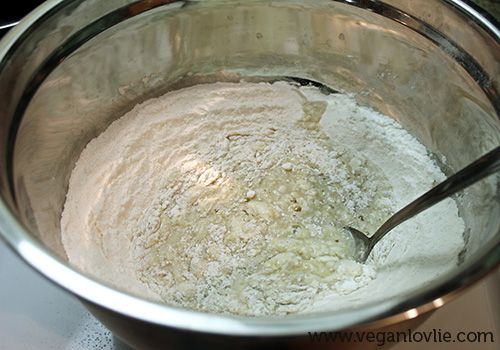
  • Make a well in the center and pour in the oatmilk mixture. 


Vegan English Muffins photo english_muffins03_zps4b3da20b.jpg


  • Start to mix and knead. If you feel the dough is too dry, add 1 tablespoon of warm water at a time (but it shouldn't be requiring more than 2 tablespoons extra).
  • Continue to knead and the dough will come together.
  • At this point you can continue to knead in the bowl or transfer onto a board and knead for another 8 - 10 minutes.
  • Place dough in a large greased bowl. Cover with a tea towel and let rise in a warm place until double in size.
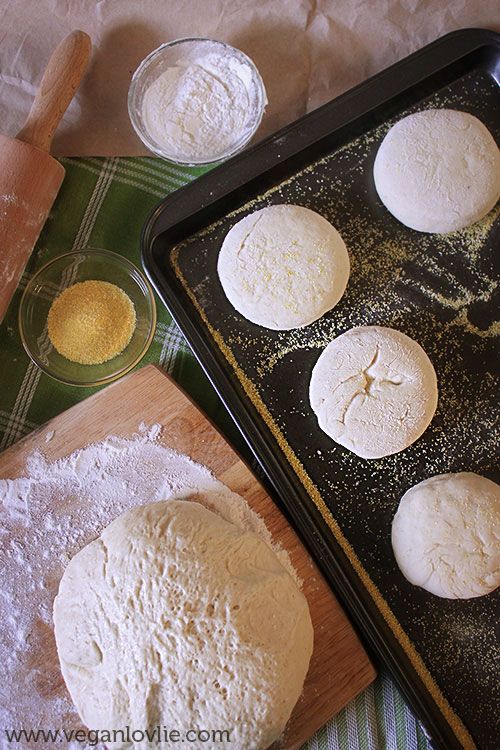
  • When dough has doubled, divide into 2 and lay on a floured board. Lightly roll out to 2 inches thickness. Using cookie cutters, cut out circles. You can then reshape and smooth out the edge with your hands to make a nicer plumper muffin.
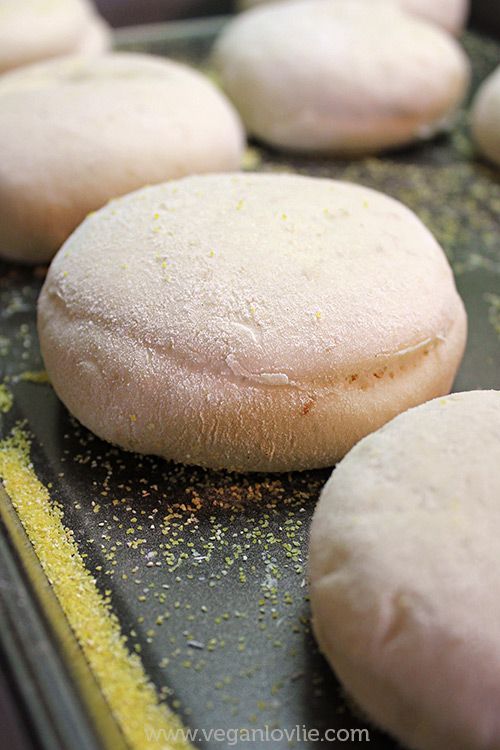
  • Sprinkle a baking tray with cornmeal and place the circles of dough with a little space around them.


Vegan English Muffins photo english_muffins04_zps3192ea94.jpg


  • Repeat with the other half of dough. For the left over cut out dough, you can combine them and re-roll, then shape by hand.
  • Let rise until each muffin is doubled in size.

 photo english_muffins11_zps6fd6f98a.jpg


You can then proceed into cooking this on a griddle in the oven (5 minutes on each side) or pan cook them first before baking for a few more minutes (5 - 8 minutes) in the oven.
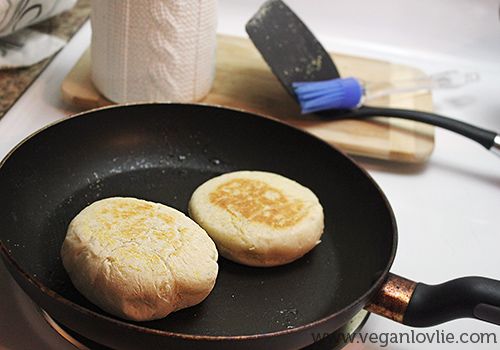
I tried both and I prefer the pan cook ones because then gave a more authentic look and taste.


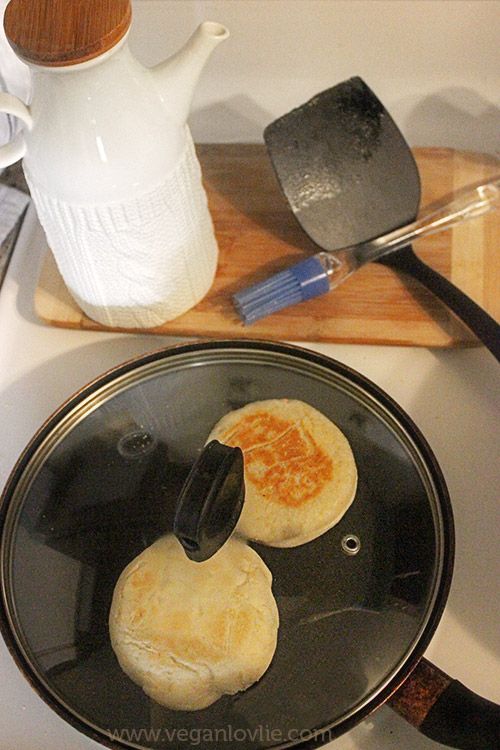
  • Lightly grease a fry pan, place 1 muffin at a time or if you have a large pan, you can fit two or more at a time. Cook for 5 minutes on each side on low-medium until each side is golden.


Vegan English Muffins photo english_muffins06_zpsdf760d43.jpg

Vegan English Muffins photo english_muffins05_zps6b421053.jpg


  • Then transfer to the baking tray and bake at 180 degrees Celsius (350 degrees Farenheit) for 5 - 7 minutes.
  • Remove and let cool.


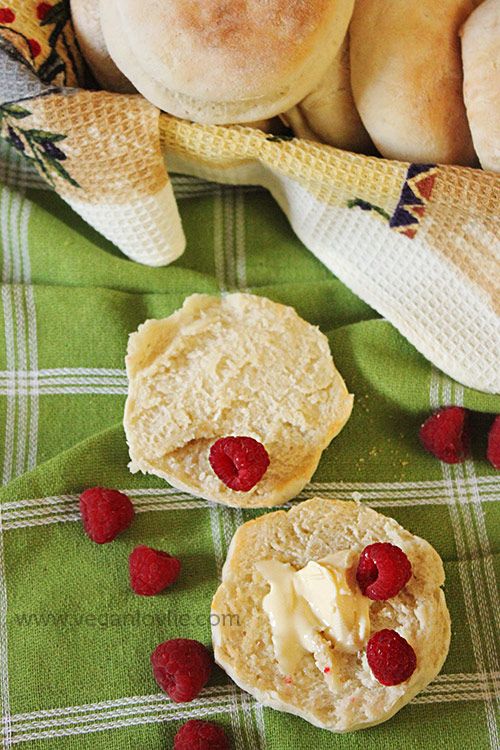
English muffins are best served warm. Try them with a sweet spread for breakfast or tea time.

Vegan English Muffins photo english_muffins08_zpsb4a2c505.jpg

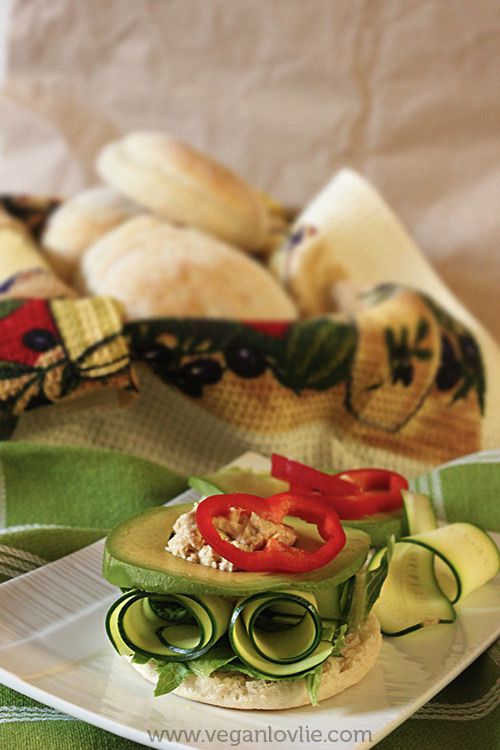
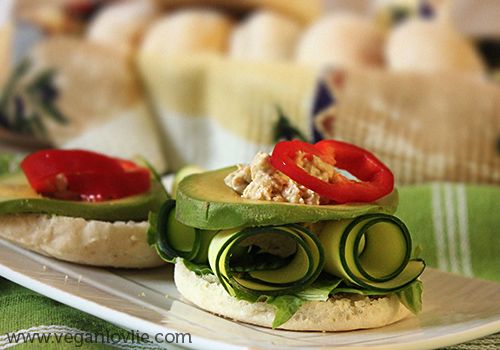
Or you can fill them with any savoury ingredient for a great lunch. Make them for your barbecues and just reheat for great homemade muffin bread!

Vegan English Muffins photo english_muffins07_zpsd534208f.jpg

Vegan English Muffins photo english_muffins09_zps34da7cec.jpg

Vegan English Muffins photo english_muffins01_zps8baa9b14.jpg

Friday, 20 July 2012

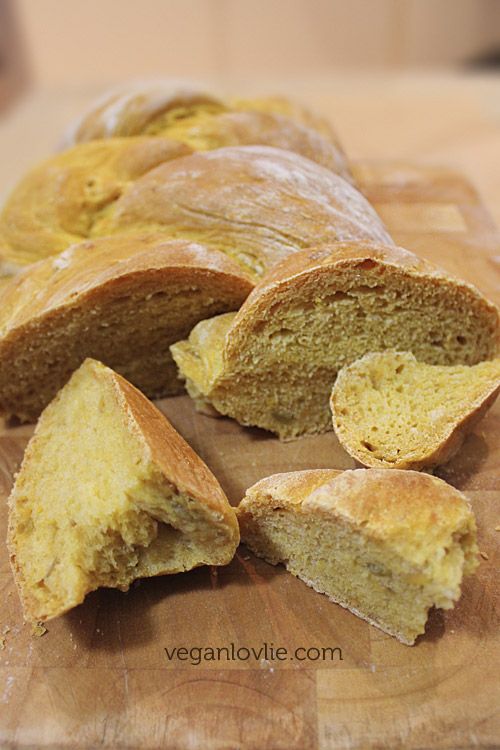
Sweet Potato Bread - A Recipe Video


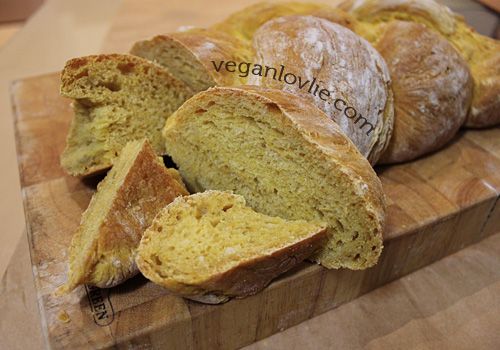
Ever since I've made this bread for a previous Daring Baker's Challenge, it has become a regular at the Lovlie Cocoon! It is THE only way Boyfriendlovlie actually ENJOYS eating sweet potatoes. I try to sneak a few pieces of roasted sweet potatoes on his plate from time to time but there is just something about their sweetness which he thinks doesn't go with other savoury food. I enjoy eating sweet potato in various dishes from salads to desserts. But this bread is surely my favourite of them all!

Bread-making is something I never really gave much time into before until I started feeling the grubbiness of store bought ones. Those breads don't get any moulds for over a month! What do they put in them, I wonder!

The recipe in the video is more or less the same I used for the Daring Baker's Challenge with a slight variation - I omitted the rice milk and just used water.
Also, in the video I am using quick yeast which does not require proofing. If you are using active dry yeast, do proof it first by dissolving it in 100ml warm water with 1 teaspoon sugar and let stand for 10 minutes until frothy. (Then this is the water you are adding into the recipe).


Easy Sweet Potato Bread
Ingredients (1 bread loaf - 12 slices)

2 1/2 cups (275g) strong white flour
2 medium sweet potato (350g)
1 sachet / teaspoon (7g) quick yeast
80 - 100ml warm water (depending on moisture content of sweet potatoes)
1 teaspoon sugar
2 tablespoons coconut oil (melt first, if hardened, then take 2 tablespoons of the liquid oil. Vegetable oil should also be fine)
1/2 teaspoon salt


  • Place sweet potatoes with the skin on a deep pan. Fill with water until 3/4 the level of the sweet potatoes. Boil for 15 -20 minutes or until soft. Prick with a fork to test.
  • Peel and discard the skin. Mash the sweet potato to a fine puree. Use while still warm; it actually helps the dough to rise.
  • Add yeast, salt and sugar to flour. Mix well.
  • Add sweet potato to the flour. Mix and knead to combine.
  • Add the warm water. Mix and knead.
  • Add coconut oil and knead. The dough should come together better by now and should be less sticky.
  • Then, transfer onto a floured board and knead for 8 - 10 minutes. You may want to add a little more flour if too sticky or 1 - 2 tablespoons more water if too dry. (This also depends on the moisture content of the sweet potatoes.)
  • Oil a large bowl and place in the dough. Cover with cling film and leave to rise for 1 and a half hours in a warm place.
  • The dough should double in size.
  • Preheat oven to 180 degrees Celsius.
  • Divide dough into 3 equal parts. Take one part and roll into a log. How long or thick you roll it will depend on the size or length of bread you want. Repeat with the other 2 pieces.
  • Join the 3 pieces at the top and start braiding. Press to secure them at the end, then reshape to nice rounded smooth ends.
  • Place on greaseproof paper on a baking tray and bake for 45 minutes to 1 hour (rotate bread 180 degrees on itself halfway through for even baking).
    When bread is baked through, it will make a hollow sound when tapped on the top, otherwise it will sound a little 'compact'.
  • Remove from oven and allow to cool a little before slicing.

Nutrition facts based on 1 slice of this bread, one bread loaf yielding 12 slices.

Nutrition Facts
Serving Size
1 serving (66.2 g)
Amount Per Serving
Calories
143
Calories from Fat
23
% Daily Value*
Total Fat
2.6g
4%
Saturated Fat
2.0g
10%
Cholesterol
0mg
0%
Sodium
108mg
5%
Total Carbohydrates
26.4g
9%
Dietary Fiber
1.7g
7%
Sugars
2.4g
Protein
3.3g
Vitamin A 115% Vitamin C 10%
Calcium 2% Iron 8%
* Based on a 2000 calorie diet

Wednesday, 6 June 2012

How Do You Pronounce Scone?


I have always pronounced 'scone' as in 'stone' and thought that was the only official pronunciation for it. However, during the years I spent in England, I've come across a good number of people who would pronounce it as in 'gone'. Apparently in Scotland and the northern part of England, it is pronounced to rhyme with 'gone' while in the south of England, the 'stone' pronounciation can more often be observed.

Well, scones originated from both Scotland and South West England where at that time, it was made with oats and baked on a griddle with no leavening agents added.

So, how do you pronounce scone?
- to rhyme with 'gone', or
- to rhyme with 'stone'


I got inspired to write a little poem:

Pitter-patter on the window,
Raindrops calling for a dough
Flour on the counter
Half an hour later
Golden scones, pipping hot
Share them, I think not!
Brew a cup of tea,
And all grim cease to be
An enchantment of fragrance
Like a new-found romance
With strawberry jam and cream
This must be a dream!


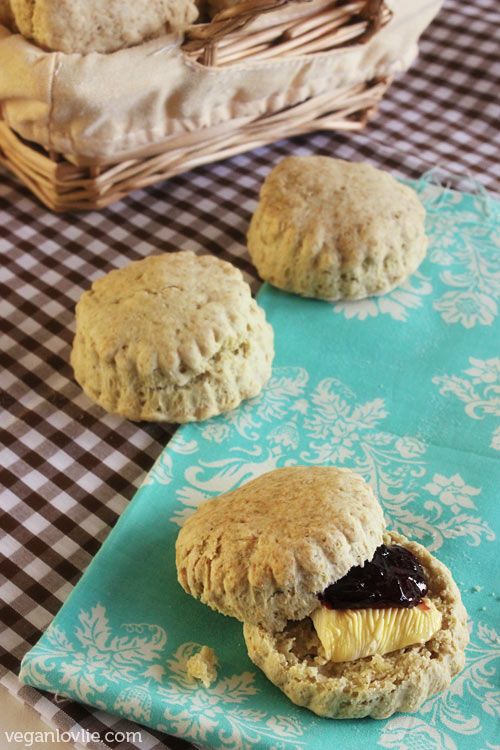
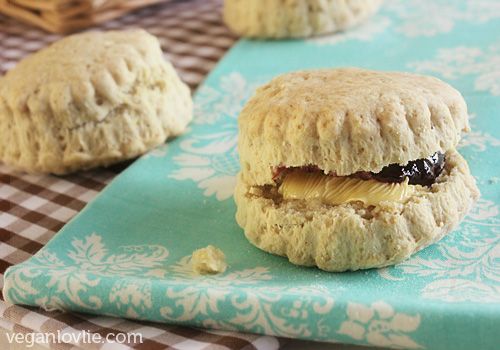
I have tried many scones recipes and adapted the non-vegan ones too. But my favourite remains this plain scone recipe which I have made many times. This is a light and fluffy version which you can enjoy with your favourite spread or topping.

Ingredients (approximately 8 scones)
300g plain flour
1/2 teaspoon baking soda
1 teaspoon baking powder
1/3 teaspoon salt
1 tablespoon sugar
75ml vegetable oil
100ml oatmilk (coconut milk also works well)

  • Preheat oven to 160 degrees Celsius.
  • Mix all dry ingredients together.
  • Add vegetable oil. Work the mixture in between the fingers until it looks like fine breadcrumbs.
  • Add the oatmilk and work the mixture to make a dough.
  • The dough should not be sticky.
  • Roll out dough on a floured surface to 1-inch (2.5cm) thickness.
  • Cut out circles using a cookie cutter (2.5 - 3 inch diameter).
  • Place on a baking tray and bake for 25 minutes.

Serve with jam and margarine.


Nutrition value per portion (1 scone) served plain (without jam / margarine).

Nutrition Facts
Serving Size:
1 scone (60.4 g)

Amount Per Serving
Calories
227
Calories from Fat
90
% Daily Value *
Total Fat
10.0g
15%
Saturated Fat
1.1g
5%
Trans Fat
0.0g
Cholesterol
0mg
0%
Sodium
100mg
4%
Total Carbohydrates
29.9g
10%
Dietary Fiber
1.1g
4%
Sugars
1.0g
Protein
4.0g

Vitamin A 0% Vitamin C 0%
Calcium 1% Iron 2%
* Based on a 2000 calorie diet

*Nutrition values are an approximation based on ingredients that I have used in this recipe. It will vary with the ingredients (different brands) and portion size.

Sunday, 14 February 2010

February 2010 Daring Cooks Challenge: Mezze

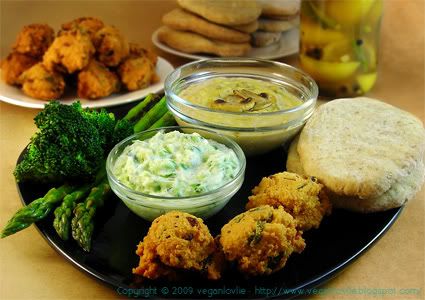
mezze,dhal chili cake,cucumber raita,canneli humous,preserved lemons,pita bread

This is going to be a very long post! But this was a great challenge though!

The Daring Kitchen

The 2010 February Daring Cooks’ Challenge was hosted by Michele of Veggie Num Nums. Michele chose to challenge everyone to make mezze based on various recipes from Claudia Roden, Jeffrey Alford and Naomi Dugid.
Pita Bread – Recipe adapted from Flatbreads & Flavors by Jeffrey Alford and Naomi Duguid
Hummus – Recipe adapted from The New Book of Middle Eastern Food by Claudia Roden
Cucumber Raita – Recipe adapted from The Indian Grocery Store Demystified by Linda Bladholm
Falafels - Recipe from Joan Nathan and Epicurious.com
Preserved Lemons – Recipe from Paula Wolfert and Epicurious

*Mezze is a Middle Eastern way of serving a selection of small dishes or appetizers all at once.

The pita bread and hummus were mandatory and the rest were up to your creativity and imagination.

My mezze was a vegan one and consisted of:
  1. Half wholewheat and half white flour pita
  2. Vegan cucumber raita (with basil and coconut milk)
  3. Mushroom and sweetcorn cannelli bean humous
  4. Dhal-chili cake
  5. Preserved lemons with green chilies and whole black pepper (these were not pickled enough to be eaten on the day, but now they are delicious!)
  6. Sauteed broccoli and asparagus

Much to my surprise this challenge didn't really take much of my time! Just the usual time I take to make dinner (well, except for the waiting time of the pita bread to rise...). I actually took more time to write this post and the recipes!


Pita Bread
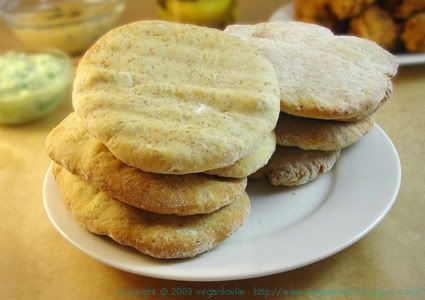
pita bread

For the pita bread, I pretty much used the recipe provided in the challenge which is adapted from Flatbreads & Flavors by Jeffrey Alford and Naomi Duguid
I did not follow the exact measurements of water and flour as these need to be adjusted anyway while making the dough. I also omitted the olive oil in the recipe (because I forgot to add it in!) and it didn’t make a difference.

Ingredients (about 16 pita breads, depending on size)

2 teaspoons regular dry yeast (.43 ounces/12.1 grams)
2.5 cups lukewarm water (21 ounces/591 grams)
5-6 cups flour (50% whole wheat and 50% strong white flour) (17.5 -21 ounces/497-596 grams)
1 tablespoon table salt (.50 ounces/15 grams)
2 tablespoons olive oil (optional)

  • In a large bread bowl, sprinkle the yeast over the warm water. Stir to dissolve. Stir in 3 cups flour, a cup at a time, and then stir continuously for about 1 minute, in the same direction to activate the gluten. Let this sponge rest for at least 10 minutes, or as long as 2 hours. (I left mine for more than an hour).
  • Sprinkle the salt over the sponge and stir in the olive oil at this point (if adding). Mix well. Add more flour, a cup at a time, until the dough is too stiff to stir. Turn it out onto a lightly floured surface and knead for 8 to 10 minutes, until smooth and elastic. Rinse out the bowl, dry, and lightly oil. Return the dough to the bowl and cover with plastic wrap. Let rise until at least doubled in size, approximately 1 1/2 hours.
  • Place a two small baking sheets (I used a pizza tray), on the bottom rack of your oven, leaving a 1-inch gap all around between the sheets and the oven walls to allow heat to circulate. Preheat the oven to 230 degrees Celsius (450F).
  • Gently punch down the dough. Divide the dough in half, and then set half aside, covered, while you work with the rest. Divide the other half into 8 equal pieces and flatten each piece with lightly floured hands. Roll out each piece to a circle 8 to 9 inches in diameter and less than 1/4 inch thick. Keep the rolled-out breads covered until ready to bake, but do not stack.
  • Place 2 breads, or more if your oven is large enough, on the tray or baking sheets, and bake for 2 to 3 minutes, or until each bread has gone into a full balloon (I left my pitas to bake for more than 5 minutes though, because I didn’t think they were ready yet). If for some reason your bread doesn't puff up (some didn’t in my case), don't worry it will still taste delicious.
  • Wrap the baked breads together in a large kitchen towel to keep them warm and soft while you bake the remaining rolled-out breads. Then repeat with the rest of the dough.


Mushroom and Sweetcorn Canelli (or white) Bean Humous (or dip)
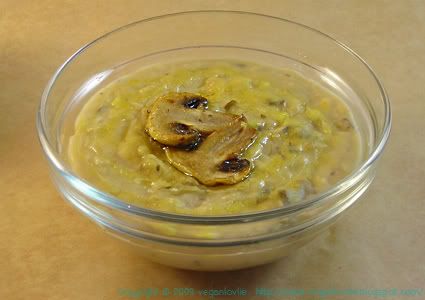

canneli humous

Mushrooms and sweetcorn were sauteed then mixed with the cannelli bean pate. This was a nice change to traditional chickpea humous.

These are not exact measurements. I didn’t weigh the ingredients but just used the cup.

Ingredients

1 cup canelli beans (boiled to almost a mush)
1 tablespoon olive oil
1 tablespoon vegan margarine
½ teaspoon cayenne pepper
Salt and pepper to taste
1 cup chopped mushrooms
2 tablespoons frozen (or canned) sweetcorn
75 ml water (more or less)

  • Heat the margarine on medium. Add in the mushrooms and sweet corn. Sautee for a few minutes.
  • Place the rest of the ingredients in a blender. Blend to a smooth paste.
  • Add more water if necessary to desired consistency.
  • Add in mushrooms and sweetcorn. Serve warm or cold.


Vegan Cucumber Raita
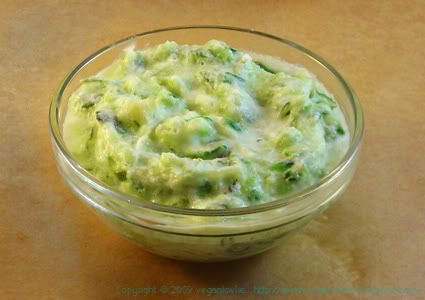

cucumber raita

Raita couldn’t be easier to make! Traditional raita is made with yogurt. It is so easy to veganise this with coconut milk. I didn’t use any garlic in the raita but you can add some finely chopped garlic or garlic powder to yours if you like.

Ingredients

1 whole green cucumber (I didn’t peel it or remove the seeds because they were very tender, but you can do so if you prefer)
Few leaves basil, finely chopped
5 tablespoons coconut cream (if using coconut milk, you may want to increase the amount and remove more juice from the cucumber)
¼ teaspoon salt (or to taste)
A few dash ground black pepper

  • Grate the cucumber. Squeeze out some of the juice from the cucumber. (You can save the juice for drinking or use it in your green smoothies! But don’t keep it for too long before consuming.)
  • Add in the rest of the ingredients. Keep chilled until ready to serve.


Dhal-chili Cake


dhal chili cake

This is a regular Mauritian favourite at Lovlie’s Cocoon! I’ve posted some recipes about these before (here in a soup and another version here). I usually customize these cakes slightly with whatever I have on hand when I’m doing them.

This time I used fresh basil as herb. And wow! What flavour combo! I think the best dhal-chili cake I’ve made so far.

Ingredients (approximately 25 cakes)

1½ cups (250g) channa dhal (yellow split is also fine) soaked for at least 8 hours (preferably overnight)
1 small onion, finely chopped
10 - 12 basil leaves (or 2-3 stems with the leaves), finely chopped
¼ teaspoon aniseed
5 green chilies chopped (adjust quantity to your taste)
Salt to taste
Vegetable oil for frying

  • Drain dhal completely. Grind the dhal to a paste in a food processor or blender to a combination of fine and not so fine consistency. (There must be enough fines to bind the chili cake together).
  • Add the rest of the ingredients – onion, basil, chilies and salt.
  • Mix well. This is best mixed by hand.
  • Preheat oil on medium heat.
  • Drop the dough in small loose balls in the hot oil. (Do not compress the dough balls too much otherwise the centre will remain uncooked).
  • Turn occasionally until golden brown. Adjust heat if necessary to ensure thorough cooking.
  • Remove and allow to drain on kitchen absorbent paper to absorb the extra oil.


Preserved Lemons
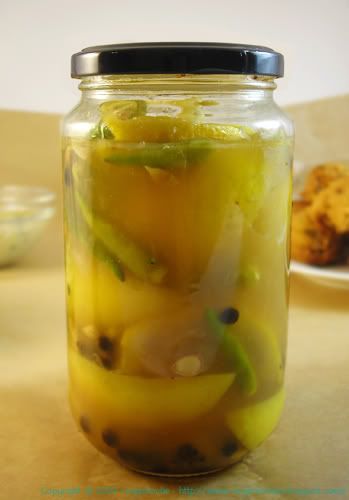
preserved lemons

They remind me of my Mum who used to make huge jars of preserved lemons that we would use in salads, chutneys or just accompaniment.

The challenge recommended Meyer lemons. “To most closely approximate the flavour of Moroccan lemons, Wolfert recommends Meyer lemons for this recipe. This lemon/mandarin orange hybrid, in season in January and February, has yellow-orange flesh, a smooth rind, and a sweeter flavour than other lemons.”

I couldn’t find those so I just used organic unwaxed lemons.

Ingredients

5 lemons
¼ cup salt (2 ounces/60 grams)
1 teaspoon whole peppercorns
10 whole green chilies
Freshly squeezed lemon juice to taste, only if needed
Rice vinegar, (optional) if required

Special Equipment: 1 pint Mason Jar – Sterilized. I just sterilized an empty jam jar.

  • Quarter the lemons, sprinkle salt on the exposed flesh.
  • Place 1 tablespoon salt on the bottom of the jar. Pack in the lemons and push them down, adding more salt, and the peppercorns and chilies between layers. Press the lemons down to release their juices and to make room for the remaining lemons. (If the juice released from the squashed fruit does not cover them, add freshly squeezed lemon juice or I added some rice vinegar — not chemically produced lemon juice and not water.)
  • Leave some air space before sealing the jar.
  • Let the lemons ripen in a warm place, shaking the jar each day to distribute the salt and juice. Let ripen for 30 days.
  • To use, rinse the lemons, as needed, under running water, removing and discarding the pulp, if desired — and there is no need to refrigerate after opening. Preserved lemons will keep up to a year, and the pickling juice can be used two or three times over the course of a year.
I hope you've enjoyed reading about these recipes just as much as I've enjoyed making them!

Tuesday, 30 December 2008

I won't go nuts again!

Photobucket

It was what I was thinking, I had a nut allergy and slightly more serious than the usual hayfever. And if that weren’t enough for this festive period, BoyfriendLovlie had it too! By the end of Christmas day, we were both sick with a swollen throat and lungs for the past few days but, we are slowly recovering now. We can both tolerate nuts to some extent but I think we crossed our limits without realizing. Well for sure, we’ll refrain from nuts for a long while now.

I haven’t been able to take any photos apart from the chocolate cake I had made for Christmas Eve. This was the best chocolate cake ever! I have to remember what I did so I can reproduce the recipe and post it here! (Recipe posted!) It was so moist and light! It was more like a dark chocolate-mocha cake as I put some coffee in it too.

I also managed to get a picture of the cornbread (using this recipe from the PPK) that I made on the Christmas morning (when I was still feeling ok-ish). The few changes I made were that added some turmeric to the batter (as I did not have any canola oil and wanted to have a nice orangey colour) and I sprinkled it with some dried basil and vegan parmesan.

It came out very nice, slightly crispy on the outside and moist inside! We had this with baked beans.

Photobucket

So, that was it. Hopefully, we should be able to have happier New Year! And, oh, thanks for all your really nice comments; I will catch up on commenting on your blogs soon!

Monday, 17 November 2008

Sweet spices enchanted my day!

Photobucket

I’ve been to an interview today and it was pretty good. I really hope to hear something from them. Otherwise I have another interview for tomorrow.

So, back from the interview today, I had to clear my head a little bit (so that I don't get excited too soon!) And there’s not better to do than baking. Right?!

I always look at those yummy hot cross buns in supermarkets and don’t buy them because they contain milk or eggs or non-vegan stuff. So, I decided to give them a try! I adapted and veganised the recipe from the BBC website. (They’ve got some quite nice recipes on there by the way).

The recipe looks quite lengthy but I did not think it took me that much time to do. During the waiting time, I just did other things then came back to it.

They’ve turned out really nice for a first try! And BoyfriendLovlie decided he would call them “hot cross bums” for some reason!

Anyway, with my interview that went on nicely and the warm yummy buns that baked really well perfuming my wintery kitchen with the smell of sweet spices, I've had a great day today!


Ingredients (12 buns)

For the ferment starter:
150 ml warm soymilk
150 ml warm water
15 g yeast (2 sachets)
1 tablespoon sugar
2 tablespoons plain flour

For the dough:

4 cups (500 g) strong white flour (I just used plain flour though and they were fine)
1 tsp salt
2 tsp ground mixed spice/cinnamon
½ cup sugar
75 ml vegetable oil
1 lemon, grated, zest only
¾ cup mixed dried fruit (or more if you like)

oil, for greasing

For the crosses:

2 tablespoons flour
1 tablespoon oil
1 – 1½ tablespoon water (or as needed)

For glazing:

2 tablespoons soymilk
1 tablespoon sugar


  • Prepare the ferment starter for the dough by combining milk with the water in a deep bowl (as it will rise consequently, mine almost overflowed!). Whisk in the yeast, sugar and flour, cover and put in a warm place for 20 minutes.
  • To make the buns: sieve the flour, salt and spice into a large mixing bowl and pour in the oil. Rub in between the fingers until mixture resembles fine breadcrumbs.
  • Make a well in the centre and put the sugar and lemon zest in the well. Pour on the ferment starter.
    Gradually draw in the flour and mix vigorously.
  • Knead to a smooth, elastic dough.
    Add in mixed dried fruit.
  • Shape the dough into a ball, put it in a greased bowl, cover with a clean tea towel and leave to rise in a warm place for 30 minutes.
  • Turn out the dough. Punch down and knead to knock out any air.
  • Divide into 12 even pieces and shape into smooth balls.
  • Place on a greased baking tray/sheet (I used my pizza tray). Leave to rise for another 15 minutes or so.
  • Preheat oven to 180 degrees Celsius.
  • Meanwhile you can do the crosses: mix the oil with the flour, then add water to form a smooth dough.
  • Roll out flat to 2 - 3 mm thickness. Then cut out thin strips.
  • Trim and place strips to form crosses on each buns.
  • Bake for 25 minutes.
  • Remove and brush with soymilk and sugar mixture, then put back for another 10 minutes or until golden and done.
  • Cool on a wire rack. Enjoy with butter, jam or they’re just good on their own!

Sunday, 18 May 2008

Pear Rolls

Photobucket

I’ve been inspired so much by Celine’s gorgeous breads that I’ve decided to give bread baking a go! The only bread I had baked so far was the flat bread for my pizzas!

This particular one was inspired from the Pumpkin Almond Rolls.

I made a huge batch and will give half the batch to BoyfriendLovlie. They will be fantastic breakfast during the week for everyone!

I used pear instead of pumpkin but I actually used them as the filling as well as in the dough. So, I adapted the recipe to this:

(I actually made 24 rolls but I have halved the recipe here. Very brave for a first attempt, I know!)


Ingredients (12 rolls)

250 g all-purpose flour
50 ml warm water
1 teaspoon yeast
1 teaspoon sugar
50 g softened margarine
6 large pears
Juice from 1 orange
Warm water as needed to form dough (approximately 2-3 tablespoons)
125 ml pear puree (obtained from liquefying some of the cooked pears)
Icing sugar (for dusting on top)


  • Peel and cut the pears into small pieces.
  • Place in a saucepan with orange juice.
  • Cook on low to medium heat for about 20 minutes or until soft.
  • When pear is cooked, liquefy some in a blender to obtain 125 ml of puree. Set aside.
  • Place the yeast, sugar and 50 ml warm water in a glass. Mix well and let to stand for 10 minutes until foamy.
  • Place flour and margarine in a mixing bowl. Work the margarine into the flour until well mixed.
  • Add the pear puree and yeast. Knead and add warm water as required to form a dough.
  • Knead until dough is not sticky anymore.
  • Pour a little oil in the bowl and allow the dough to stand for about an hour or until double in size. (I didn’t have to wait long. Mine rose in about 40 minutes).
  • After dough has risen, punch down and divide in two.
  • Roll each dough flat to 30 cm by 30 cm (12 in by 12 in).
  • Spread 2/3 of the area (from the side closer to you) with the pears.
  • Roll tightly.
  • Cut into 6 parts (5 cm or 2 in).
  • Flatten slightly trying to close the bottom slightly with the dough.
  • Place on a baking tray lined with greaseproof paper. (I used greaseproof paper as the excess juice from the pear filling might cause the rolls to stick to the pan).
  • Bake for 20 – 25 minutes until golden. (I turned the trays midway through for even baking).
  • Remove from oven.
  • Dust with icing sugar through a sieve.

I’m happy with my first attempt at bread baking! I’ll be awaiting BoyfriendLovlie’s verdict tomorrow!

Photobucket

Share This Post

Share This Post

Related Posts Plugin for WordPress, Blogger...