
I am posting this 5 days late! Not that this was a tedious recipe to make. It was infact very easy and quick. Because I am allergic to nuts, I regularly make fruit butters to use as spreads. I have made apple butter a lot of times before and I like mixing it with other fruits.
This time I mixed it with some tamarind paste for a distinctive sweet and sour taste.
I really like this combination and more often I find myself eating a spoonful as dessert rather than a breakfast spread! The slight sour taste also makes it really good to use as a dipping sauce with corn chips or poppadums!

The September 2010 Daring Cooks’ challenge was hosted by John of Eat4Fun. John chose to challenge The Daring Cooks to learn about food preservation, mainly in the form of canning and freezing. He challenged everyone to make a recipe and preserve it. John’s source for food preservation information was from The National Center for Home Food Preservation.
DARING COOKS 2010 CHALLENGE: FOOD PRESERVATION: THE APPLE BUTTER OF KNOWLEDGE
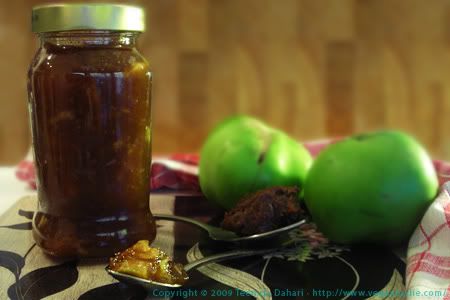
For this recipe I used Irish Bramley apples. Bramley apples are usually slightly larger than a common regular apple and they have a tangy taste. They are mostly used as cooking apples in pies or crumbles.
Because I tend to eat these butters quite quickly, I don't usually use elaborated methods of preservation and these butters usually keep for up to 3 weeks in the fridge.
Bramley Apple Butter (with a hint of tamarind)
3 bramley apples (peeled and seeds removed, finely chopped/sliced)
1 tablespoon tamarind paste (seeds removed, dilute with a little water to make it easier to remove the seeds)
1 cup sugar
- Place all ingredient in a non stick pan, cover and cook for 20 minutes or until apples are soft enough to mash. Occasionally add water if required to allow the apples to cook and not burn.
- After cooking, you can either mash in a blender, with a hand blender or with a wooden spoon (which I did, as I like some chunky pieces to be left).
- Put back in the pan and reduce to desired spreadable consistency.
- Allow to cool then place in sterilised (boiled in water, then left to dry) pots and keep refrigerated.
I've always wanted to make my own apple butter but haven't felt like going through the long canning process. Now that I know they keep for quite some time and I, like you, go through them extremely fast, I'll definitely give it a try!
ReplyDeleteYummy! That looks so much better than store bought apple butter!
ReplyDelete